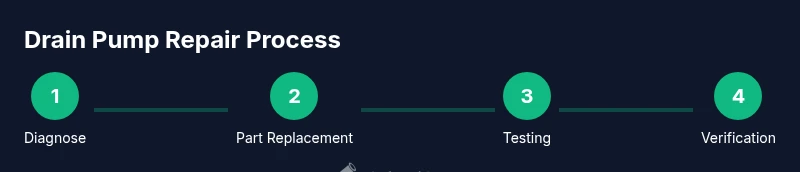
Washing Machine Drain Pump Repair: A DIY Guide
Learn to diagnose and repair a washing machine drain pump with clear, practical steps. This Drain Guide walkthrough covers tools, safety, troubleshooting, and replacement options for common drainage issues.

To perform washing machine drain pump repair, safely diagnose the pump, then replace the pump assembly if the impeller is damaged or the housing leaks. Start by unplugging the machine and draining residual water, gather basic tools and the correct replacement pump, and follow the manufacturer’s wiring diagram. Drain Guide recommends proceeding cautiously.
Understanding the Drain Pump in a Washing Machine
The drain pump is a small but essential component that moves used water from the tub to the drain. In most modern washers, the pump is powered by a small DC motor that spins an impeller inside a plastic housing. When the washer completes a wash or rinse cycle, the control board signals the pump to run, creating enough flow to push water through the drain hose and out of the machine. Over time, pumps can fail due to worn bearings, a clogged impeller, or a damaged housing. Symptoms include water that won’t drain, unusual noises such as grinding or whining, and occasional leaks around the pump area. Because the pump is usually accessible behind the back or rear-access panel, many homeowners can inspect it without professional service. Drain Guide notes that a basic understanding of pump location and airflow helps you decide if a DIY repair is feasible on your model.
In addition to pump failure, clogged drain hoses can masquerade as a pump problem. A blocked hose or a kinked line can prevent proper drainage, triggering the same error codes or symptoms. Always verify hose integrity and free flow before concluding the pump itself is at fault. Modern models may include multiple filtration stages where the pump works with a diverter valve; if misrouting occurs, drainage may appear faulty even with a healthy pump. By understanding how the pump integrates with the tub, hoses, and control board, you’ll be better prepared to diagnose problems accurately. Drain Guide’s experience in home drainage systems shows that most drain-related issues stem from blockages or loose connections rather than a failed motor, especially in older, well-maintained units.
When to Repair vs Replace
Deciding whether to repair or replace a washing machine drain pump depends on several factors: the age of the machine, the cost of replacement parts, the availability of a compatible pump, and the feasibility of a DIY fix. If your unit is newer and the pump is still supported by the manufacturer, replacing the pump assembly is often the most cost-effective option with fewer unseen complications. Conversely, if the machine has high labor costs, obscure part numbers, or a history of repeated component failures, replacement might be a more reliable long-term choice. Drain Guide analysis notes that homeowners frequently succeed with a pump replacement when the model uses a standard, modular pump assembly. If the motor is burnt, the housing cracked, or wiring insulation degraded, replacement is usually the safer path. Consider whether you’re comfortable with electrical connections and water containment, or if you’d rather hire a technician for a clean, warrantied repair.
Tools, Parts, and Safety Considerations
Before you begin, assemble the essential tools and parts. A replacement pump assembly compatible with your washer model is required, along with common hand tools to remove fasteners and hoses. Always unplug the machine and disconnect the water supply to avoid shocks or floods. A shallow pan or towels help catch residual water, and a bucket can hold spilled liquid during the process. Safety glasses are recommended to protect against splashes, and you should work in a dry, well-lit area. If you’re uncertain about electrical panels or wiring, consult your model’s service manual or call a professional. Drain Guide emphasizes that proper labeling of wires and hoses, plus photos of connections before disassembly, reduces confusion during reassembly and lowers the risk of incorrect wiring.
Common Diagnostic Steps for Drain Pump Issues
Start with the simplest checks: confirm there is water in the tub that needs draining and verify the pump’s power supply. Use a multimeter to check continuity on the pump’s electrical leads if you have one, and listen for the pump when the washer attempts to drain. If there’s no noise and water remains, the problem could be a blown fuse, a faulty relay, or a burned-out motor. Inspect the drain hose for kinks, blockages, or improper routing that could impede flow. Check the filter or debris screen for clogs that restrict drainage. Remember to reseat hose connections securely—loose clamps can mimic pump failure. For safety, never reach into the tub while it’s powered, and keep pets or children away during testing. Drain Guide suggests documenting observations with notes or photos to track recurring issues and prevent unnecessary repairs.
How to Source a Compatible Replacement Pump
Choosing the right pump is crucial for a reliable repair. Start by locating the model number of your washer (usually inside the door frame or on the back panel). Use this information to search for a compatible pump assembly—many brands offer a universal fit, but compatibility checks prevent mismatched connectors or wrong flow ratings. Consider whether the pump is a direct replacement or a modular unit that includes mounting brackets and seals. The most straightforward path is to purchase the exact replacement part from the manufacturer or an approved distributor. If you opt for a third-party part, verify it comes with a warranty and read user reviews for reliability. Keep the wiring harness, clamps, and gaskets in good condition; damaged components can lead to leaks or electrical faults after reassembly.
Aftercare: Testing and Preventive Steps
After installing the new pump, reconnect power and run a short test cycle with the drum empty to verify drainage. Check for leaks around hose connections and the pump housing. If leaks persist, re-tighten clamps or reseal gaskets as needed. Run through a full wash cycle to ensure thorough draining and verify that the water exits smoothly within expected timeframes. To prevent future failures, keep the pump and hoses free of lint buildup and periodically inspect the clamps for tightness. Consider a preventive maintenance routine: a quick check every six months can extend the life of the pump and related components. Drain Guide recommends documenting your repair for future reference and labeling any model-specific notes for quick reentry.
Repair Costs and Time Investment
A typical drain pump repair costs mainly cover the replacement pump and minor labor if you hire a technician. If you perform the repair yourself and already own basic tools, the cost often centers on the replacement part, which can vary by model and supplier. Time investments vary by your familiarity with appliance repair and the accessibility of the pump in your particular washer. In compact or front-load machines, the pump may be behind removable panels or a rear access cover, which can add to the total time. Plan for an hour or two for most installations if you’re working carefully and methodically, including set-up and cleanup. Drain Guide emphasizes patience, as rushing can cause missed connections or leaks that lead to further problems.
Tools & Materials
- Flathead screwdriver(6-8 inch blade; used to pry open covers and loosen clamps)
- Phillips screwdriver(Cross-head screws securing pump housing or access panel)
- Nut driver set(Sizes matching pump bolts and hose clamps)
- Pliers(To loosen hose clamps and grips for hose removal)
- Replacement drain pump assembly (compatible with model)(Check model number and part compatibility before purchase)
- Bucket or shallow pan(Catch residual water when hoses are disconnected)
- Towels or rags(Clean up spills and provide grip on slippery surfaces)
- Gloves(Protect your hands during disassembly)
- Multimeter (optional)(Test continuity and motor resistance if available)
Steps
Estimated time: 60-90 minutes
- 1
Power down and prepare workspace
Unplug the washer from the wall outlet and shut off the water supply. Move the machine to a clear, dry area and place towels around the work zone to catch any residual water. Take photos of connections before disassembly for reference.
Tip: Label or photograph each connection as you go to simplify reassembly. - 2
Drain remaining water and access the pump
If your model has a user-access panel, remove it. Place a bucket under the pump area and drain any standing water. You should be able to see the drain hose and the pump housing. Gently move hoses to avoid tearing or kinking.
Tip: Work slowly to avoid tearing hoses or damaging seals. - 3
Disconnect electrical and hoses
Carefully unplug any electrical connectors from the pump and detach the inlet and outlet hoses. Note the orientation of hose clamps and connectors for correct reassembly.
Tip: A quick photo of the wiring can prevent miswiring later. - 4
Remove the old pump
Unscrew the pump mounting bolts and lift the unit out. Inspect the mounting brackets and seals for wear. Remove the old gasket or O-ring if present and set aside.
Tip: Check if the pump gasket/retaining clip is reusable or needs replacement. - 5
Install the new pump
Position the new pump, align mounting holes, and secure with bolts. Reattach hoses with new clamps if possible. Ensure the impeller turns freely and no obstructions prevent rotation.
Tip: Do not overtighten clamps; a snug fit prevents leaks without damaging hoses. - 6
Reconnect wiring and test
Connect electrical leads exactly as labeled and reinstall access panel. Reconnect water supply, plug in the machine, and run a quick drain test with the drum empty. Look for leaks and listen for normal operation.
Tip: Start with a short test cycle to catch leaks before running a full wash. - 7
Final checks and cleanup
Run a full wash cycle with a small load to ensure proper drainage. Wipe down any moisture on exterior surfaces and confirm there are no leaks around hose connections. Keep the area dry and organize tools.
Tip: Keep model-specific notes handy for future DIY references.
Got Questions?
Is it safe to repair a washing machine drain pump myself?
Yes, if you follow proper safety steps: unplug the unit, drain water, and handle electrical components with care. Use the manual and manufacturer guidelines for model-specific instructions.
Yes, you can repair it yourself if you take safety steps and follow the manual.
What are the signs that indicate replacement rather than repair?
If the motor is burnt, the housing is cracked, or there are recurrent leaks after a repair, replacement is generally more reliable and cost-effective.
If the motor is burnt or leaks persist after a repair, replacement is usually best.
Can I use a non-OEM pump for replacement?
Aftermarket pumps can work, but verify compatibility with your model, check for a warranty, and ensure electrical and hose connections match.
You can use aftermarket parts if they’re compatible and come with a warranty.
How long does a drain pump replacement typically take?
Most DIY replacements take about 60-90 minutes depending on model access. Professional service may take less time but costs more.
About an hour or so for a typical DIY replacement.
Will replacing the pump fix all draining problems?
Replacement fixes pump-specific issues, but drainage problems can also be caused by clogs, valve faults, or controller errors.
It fixes pump issues, but other drainage problems can still exist.
Should I run a full load test after repair?
Yes, run a full cycle with a small load to confirm proper drainage and check for leaks.
Yes, always test with a small load to verify everything works.
Watch Video
The Essentials
- Diagnose drain issues by verifying pump and hoses are primary causes.
- Use model-specific replacement parts to ensure compatibility.
- Test thoroughly after installation to confirm complete drainage and seal integrity.
- Document steps and keep maintenance notes for future DIY repairs.
- Safety first: power off and water drained before any disassembly.