How to Drain and Spin LG Washer: A Complete DIY Guide
Learn how to safely drain and spin an LG washer with clear, practical steps, essential tools, and maintenance tips to prevent drainage issues.

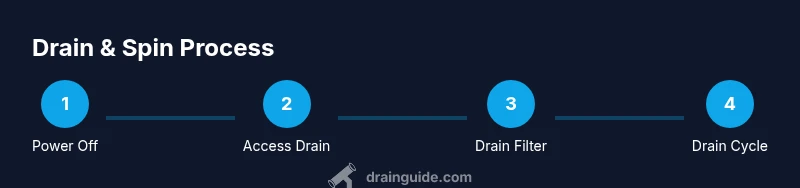
To drain and spin an LG washer, first unplug the unit and gain access to the drain path. Remove standing water via the drain pump filter or the drain hose into a container. Then run a drain/spin cycle to remove the last of the water. Have towels and a bucket ready; consult your model manual for exact access steps.
Why draining and spinning properly matters
According to Drain Guide, draining and spinning a washer correctly helps prevent mold and mildew buildup, reduces stagnation odors, and minimizes the risk of water damage from leaks or overflows. For LG models, a thorough drain ensures the drum is reset for the next load and improves efficiency of subsequent spins. When water remains in the drum, clothes can take longer to dry and the motor may work harder, increasing wear over time. Understanding the drain path and how the spin cycle works gives you confidence to troubleshoot common issues without unnecessary repairs. This section will outline the reasons why a proper drain and spin routine pays off in both short-term performance and long-term reliability.
Safety first: what to do before you start
Before touching any moving parts, unplug the washer and turn off the water supply if you plan to disconnect hoses. Work on a dry, stable surface and wear gloves to protect your hands from sharp edges and hot surfaces. Keep a bucket and towels handy to manage any residual water. For front-loading LG washers, you may need to access the toe panel to reach the drain pump filter; for some models, the filter is behind the front kick plate. Always refer to your model’s manual for panel locations and safe access points.
Tools and materials you’ll need
Having the right tools on hand makes the draining process smoother and faster. This list includes essentials that are useful across most LG washer models, while optional items can speed up the job or make reassembly easier. A bucket or basin to catch water, a few towels for spills, and a flashlight for dark corners are must-haves. If your model uses screws to access the drain or filter, you’ll need a screwdriver set. For stubborn hoses or clamps, pliers can be helpful.
Accessing the drain path on many LG front-loaders
Access methods vary by model, but typical paths include a front toe panel that hides the drain pump filter or a service door near the bottom front of the unit. If you don’t see an obvious panel, gently slide the washer away from the wall to inspect the base, then refer to the user manual for specific access steps. When you locate the panel, use the appropriate screwdriver to remove screws and gently pull off the panel to reveal the drain area.
Locating and inspecting the drain pump filter
The drain pump filter traps lint, coins, and fibers that could clog the pump. Locate the filter opening, which is usually behind a small door or cap near the bottom front. Place a container underneath and keep towels within reach. Once opened, let the water drain naturally into the container. Check the cover and the seal for wear before reinserting. If you notice a damaged seal, replace it before continuing.
Draining the drum: removing standing water
After opening the filter, slowly drain standing water from the drum area into your container. If your model provides a secondary drain hose, divert water into a bucket; otherwise, use a shallow tray to catch drips as you guide water out. Once the majority of the water is drained, re-close the drain access and wipe away any remaining moisture. Do not rush this step; rushing can splash hot water and cause scalding.
Cleaning and reinserting the filter properly
Remove the filter element completely and rinse it under running water. Use a soft brush to dislodge lint buildup and ensure there are no small debris trapped in the mesh. Dry the filter and the housing before reinserting to prevent mold growth. Re-seal the filter fully to avoid leaks. If you notice damage or cracks, replace the unit rather than forcing it back into place.
Checking the drain hose and connections
Inspect the drain hose for kinks, bends, or clogs. Make sure the hose is routed correctly to avoid backflow and that the end is positioned as required by your model. If you see a clog inside the hose, disconnect and flush it with warm water. Reattach securely, ensuring there are no leaks at the clamps or connectors. A loose connection is a common reason for poor drainage.
Running the drain/spin cycle safely
With the drum and hose inspected and reconnected, plug the washer back in and power it on. Select a drain or spin cycle (or both, depending on your model) and monitor the cycle to confirm water is draining smoothly. Stop the cycle if you hear unusual noises or detect leaks. Allow the washer to complete the cycle and observe for a dry drum and minimal residual water.
Common issues and quick fixes
If water remains after a drain cycle, the pump may be blocked, the filter clogged, or the hose kinked. Clean the filter again, inspect the pump for debris, and recheck hose connections. Debris in the filter can restrict drainage, causing longer spin times and potential odors. If the pump fails to operate after basic checks, consult a professional.
Maintenance tips to prevent future clogs
Regularly inspect the pump filter, especially if you have pets or wash small items like socks that can slip through into the drum. Clean the filter at least every few months or sooner if you notice slower drainage. Use a mild, non-caustic cleaner for the tub if you see soap scum accumulation. Keep the drain hose elevation within the recommended range to prevent backflow and minimize standing water in the drum.
When to seek professional help
If you’ve performed basic checks—cleaning the filter, inspecting the hose, and testing the spin cycle—yet drainage issues persist or you notice leaks, it’s time to call a professional. A licensed technician can diagnose pump failures, motor issues, or seal leaks that require replacement parts. Do not attempt major electrical or component replacements without proper training.
Tools & Materials
- Flat-head screwdriver(For releasing front panel screws)
- Phillips-head screwdriver(For toe-kick panel screws)
- Bucket or basin(Catch drained water; choose a size that fits beneath the drain area)
- Towels or absorbent rags(Contain spills during filter removal and water drainage)
- Gloves(Protect hands when handling metal parts or damp surfaces)
- Pliers or channel-locks(Helpful for stubborn hose clamps)
- Flashlight(Improve visibility under panels or behind the unit)
- Soft brush(Used to clean lint from the filter screen)
Steps
Estimated time: 45-75 minutes
- 1
Power off and prepare the area
Unplug the washer and turn off the water supply if you might disconnect hoses. Move the appliance slightly to access the bottom front. This reduces electrical and water hazards before you begin.
Tip: Have a helper assist with panel access if your unit is heavy. - 2
Access the drain area
Locate the front toe panel or service door and remove screws to gain access to the drain pump area. If your model uses a different access point, refer to the manual for exact steps.
Tip: Keep screws in a labeled tray to avoid losing them. - 3
Prepare the drainage setup
Place a bucket under the drain area and lay towels around to catch any spills. This ensures a clean and safe drainage process.
Tip: Have a second container ready in case the first fills quickly. - 4
Open the drain pump filter
Open the filter cover slowly to release any built-up pressure. Let water drain into the bucket before fully removing the filter.
Tip: If water gushes out, pause and push the cover back until the pressure subsides. - 5
Drain standing water from the filter
Loosen the filter and pull it out. Allow the water to drain completely into the bucket. Reposition the bucket if needed to prevent spills.
Tip: Do not twist the filter too hard; it could crack. - 6
Clean and inspect the filter
Rinse the filter under running water and remove lint or debris with a soft brush. Inspect the seal housing for cracks or wear.
Tip: If you see damage, replace the filter housing instead of forcing it back. - 7
Reinstall the filter
Place the clean filter back into the housing until it seats firmly. Close the cover and ensure there are no gaps that could leak.
Tip: Hand-tighten only; over-tightening can strip threads. - 8
Check the drain hose and connections
Inspect the hose for kinks or clogs and verify clamps are secure. Flush the hose with water if needed to clear blockages.
Tip: Keep the hose endpoint above the bucket to prevent backflow. - 9
Reconnect hoses and restore power
Reconnect any hoses and plug the unit back in. Confirm that all connections are snug and there are no leaks when the unit is powered.
Tip: Test the unit for a moment without clothes to confirm drainage works. - 10
Run a drain/spin cycle
Select a drain or spin cycle (or both, per your model). Observe for proper drainage and listen for unusual noises or leaks.
Tip: If the cycle stalls, stop immediately and recheck connections. - 11
Assess residual water and cleanup
If residual water remains, repeat the drain cycle or manually remove any remaining water from the drum with towels. Wipe dry to prevent odors.
Tip: Leave the door or lid open for a while to air out the drum. - 12
Finish and reassemble
Reinstall any access panels securely. Return the washer to its normal position and perform a quick test load to confirm normal operation.
Tip: Take a photo of panel alignment to simplify reassembly next time.
Got Questions?
What is the drain pump filter and why should I clean it?
The drain pump filter traps lint and debris that can clog the pump. Cleaning it regularly helps water drain properly and prevents pump failure.
The drain pump filter catches lint and debris; cleaning it regularly keeps drainage smooth and helps the pump last longer.
Can I drain water with clothes still inside the washer?
No. Remove clothes first. Draining with clothes inside can block the drain or damage the drum and motor.
No, always drain with the drum empty to prevent blockages and damage.
What should I do if the washer still won’t drain after cleaning the filter?
Check the drain hose for kinks, verify all clamps are secure, and inspect the pump for obstructions. If unresolved, professional service may be needed.
If it still won’t drain after cleaning, inspect the hose and pump; call a pro if the issue persists.
Are tools required for opening panels always necessary?
Tools are model-dependent. Many LG washers hide the drain behind a toe-panel or service door; use the proper screwdriver and follow the manual.
Tools are often needed, but check your model’s manual for the exact access method.
How long does a typical drain/spin cycle take?
A drain/spin cycle duration varies by model; allow several minutes for drainage and drying, plus potential extra time if the drum was heavily loaded.
Cycle time varies, but drainage and spinning usually take a few minutes, depending on model.
When should I call a professional for drainage problems?
If basic checks (filter, hose, and basic pump function) don’t resolve the issue, or you hear leaks or loud noises, a professional technician should assess the unit.
Call a pro if simple checks don’t fix the drainage problem or you hear leaks or strange noises.
Watch Video
The Essentials
- Unplug and prepare the area before starting.
- Access the drain path safely and remove standing water gradually.
- Inspect and clean the pump filter to restore proper drainage.
- Check hoses for kinks and secure connections to prevent leaks.
- Run a drain/spin cycle to clear residual water and test performance.
- Maintain regular filter cleaning to prevent future clogs.