How to Drain One Side of Nose: Unilateral Nasal Drainage Guide
Discover a safe, step-by-step method to drain one side of the nose using unilateral nasal irrigation. Includes prep, technique, safety tips, and when to seek medical advice.

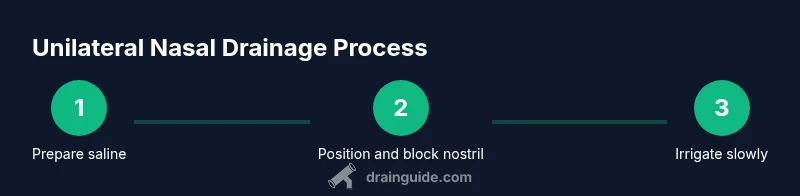
To drain one side of the nose safely, perform unilateral nasal irrigation with sterile saline while keeping the opposite nostril closed. Tilt your head to the side, insert the irrigation nozzle into the upper nostril on the side you’re treating, and squeeze slowly until saline flows through. Stop if you feel pressure beyond mild resistance.
Understanding how to drain one side of nose
When someone asks how to drain one side of nose, they’re usually seeking a temporary relief from congestion on that side. Unilateral nasal drainage focuses on delivering saline or a medicated spray to a single nostril while the opposite nostril is gently blocked or kept passive. This technique leverages gravity and the natural drainage pathways to help fluids move away from the congested side, flushing mucus, allergens, and irritants from the nasal passages. The approach can be particularly helpful for people with a blocked nasal valve, a deviated septum, or localized irritation that makes one nostril the primary source of discomfort. According to Drain Guide, using sterile saline and a proper technique reduces irritation and lowers the risk of infection when performing unilateral drainage. Always prioritize gentle pressure and stay within your comfort level to avoid ears or sinuses discomfort. The goal is relief, not forceful cleansing, so proceed slowly and listen to your body.
Key terms to know: unilateral nasal irrigation, saline rinse, nasal drainage, deviated septum, and nasal valve. In most cases, this method offers temporary relief and should be combined with general nasal care such as humidification and allergen control. If you experience fever, severe pain, or persistent congestion, seek medical advice.
Tools and safety considerations for unilateral drainage
Having the right tools and safety mindset makes a big difference when learning how to drain one side of nose. Choose a dedicated irrigation device (bulb syringe, squeeze bottle, or neti bottle) designed for single-passage use, and always use sterile saline or properly prepared saline solution. Distilled or boiled water cooled to body temperature is essential if you’re making homemade saline; never use unboiled tap water for nasal rinsing due to potential pathogens. Drain Guide emphasizes rinsing equipment after each use and allowing it to dry completely to prevent contamination. If you wear contact lenses or have a history of recurrent sinus infections, consult a healthcare professional before starting unilateral irrigation regularly. Remember to wash your hands before handling any device to minimize introducing new bacteria into the nasal passages.
Step-by-step overview for safe unilateral drainage (high level)
This section provides a practical framework that complements the step-by-step guide. Start with a calm, seated posture near a sink. Position your head slightly forward and toward the side you want to treat. Use your finger to close the opposite nostril to encourage unilateral flow. Gently insert the device’s nozzle into the studied nostril, aim slightly upward, and apply steady, gentle pressure. Allow the solution to drain, either through the same nostril or into the throat, depending on your device and technique. Avoid forceful squeezing that can create pressure behind the ears or sinuses. After finishing, blow your nose gently and clean the equipment thoroughly according to the manufacturer’s instructions. Practicing in a comfortable environment with clean water, fresh saline, and a clean surface reduces the chance of irritation or infection.
Safety tips, contraindications, and common mistakes
Not every congested side requires unilateral drainage. If you have a recent nasal surgery, active nosebleeds, severe facial pain, or a history of nasal polyps, talk to a clinician before attempting unilateral irrigation. Use warm saline rather than cold solutions to minimize discomfort, and never reuse saline that’s been exposed to air for extended periods. Common mistakes include using improvised water sources, applying too much pressure, and irrigating both nostrils at once by accident. Drain Guide recommends taking a cautious approach, especially for beginners, and stopping immediately if you feel dizzy, experience sudden headache, or persistent nasal pain.
Tools & Materials
- Nasal saline irrigation bottle (bulb syringe, squeeze bottle, or Neti bottle)(Choose a device with a soft, comfortable tip and a measured-dose mechanism)
- Saline solution or ingredients to prepare saline(0.9% saline; if making saline, use sterile or boiled water that has cooled)
- Distilled or boiled water(Do not use plain tap water for homemade saline; safe water prevents infection)
- Measuring cup and clean towel(To prepare saline and dry the face after irrigation)
- Tissues or disposable wipes(For quick cleanup after irrigation)
Steps
Estimated time: 15-25 minutes
- 1
Prepare saline solution
If using a pre-made saline mix, skip to the next step. If making saline, dissolve 1/4 teaspoon of salt in 1 cup of sterile or boiled-cooled water. Stir until fully dissolved. Ensure the solution is lukewarm to comfortable body temperature.
Tip: Warming saline reduces stinging and makes the process more comfortable. - 2
Position yourself for unilateral drainage
Sit near a sink. Tilt your head slightly forward and toward the side you want to treat. This position helps the solution stay on the targeted side and reduces drainage into the other nostril.
Tip: Keep your shoulders relaxed to avoid sudden movements that could spill solution. - 3
Close the opposite nostril
Gently press the nostril you’re not treating with a finger to create a unilateral pathway. This keeps the flow from crossing to the other side and helps you focus drain on the target side.
Tip: Be gentle to avoid irritation or triggering coughing reflexes. - 4
Insert the nozzle and begin
Insert the irrigation nozzle into the upper nostril of the side you’re treating. Angle the device slightly upward and forward. Begin to squeeze slowly, allowing the saline to flow through the nasal cavity.
Tip: Go slowly; a steady stream is safer than a rapid burst. - 5
Monitor flow and drainage
Watch the saline as it exits the nasal passages. If you feel pressure, stop and adjust the angle. If you experience sharp pain, discontinue and stop irrigation.
Tip: If the liquid seems to go into the throat, pause and breathe calmly before continuing. - 6
Finish and clean
Once the targeted side feels clearer, release the nostril and gently blow the nose. Rinse the device with clean water and dry thoroughly before storage.
Tip: Regular cleaning reduces bacterial growth and ensures safe reuse. - 7
Optional: switch sides or repeat
If needed, you can perform the same unilateral technique on the other side. Do not do both sides at once if you’re just learning; focus on one side first to build comfort.
Tip: Limit sessions to 1-2 times daily unless advised by a clinician. - 8
Post-care and monitoring
Observe for any persistent congestion, fever, or facial pain over the next 24-48 hours. If symptoms worsen or don’t improve, seek medical advice.
Tip: Keep a log of symptoms to discuss with a clinician if needed.
Got Questions?
Is unilateral nasal irrigation safe for most people?
For most people, unilateral nasal irrigation is safe when done with sterile saline and proper technique. Avoid if you have recent nasal surgery, severe nasal polyps, or a history of ear infections without medical advice.
Most people can use unilateral nasal irrigation safely when done correctly, but consult a clinician if you have nasal surgery or persistent problems.
Can I use tap water for nasal irrigation?
No. Use distilled, boiled and cooled water or commercially prepared sterile saline to reduce infection risk.
Avoid tap water for safety; use sterile saline or properly boiled and cooled water.
How often can I drain one side of the nose?
Use as needed for relief, but limit to 1-2 sessions per day and avoid long-term, frequent use without medical guidance.
Use as needed for relief, but don’t overdo it daily without advice.
What if I feel pain or dizziness during irrigation?
Stop immediately. Rinse with saline if needed and rest. If symptoms persist, seek medical advice.
If you feel pain or dizziness, pause and consult a clinician if it continues.
Will unilateral drainage cure allergies or infections?
No. It can relieve congestion temporarily, but underlying allergies or infections require separate treatment.
It may help with congestion, but it isn’t a cure for allergies or infections.
Watch Video
The Essentials
- Prepare sterile saline and comfortable posture before starting
- Focus on one side by closing the opposite nostril
- Squeeze slowly and stop at any sign of pain or dizziness
- Clean equipment thoroughly after each use to prevent contamination