How to Drain Sinus: Safe Nasal Irrigation Guide
A practical, educational guide to safely drain sinus through saline irrigation. Step-by-step instructions, tools, safety tips, and aftercare for at-home relief.

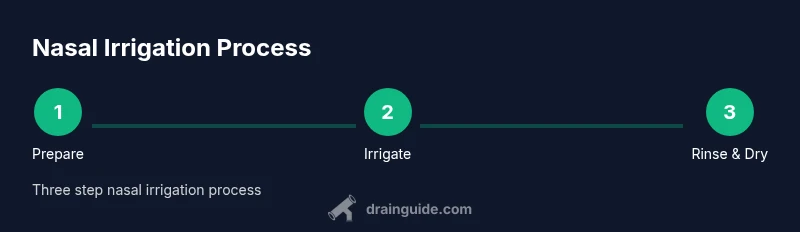
You can learn to relieve nasal congestion by following a simple, three part process: soften mucus, irrigate the nasal passages, and gently dry and monitor. Before you begin, assemble a saline rinse kit, a clean squeeze bottle or neti pot, and a warm, safe technique. This step by step guide explains exactly how to drain sinus safely at home.
Understanding Sinus Drainage and Its Purpose\n\nThe nasal and sinus cavities produce mucus to trap dust, germs and allergens. When mucus becomes thick or infected drainage slows, leading to congestion, pressure and breathing discomfort. Learning how to drain sinus safely involves understanding anatomy, typical causes and the limits of home remedies. In short, effective drainage helps restore normal airflow, reduce inflammation and lower the risk of secondary infections. This guide uses practical steps and everyday materials to support gentle nasal irrigation. When done correctly a simple saline rinse can relieve pressure loosen mucus and promote more comfortable breathing.
Safety First: When Home Remedies Are Appropriate and When to Seek Help\n\nSafety matters. Do not attempt nasal irrigation in children under two without medical guidance. Use only sterile or boiled then cooled water for rinses and avoid forcing solutions into the sinuses. If you have fever severe facial pain nasal bleeding or a recent skull injury seek medical care rather than attempting home remedies. Use neti pots or squeeze bottles with clean dry hands and rinse after each use. Stop if you notice persistent dizziness or swelling and consult a clinician if symptoms persist beyond a few days.
Tools and Materials for Saline Irrigation\n\nEssential tools include a saline rinse kit with pre mixed saline a clean irrigation bottle or neti pot and a clean bowl or cup for preparation. You will also want a soft tissue a towel and access to warm water to prepare the solution. Optional items include distilled water testing strips a small mirror for nasal visualization and a timer to ensure consistent sessions. Always store your equipment dry and clean between uses to minimize contamination.
Step by Step: Technique Overview\n\nTo drain sinus safely prepare your space mix a saline solution if not pre mixed and assume a comfortable position. Lean forward with the head tilted to the side so the upper nostril is slightly higher than the lower one. This encourages flow through the nasal passages without pushing solution into the throat. Let the liquid drain from the opposite nostril, repeat on the other side and avoid forcing solutions too aggressively. Finish by softly blowing the nose and wiping away any excess moisture.
Common Mistakes and How to Avoid Them\n\nCommon errors include using water that is not sterile or boiled using too much solution and forcing liquid too hard into the nasal passages. Avoid irrigation when you have nasal trauma or a recent ear infection. If the solution causes burning or dizziness pause and recheck water temperature and concentration.
Aftercare and Nasal Health After Drainage\n\nAfter a session rinse and dry the irrigation device wash your hands and store the kit to prevent contamination. Consider following up with regular gentle sessions if symptoms recur and maintain room humidity to support mucosal health. If congestion returns frequently review your technique and consider consulting a clinician for evaluation.
Chronic Sinus Issues and When to Seek Medical Advice\n\nChronic sinus symptoms may require medical evaluation to identify underlying causes such as allergies infections or structural issues. Home irrigation can help temporary relief but persistent symptoms should be assessed by a healthcare professional. Keep a brief diary of symptoms treatments tried and response to therapy.
Tools & Materials
- Saline rinse kit(Pre mixed saline solution recommended)
- Neti pot or squeeze bottle(Clean and dedicated for nasal use)
- Boiled and cooled water or distilled water(Use only safe water for rinses)
- Measuring cup or spoon(For accurate saline concentration)
- Towel and tissue(To clean and dry nostrils)
- Timer(Optional for session timing)
Steps
Estimated time: 30-45 minutes
- 1
Prepare space and materials
Set up a clean area, gather all items, and wash hands thoroughly. Ensure you have a mirror if helpful for positioning. Read safety notes before starting.
Tip: Keep water safe and equipment clean to avoid contamination. - 2
Prepare saline solution and device
If using a pre mixed kit, skip to the device assembly. If making saline, dissolve a quarter to a half teaspoon of non iodized salt in a cup of warm water and mix until dissolved.
Tip: Right concentration matters; too salty can irritate mucosa. - 3
Position the head for flow
Lean forward over the sink and tilt your head to one side so the upper nostril is slightly higher than the lower one. This encourages flow through the nasal passages without pushing solution into the throat.
Tip: Breathing through the mouth reduces gag reflex. - 4
Irrigate gently
Insert the nozzle into the upper nostril and slowly allow solution to flow through the nasal cavity. Do not force liquid; if discomfort occurs, pause and adjust head position or concentration.
Tip: If using a neti pot, keep the angle stable and steady. - 5
Repeat on the other side
Switch sides and repeat the process with the opposite nostril. If mucus thickens, pause and rewarm the solution slightly.
Tip: Take shallow breaths through the mouth to stay relaxed. - 6
Finish and clean up
Gently blow the nose to clear remaining mucus. Rinse the device with clean water, dry, and store in a clean area. Record any unusual symptoms.
Tip: Disinfect device after each use to prevent contamination.
Got Questions?
Can I use tap water for nasal irrigation?
Use sterile, boiled and cooled or distilled water to avoid rare infections. If you have access only to tap water, boil and cool it first.
Use boiled and cooled water or distilled water to be safe. Tap water can be used if boiled first.
Is nasal irrigation safe for children?
Nasal irrigation can be safe for children older than two with adult supervision. Always consult a pediatrician before starting a routine.
Generally safe for kids over two with supervision. Check with a pediatrician first.
How often should I irrigate?
Frequency depends on symptoms. Daily or every other day can be helpful during congestion, but avoid overuse which can irritate nasal tissue.
It depends on symptoms; avoid overuse.
What if I feel dizzy or nauseated?
If dizziness occurs, stop, breathe normally, and reassess water temp and concentration. If symptoms persist, seek medical advice.
Stop and reassess; seek advice if it continues.
When should I seek medical care?
Seek medical care if fever, severe sinus pain, facial swelling, or nasal bleeding persists beyond a few days despite irrigation.
See a clinician if red flags persist.
Watch Video
The Essentials
- Follow a safe saline concentration and avoid forcing liquid.
- Prepare the space and tools before starting.
- Rinse, dry, and sanitize equipment after each use.
- Consult a clinician for persistent or severe symptoms.