How to Drain One Nostril: Clear Relief at Home
Learn safe, practical ways to drain one nostril at home. This Drain Guide tutorial covers steps, tools, tips, and safety considerations for nasal relief.

This guide on how to drain one nostril provides safe, practical steps you can perform at home. Begin with saline spray or rinse to moisten nasal passages, use warm steam if comfortable, and then apply a gentle, controlled exhale through the affected nostril while keeping the opposite side open to direct airflow. Do not force blows or pinch tightly; stop if you feel pain.
What this technique is and safety basics
The phrase how to drain one nostril describes a controlled approach to clearing mucus from a single nostril without forcing air through both passages. This technique can provide relief during mild congestion from colds, allergies, or dry nasal tissue. It is not a substitute for medical care when you have severe symptoms, fever, or suspected sinus infection. According to Drain Guide, the safest approach emphasizes moisture, gentle handling, and listening to your body. If you feel dizzy, faint, or experience persistent nasal bleeding, stop immediately and seek medical advice. Before you begin any self-care routine, wash hands and ensure devices are clean to prevent bacterial transfer. For children or older adults, adjust the pressure and duration and supervise to avoid choking or aspiration. The goal is gradual improvement in breathing, not a forceful clearing of the nose.
Why one nostril might clear more easily than the other
Nasal passages are not perfectly symmetrical. The most noticeable differences come from the nasal cycle, where congestion shifts between sides over time. In many people one nostril remains slightly more open, making it easier to breathe through that side when you perform a gentle drainage maneuver. Shared factors like allergies, humidity, and illness influence which side feels clearer at a given moment. Understanding this can help you time your technique for comfort. The guidance here focuses on patient, stepwise actions rather than aggressive blowing. Always aim for gradual relief with minimal pressure. Drain Guide's experience suggests starting with moisture and slow exhalation rather than attempting to force an immediate, complete clearance.
Saline solutions and nasal moisture management
Moistening the nasal passages is the first critical step. Saline sprays add moisture and thin mucus, making drainage more comfortable. Isotonic saline (0.9% salt) matches body fluids and is gentle enough for daily use; hypertonic solutions (more concentrated salt) may offer a brief mucus-thinning effect but can irritate if used too often. For a DIY rinse, mix clean water with non-iodized salt according to a tested ratio, or use pre-mixed packets. Always ensure water is distilled, boiled, or sterile to avoid introducing pathogens. After moistening, you should feel the nasal passages more flexible and ready for a gentle drainage maneuver. Keep a tissue handy and avoid rubbing or picking your nose, which can irritate mucosa further. Hydration and ambient humidity also help keep the nasal lining resilient. Drain Guide notes that consistent, small gains are safer than large, abrupt changes.
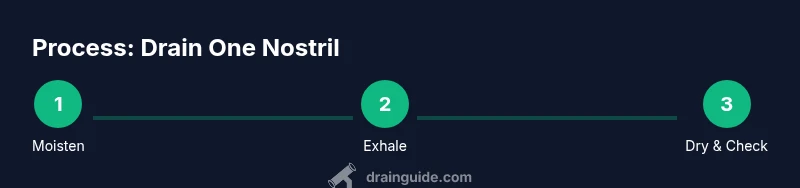
Step-by-step overview of the approach
To minimize risk, this guide emphasizes moisture, slow breathing, and controlled pressure applied to one nostril at a time. The technique combines moistening the mucosa with gentle exhalation through the targeted nostril while the opposite side is kept lightly open or closed to direct airflow. Remember: this is a relief measure for mild congestion, not a cure for infections or structural problems. If you experience fever, severe pain, or nasal bleeding that lasts beyond a few minutes, seek medical attention. The steps below are designed to be performed one at a time, pausing if you feel uncomfortable. The goal is improved airflow on the affected side without triggering coughing or choking.
Step-by-step prep tips
Begin by clearing a clean, well-lit space. Lay out all tools and materials so you can access them without leaving your seat. Wash your hands thoroughly for at least 20 seconds and dry them with a clean towel. Have a tissue ready for when the passage opens and mucus begins to drain, and keep a glass of water nearby to maintain hydration. This preparation reduces the likelihood of introducing bacteria or causing accidental coughing during the process. Drain Guide emphasizes that a calm, methodical setup improves outcomes more than rushing through the steps.
Step-by-step technique details (Part 1)
Moisturize the nasal passages using a saline spray or rinse. The humid environment helps mucus detach more gently, reducing irritation. If you choose a rinse, use only distilled, boiled, or sterile water to avoid infection risk. Always follow the salt-to-water ratio provided by the product or a trusted recipe. With a moistened mucosa, you will notice that mucus becomes softer and easier to move, setting the stage for a safe exhale through the targeted nostril. Drain Guide reminds practitioners to avoid using forceful blows that can injure nasal tissue.
Step-by-step technique details (Part 2)
Position yourself so the head is slightly tilted forward and toward the side of the nostril you want to drain. Close or lightly press the opposite nostril with a finger to direct airflow. Slowly exhale through the targeted nostril, letting mucus move toward the opening rather than backward toward the sinus. If you feel resistance, pause, breathe through your mouth for a moment, and reset. The aim is a gentle, controlled exhale that reduces congestion without creating pressure in the ears or sinuses. This approach minimizes discomfort while improving airflow.
Aftercare and hygiene
Gently pat the outside of the nose with a clean tissue to remove any residual moisture. Rinse or wipe down any tools you used, and store them in a clean, dry place. Refrain from picking or rubbing the nasal passages immediately after drainage, which can irritate mucosa. If you notice continued congestion, consider spacing out sessions and increasing ambient humidity with a humidifier. Staying hydrated supports mucus thinning and overall nasal health. Drain Guide emphasizes routine care over episodic clearing for better long-term comfort.
Safety checks, red flags, and redirection
If you experience severe nasal bleeding, facial trauma, fever, facial pain, or a stiff neck after attempting drainage, stop immediately and seek medical help. Do not continue if you feel dizzy, weak, or short of breath. Children, older adults, or people with a history of sinus or ear problems should use extra caution and consult a clinician before attempting any self-care technique. Certain conditions, like a deviated septum or chronic sinusitis, may require professional evaluation rather than at-home routines. Always err on the side of caution and prioritize safety over technique.
Tools & Materials
- Isotonic saline spray bottle(Pre-mixed saline spray, ready to use)
- Neti pot or squeeze bottle for nasal irrigation(Cleaned before and after use; use sterile saline solution)
- Distilled or boiled water(Water used for rinses must be sterile; cool to safe temperature)
- Non-iodized salt or saline mix(Follow product guidance or tested DIY ratio)
- Tissue or disposable wipes(For wiping and cleanup)
- Humidifier or warm towel for steam(Optional; helps soften mucus)
- Timer or clock(Useful for pacing steps or steam duration)
- Gloves (optional)(Optional for hygiene during handling)
Steps
Estimated time: 15-25 minutes
- 1
Prepare your space and supplies
Clear a clean work area, wash your hands, and lay out all tools. Use a calm environment to reduce anxiety or rushing. This first step sets safety and hygiene as priorities.
Tip: Have tissues within easy reach and a glass of water for hydration. - 2
Moisten nasal passages with saline
Use isotonic saline spray or prepare a saline rinse with sterile water and salt. Moisture softens mucus and reduces friction during drainage. Allow a minute for the spray to distribute evenly.
Tip: If using a rinse, tilt the head slightly and breathe normally through the mouth. - 3
Optionally apply gentle steam
Steam can loosen stubborn mucus and ease exhalation. Sit with a warm shower or bowl of hot water nearby for 3–5 minutes. Do not overheat or scald yourself.
Tip: Keep a safe distance from the steam to avoid burns. - 4
Position the head and nostrils
Tilt your head toward the side you want to drain. Lightly close the opposite nostril with a finger to guide airflow. Keep the jaw relaxed and breathe through the nose as you prepare to exhale.
Tip: Small, shallow breaths reduce the risk of coughing. - 5
Exhale gently through the targeted nostril
With controlled effort, exhale through the nostril you’re draining while the other nostril remains open or lightly pinched. Stop if you feel uncomfortable or experience pain.
Tip: Use a tissue to catch mucus as it drains. - 6
Repeat on the other side if needed
If congestion shifts, repeat the gentle exhale on the other side. Do not force alternation if you feel pressure or dizziness. Respect your body’s signals.
Tip: Limit to 2 cycles per session to avoid irritation. - 7
Clean up and dry the nose
Gently pat the nostrils dry with a clean tissue. Wash or rinse tools and store them dry. Hydrate and avoid blowing too hard immediately after to prevent tissue damage.
Tip: Disinfect irrigation equipment after use. - 8
Evaluate and decide on continued care
If breathing improves and there’s little irritation, you may repeat later if needed. If symptoms persist beyond a few days or worsen, consult a clinician.
Tip: Keep track of symptom changes for your next appointment.
Got Questions?
Is it safe to drain one nostril every day?
For most people, occasional relief using moisture and gentle exhalation is safe. Daily use should be light and limited, and stop if symptoms worsen. If you have chronic congestion, consult a clinician before continuing.
Mostly safe in moderation; see a clinician if symptoms persist.
What’s the difference between nasal spray and irrigation for this purpose?
Saline spray moisturizes and can ease mild congestion, while irrigation rinses loosen mucus more deeply. Both can help, but avoid overuse to prevent irritation and contamination.
Spray moistens; irrigation cleans more deeply.
Can I use tap water for rinses?
No. Use distilled, boiled and cooled, or sterile water to prevent infection from pathogens. Always follow safety guidelines for water quality when rinsing.
Use sterile water, never tap water.
What should I do if I get a nosebleed?
Stop the flow by leaning forward slightly and applying gentle pressure to the soft part of the nose. If bleeding lasts more than 10-15 minutes, seek medical care.
Lean forward, pinch the nose gently, seek help if bleeds long.
Are there people who should avoid this technique?
Yes. People with fever, facial trauma, recent nasal surgery, or chronic sinusitis should consult a clinician before attempting at-home drainage. Individual risk factors matter.
Some conditions require clinician guidance.
How long should I wait between attempts?
Give your nose time to rest between sessions. If congestion remains persistent or worsens, reduce frequency and seek medical advice.
Rest between attempts; seek help if persistent.
Watch Video
The Essentials
- Moisturize first, then exhale gently through one nostril.
- Use sterile water and salt to avoid infection.
- Avoid forceful blowing and stop if pain or dizziness occurs.
- Keep equipment clean and practice in short, calm sessions.