How to Drain the Pool: Safe, Practical Steps
Learn how to drain the pool safely with a step-by-step approach, safety checks, discharge guidelines, and tips for rebalancing chemicals after draining.

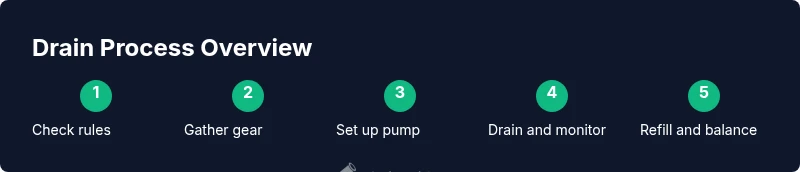
Drain the pool safely by choosing the right method, planning around regulations, and following a clear step-by-step process. Decide if you need a full or partial drain, set up a pump or siphon, protect the pool from damage, and monitor discharge to comply with local rules. Start with safety checks and a dry run of the setup.
Why drain the pool (and when it's appropriate)
Draining a pool is not always the first option. In many cases, partial draining to lower the water level for maintenance or winterization is all that's needed. According to Drain Guide, homeowners often start with lowering the water to the top of the tile line or the minimum safe level before opening lines for repairs. If you expect heavy equipment work or chemical adjustments, plan for a partial drain rather than a full drain. A full drain can put stress on the structure, liner, and coping, and it can introduce issues with backflow or debris. When considering a drain, think about the pool type (vinyl liner, gunite, or fiberglass), the water depth, weather conditions, and your local codes. The Drain Guide team emphasizes safety and legality above convenience, and recommends a written plan before you touch any pump.
Regulations and environmental considerations
Before you start, check local discharge rules with the city or county, and know where the water will go. Many municipalities restrict draining to sanitary sewer or approved drainage areas, and some require permits for large homes. Drain Guide analysis suggests that following the rules reduces the risk of fines and property damage. Also consider the environmental impact: contaminated water, chlorine, and algaecide can affect lawns, stormwater systems, and nearby waterways. If you’re unsure, contact your local water department or a licensed professional. Keeping a simple record of where you plan to discharge helps you stay compliant.
Safety foundations for draining a pool
Safety comes first. Shutting off power to nearby outlets, removing pool lights, and keeping children and pets away from the discharge area minimizes risk. Wear protective gloves and eye protection when handling chemicals or pumps, and always use a grounded, outdoor-rated power source with a GFCI. Never work alone near water; have a helper on hand in case of an electrical fault or pump jam. Understanding your pool’s electrical layout and chemical inventory helps prevent accidents and damage.
Drainage options: methods and trade-offs
There are several ways to drain a pool, each with pros and cons. A submersible pump with a discharge hose works well for most residential pools, but you must ensure the hose reaches a safe, legal discharge spot. A siphon can be cost-effective but may require careful priming and patience. Gravity drainage to the sanitary sewer is often the most compliant option for large loads, but not all communities allow it. Consider pool type, depth, and the potential for backflow when choosing a method. Always follow local guidelines to protect your property and the environment.
Equipment and site preparation checklist
Before you begin, gather the equipment you’ll need and prepare the discharge area. Place a tarp or plastic sheeting to catch spills, set up a pump and emptying hose, and confirm the outlet is GFCI-protected. Clear the area of furniture and obstacles, and ensure the discharge point is at an appropriate grade away from foundations. If your yard has slope constraints, plan for a temporary drainage path that won’t erode soil or flood plants. Safety signage can help remind others to stay clear.
Step-by-step overview before you start
Plan a concise sequence: verify regulations, assemble tools, power down, connect the pump, initiate drainage, monitor water level, and after-drain stabilization, refill gradually. Keeping a checklist helps prevent missed steps and minimizes the time the pool is unattended. A quick dry-run of the setup with the pump off is a useful way to confirm hose routing and power availability.
Chemical management during and after draining
Water drained from a pool can carry concentrated chlorine, cyanuric acid, and other additives into the environment. Test the remaining water balance before refilling and plan for chemical adjustments as the pool fills. After draining, re-test pH and alkalinity, then reintroduce stabilizers slowly according to manufacturer guidelines. Drain Guide notes that improper chemical handling can irritate skin, damage grass, and affect nearby waterways, so manage chemicals with care.
Refill, maintenance, and long-term care
Refilling should be gradual to avoid shocking the pool shell and to allow filters to re-prime properly. Check the water level as you refill and keep an eye on chemical balance during the process. Once full, balance chlorine, pH, and alkalinity, run thePool equipment briefly to re-establish circulation, and inspect for leaks or liner shifts. Ongoing maintenance after drainage reduces the chance of staining, algae growth, or structural stress.
Tools & Materials
- Submersible pool pump(Ensure outdoor-rated, sufficient GPH for pool size)
- Discharge hose(Long enough to reach discharge area; 25-50 ft recommended)
- Garden hose adaptor(Fits pump outlet and hose diameter)
- Outdoor GFCI-protected extension cord(Weather-rated; inspect for damage)
- PPE: gloves and eye protection(Chemicals and moving parts safety)
- Water test kit(Test pH, alkalinity, chlorine after drainage)
- Tarps or towels(Contain spills around the discharge area)
Steps
Estimated time: 2-6 hours
- 1
Assess need and check regulations
Confirm whether a full drain is truly necessary or if a partial drain suffices. Review local rules and permitted discharge locations before starting to avoid fines or property damage. If in doubt, contact your water department or a licensed pro.
Tip: Document where you plan to discharge and keep a copy of the rules on site - 2
Gather the necessary tools
Assemble the pump, hoses, adapters, and safety gear in a dry area. Double-check hose length and fittings so you won’t run short during draining. Prepare a plan B in case an adapter doesn’t fit.
Tip: Lay out equipment in a straight line to minimize tripping hazards - 3
Shut off power and secure the area
Turn off the pool pump, breaker, and any nearby electrical devices. Remove lights and close the equipment area to prevent accidental contact with water. Have a helper ready to assist if the pump stalls or if water starts to surge.
Tip: Test a GFCI outlet with a known load before starting - 4
Attach hose and position discharge
Connect the discharge hose to the pump outlet and route it to your approved discharge location. Avoid paths that could erode soil or pose a hazard to nearby structures. Use clamps or fittings to prevent leaks at the joint.
Tip: Use a hose anchor or weight to prevent movement during drainage - 5
Prime and start the pump
Prime the pump if required and switch it on. Allow 2-5 minutes for priming and check for leaks. If the water level is dropping slowly, pause and inspect hose connections.
Tip: Avoid running on an empty suction line to prevent air locks - 6
Monitor water level and stop at target height
Watch the level as water drops and stop when you reach the recommended minimum safe height for your pool type. For vinyl liners or fiberglass, avoid exposing the bottom cushions or liners to sun exposure for extended periods.
Tip: Use a marked stick or measuring tape to confirm level - 7
Stabilize remaining water and test chemistry
Test residual chlorine, pH, and alkalinity before adding more water. If chemical levels are off, plan to rebalance gradually as you refill to avoid shock to the shell and surrounding vegetation.
Tip: Keep a chemical kit on hand and follow label directions carefully - 8
Refill gradually and monitor refill rate
Begin refilling slowly, especially in heat, to prevent thermal stress on the shell and liner. Recheck chemical levels periodically and adjust as needed as the pool fills.
Tip: Refill rate of 1-2 inches per hour helps prevent damage - 9
Perform final checks and cleanup
Once full, run circulation briefly and recheck chemistry. Clean up hoses, store tools, and inspect for leaks or misaligned fittings.
Tip: Record completion time and water levels for future reference
Got Questions?
Do I need to drain my pool completely or partially?
Most pools can be drained partially to reach the minimum safe level for maintenance. Full drainage is rarely necessary unless repairing the shell or liner. Consider the pool type and local rules before deciding.
Most pools only need a partial drain; full drainage is rare unless you're repairing the shell. Check local rules first.
Is it legal to drain into a lawn, street, or storm drain?
Discharge legality varies by location. Many areas prohibit draining to streets or storm drains and require sanitary sewer or approved sites. Always verify with local authorities before draining.
Discharging rules vary by area. Check with local authorities before draining to avoid fines.
How long does it typically take to drain a residential pool?
Drain duration depends on pool size and pump flow rate. A standard residential pool often drains in several hours, but large or fast pumps can shorten the time. Plan for breaks and supervision.
Times vary, but expect several hours for typical pools, with longer times for larger ones.
What safety steps should I take before draining?
Shut off power, remove lights, secure pets and kids, and wear protective gear. Ensure discharge location is safe and compliant. Keep a helper nearby in case of pump issues.
Turn off power, secure the area, and have a helper nearby if possible.
What should I do with pool chemicals after draining?
Test the remaining water balance, then rebalance with measured additions as you refill. Avoid over-concentrating chlorine or algaecides near plants or your yard.
Test and rebalance chemicals gradually as you refill.
Can a vinyl liner be damaged when draining?
Yes, exposing a vinyl liner to sun and air for too long can cause drying and shrinking. Keep the liner covered while practical and refill promptly.
Vinyl liners can dry and shrink if exposed; refill promptly.
Watch Video
The Essentials
- Plan first and check local rules
- Choose a discharge method that protects property
- Shut off power and secure the area
- Refill gradually and rebalance chemicals