How to Flush Without a Plunger: A Step-by-Step Guide
Learn practical, step-by-step methods to flush a clogged toilet without a plunger using gravity, warm water, and dish soap. Safe, homeowner-friendly techniques with clear precautions and troubleshooting tips.

You can flush a backed-up toilet without a plunger by using gravity and water dynamics. Start with a controlled pour of warm water and dish soap from a bucket to create pressure and lubrication, then attempt the flush. If the bowl remains sluggish, pause briefly, repeat with fresh warm water, and consider alternative methods like a sink plunger or calling a plumber for stubborn clogs.
Why a plunger-free flush can work: the science and the setup
A standard gravity-based toilet relies on a rapid influx of water to push a clog through the trap and into the drain line. When a blockage slows that surge, you can leverage water dynamics to generate a stronger flow without reaching for a plunger. The key is to use warm water, a small amount of dish soap, and a controlled pour that creates a deliberate surge rather than random splashes. This approach is most effective for minor blockages caused by paper or light debris, not solid objects or extensive mineral buildup. Always assess the situation safely: if you feel you’re dealing with a major obstruction or you notice unusual sounds, stop and seek professional help. According to Drain Guide, many households can resolve minor clogs using gravity-focused methods before resorting to mechanical tools.
Safety considerations and what to avoid
Before attempting any non-plunger flush, prioritize safety. Do not use boiling water, which can crack porcelain, and avoid aggressive scrubbing near the rim or inside the trap that could cause sprays of wastewater. Keep children and pets away from the bathroom while you work, and wear gloves to minimize contact with contaminated surfaces. If the toilet begins to overflow, immediately stop and take steps to control the water supply. Drain Guide emphasizes careful, incremental attempts rather than forceful, repeated flushes, which can worsen the issue or create a bigger mess.
What you’ll need (and why) to attempt a non-plunger flush
A successful non-plunger flush relies on simple, widely available tools. You’ll want a sturdy plastic bucket to hold warm water, a long-handled pitcher or cup for precise pours, a squirt of dish soap to reduce surface tension, rubber gloves for hygiene, and several towels to protect the floor. Optional items like an extra bucket and non-slip footwear can improve safety. The goal is to create a controlled surge that’s strong enough to move the clog, not to flood the room. Prepare your space: lay down towels, remove rugs, and ensure the bathroom door can close without snagging a towel or cord.
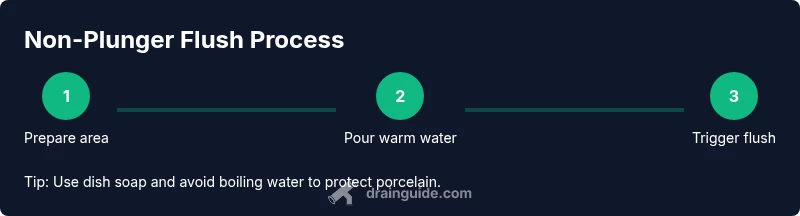
Step-by-step gravity flush method (Part 1)
- Gather supplies and set the area. Place towels around the base, keep a trash can nearby for overflow, and ensure you have a clear path to the bathroom exit in case you need to step away. The setup reduces the chance of splashing and keeps things contained. (Tip: keep a spare bucket ready for additional warm water.)
- Check the water supply valve to ensure it’s open. This ensures a steady water flow when you trigger the flush and avoids partial or no water entering the bowl. (Tip: if the valve sticks, don’t force it—call a professional.)
Step-by-step gravity flush method (Part 2)
- Fill a bucket with warm water (not hot) and add a small squirt of dish soap. The soap helps reduce surface tension and allows the water to move more freely through the bowl. Let it sit for a few seconds before proceeding. (Tip: use a long-handled pitcher for controlled pouring.)
- Hold the pitcher high enough to create a strong surge, then pour the warm water into the bowl in a single, confident motion. The sudden influx should push toward the siphon and dislodge light obstructions. (Tip: aim for the middle of the water surface to maximize the effect.)
Troubleshooting: what to do if the water surge doesn’t budge the clog
If the first surge doesn’t clear the blockage, pause for 1–2 minutes and try again with fresh warm water and soap. Avoid repeated, aggressive pours that could cause overflow. If you still see a sluggish bowl after a second attempt, stop and consider a more direct approach or professional help. Remember, patience reduces mess and reduces the risk of damaging the toilet.
Common mistakes to avoid
Common mistakes include using boiling water, which can crack porcelain, pouring water too quickly after soap to cause splashing, and ignoring overflow warnings. A cautious, measured approach is more effective and safer for your plumbing. Use towels and a mop to manage spills, and never mix cleaning chemicals with plain water in a toilet. Drain Guide recommends sticking to simple household methods first before escalating.
When to call a plumber and what to expect
If multiple non-plunger methods fail, or if you notice persistent backups, it’s time to call a professional. A plumber can perform a targeted snaking or hydro jetting if necessary and diagnose potential sewer line issues. In the meantime, avoid forcing water through a stubborn clog and protect your floors from overflow. The Drain Guide team suggests documenting what you tried and any unusual sounds or changes in water level to share with the expert.
Realistic expectations and next steps
Non-plunger techniques can resolve many common clogs caused by paper or minor debris, but they won’t fix hard waste or large objects. Expect to spend 15–25 minutes on the initial attempts, with attention to safety and sanitation. If success is not achieved after one or two attempts, do not persist in a way that risks overflow. The goal is to move the blockage with a gentle, deliberate surge, not to force a radical solution.
Tools & Materials
- Plastic bucket (3–5 gallons)(For pouring warm water to create a surge; use a clean bucket.)
- Dish soap(A small squirt helps reduce surface tension during the surge.)
- Long-handled pitcher or sturdy cup(For controlled, high-velocity pours into the bowl.)
- Rubber gloves(Protect hands from contamination.)
- Old towels or shop towels(Protect floors and contain spills.)
- Extra bucket (optional)(Use if you anticipate needing more warm water.)
- Non-slip footwear(Reduce slipping on wet floors.)
Steps
Estimated time: 15-25 minutes
- 1
Prepare area and safety gear
Set towels around the base, remove any rugs, and keep the bathroom door clear. Don gloves and gather your bucket, pitcher, soap, and extra towels so everything is within reach. This minimizes spills and keeps the workflow smooth.
Tip: Position towels to create a dry zone you can step into if overflow occurs. - 2
Check the water supply
Make sure the toilet’s fill valve is open and water can flow normally into the bowl. A partially closed valve can starve the surge needed for an effective flush. If the valve feels stiff, don’t force it—adjust gently or call a plumber.
Tip: A stable water supply improves the chance of clearing the blockage on the first try. - 3
Pour warm water into the bowl
Fill the bucket with warm (not boiling) water and carry it to the bathroom. Lift the bucket to a moderate height and pour slowly into the bowl to avoid splashing. The goal is a controlled surge, not a flood.
Tip: Warm water helps break up minor clogs without harsh mechanical action. - 4
Add dish soap
Squirt a small amount of dish soap into the bowl and let it sit for a few seconds. The soap reduces surface tension and helps the water penetrate the blockage more effectively.
Tip: Don’t overdo the soap—one small squirt is enough for most clogs. - 5
Pour again for a surge
Pour another batch of warm water from the same height, aiming toward the center of the bowl to maximize the surge. This helps push the clog through the trap and into the drain.
Tip: Maintain a steady, confident pour rather than a quick splash. - 6
Trigger the flush and observe
Pull the toilet lever to flush. Watch the water level and listening for the expected siphon sound. If water rises toward the rim, stop and mop up the overflow quickly.
Tip: Be prepared to shut the water supply if overflow begins.
Got Questions?
Is flushing without a plunger recommended for all clogs?
Not for severe blockages or foreign objects. If the water rises or you hear grinding sounds, stop and seek professional help rather than risking a bigger mess.
Not for every clog—if it’s severe, call a plumber instead of trying risky home methods.
Will using warm water damage the toilet?
Warm water (not boiling) is generally safe for most toilets. Avoid boiling water which can crack porcelain; if you see cracks, stop and call a pro.
Warm water is usually safe, but never use boiling water.
What if water continues to rise and overflow?
Shut off the water supply valve behind the toilet, mop up excess water, and wait to try again. If overflow repeats, stop and call a plumber.
If it overflows, turn off the water and call a pro if it keeps happening.
Can these methods harm septic systems?
Small amounts of dish soap and water are generally safe for septic systems when used sparingly. Avoid chemical drain cleaners that can disrupt the system.
They’re usually safe if used in moderation; avoid harsh chemicals.
Do these methods work on all toilets?
Most standard gravity-flush toilets respond to the surge, but performance varies with clog type and toilet design. If unsure, don’t risk overflow.
Usually works for standard toilets, but some clogs may require a pro.
Watch Video
The Essentials
- Try gravity-first techniques before tools.
- Use warm, soapy water to lubricate the interior.
- Pour from waist height to generate a surge.
- Keep towels ready to catch spills and prevent a mess.
- If it fails, don’t force it—consider professional help.