How to Get a Drain to Drain: A DIY Guide
Discover practical, step-by-step methods to make a clogged drain drain again. This DIY guide covers traps, plungers, snakes, and safe maintenance to keep drains flowing smoothly.

You can get a drain to drain again by clearing the trap, removing the clog, and restoring flow with safe, DIY steps. Start with the P-trap under the sink, then use a plunger or a manual drain auger. If water backs up or odors persist, stop and seek professional help.
Why getting a drain to drain matters
A drain that refuses to drain can trigger a cascade of household headaches, from standing water under sinks to unpleasant odors and mold growth in cabinets. Slow drainage often signals a partial clog that, if ignored, can worsen and force more drastic fixes later. According to Drain Guide, understanding the drainage anatomy helps you pick the right approach and avoid unnecessary chemical cleaners. By learning the basics of the P-trap, waste line, and venting, you gain confidence to tackle common clogs safely and effectively. This section sets the stage for practical, hands-on steps you can perform using affordable tools you already own, reducing the need for costly service calls while preserving your plumbing.
Common causes of slow drains
Clogs form from a mix of hair, soap scum, grease, mineral buildup, and food debris. In kitchen sinks, food scraps and grease can accumulate at the disposal connection or within the trap, while bathroom drains trap body hair and soap scum. Outside drains slow due to sediment or plant roots migrating into the line. A poorly vented system can also trap air and slow drainage. Recognizing the root cause helps you decide whether a simple flush, mechanical removal, or a deeper clean is needed. Drain Guide notes that regular maintenance—like flushing with hot water and using a drain cover—prevents many clogs before they start.
Safety and prep before you start
Prepare your workspace to protect floors and cabinets. Clear the area, place a bucket under the trap, and have towels ready for spills. Wear protective gloves and eye protection; disturbed clogs can release stinky gases. Keep children and pets away while you work. A bright flashlight helps you see inside tight spaces. By establishing a clean, organized setup, you minimize mess and mistakes, and you’ll work more efficiently.
Tools and materials you’ll need (essential list)
- Bucket (essential) – large enough to catch water from the P-trap (2-3 gallons)
- Adjustable wrench (essential) – to loosen P-trap nuts without stripping
- Plunger (essential) – standard sink plunger with a tight seal
- Drain snake/auger (essential) – 3-6 ft for most household clogs
- Towels or rags (essential) – for spills and cabinet protection
- Gloves (essential) – protects hands from grime
- Flashlight (optional) – improves visibility in dark pipes
- Old toothbrush or brush (optional) – helps clean threads
- Small tray or container (optional) – keeps screws and parts organized
Step-by-step overview: what you’ll do
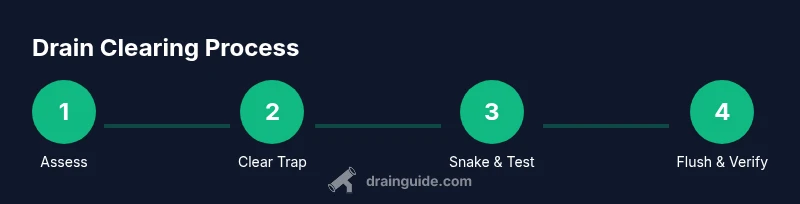
This section outlines the high-level flow: locate and clear the trap, plunge the drain, use a drain snake for deeper clogs, then test and maintain. You’ll move from a quick, mechanical approach to a more thorough cleaning if needed. Remember, the goal is to restore steady flow without injuring pipes or seals. Drain Guide emphasizes patience and methodical checks to avoid unnecessary damage.
Mechanical methods first: plunger and stopper
Begin with the simplest tool: a plunger. A good seal and firm, controlled pushes can dislodge many clogs near the drain opening. If you have a sink with a stopper, remove it to expose a clear path for the plunger. Plunge with short, strong strokes, keeping the seal intact. If the flow improves, rinse with hot water and observe for a while to ensure the clog is fully cleared.
Deeper cleaning: P-trap inspection and drain snake
If plunging doesn’t fully clear the drain, the next step is to inspect the P-trap. Place a bucket beneath to catch water, then loosen the trap nuts with your wrench and remove the trap. Clear any gunk by hand and run water through the pipe to check for remaining blockages. If the pipe remains clogged further down the line, insert the drain snake into the drain, rotating it clockwise while applying gentle pressure to break apart debris. Remove the snake and pull out the clog, then rinse the pipe.
Safety, chemical cleaners, and alternatives
Chemical drain cleaners are not the first choice for most homeowners; they can damage pipes, especially on older systems, and may not reach deeper blockages. If you choose to use a cleaner, opt for a product labeled safe for your pipe type and follow the manufacturer’s instructions precisely. Prefer mechanical methods first, and flush with hot water or a baking soda and vinegar treatment as a safer, gentler option.
Prevention and maintenance
After restoring drainage, commit to a simple maintenance routine: flush with hot water weekly, use a drain screen to catch hair and food debris, and avoid pouring grease down the sink. Regularly inspect the P-trap for signs of wear or leakage and tighten connections as needed. A small amount of vinegar can help keep pipes smelling fresh, but avoid mixing acidic cleaners with bleach or ammonia. By taking these preventive steps, you reduce the chance of future clogs and extend the life of your pipes.
Tools & Materials
- Bucket(Large enough to catch water from the P-trap (2-3 gallons))
- Adjustable wrench(Loosen P-trap nuts without stripping)
- Plunger(Flat plunger; ensure a tight seal for best results)
- Drain snake/auger(3-6 ft length; choose a model with a flexible head)
- Towels or rags(Protect surfaces and absorb spills)
- Gloves(Protect hands from grime and bacteria)
- Flashlight(Improve visibility in dark pipes)
- Old toothbrush/brush(Clean threads and parts)
- Container for parts(Keep screws organized during disassembly)
Steps
Estimated time: 45-75 minutes
- 1
Shut off water and prep area
Turn off the sink shutoff valve and place a bucket under the P-trap. Clear the area of items that could fall in, and lay towels to catch spills. This prevents splashes and makes clean-up easier.
Tip: Have a flashlight handy to see into the pipes. - 2
Loosen and remove the P-trap
Place the bucket under the trap, then use the adjustable wrench to loosen the slip nuts. Carefully remove the trap while catching any remaining water. Inspect for cracks or wear before reassembly.
Tip: Do not force nuts; apply steady pressure to avoid stripping. - 3
Clear the trap debris
Trash any gunk and rinse the trap with water. Use a brush to clean threads and the interior of the trap. Reinstall if clean and undamaged.
Tip: Take a quick photo of the assembly to reference during reassembly. - 4
Test the drain with plunging
Reattach the trap loosely and set a bucket beneath. Plunge the drain with short, firm strokes to dislodge remaining clogs. If flow improves, tighten the trap and run hot water.
Tip: Seal the plunger around the drain for maximum suction. - 5
Use a drain snake for deeper clogs
Insert the snake into the drain and rotate clockwise as you push. Break up debris and pull it back out slowly. Rinse with water to verify flow.
Tip: Go slow to avoid damaging the pipe or pushing the clog further. - 6
Rinse and reassemble
Reconnect all trap parts, ensuring tight seals without overtightening. Run hot water for several minutes to flush any residual debris.
Tip: Check for leaks around joints after testing with water. - 7
Final drain test
Fill the sink partially and drain to confirm consistent flow. Check other connected fixtures for backup as a quick multi-fixture check.
Tip: If odors persist, consider routine cleaning or vent checks. - 8
Clean up and recover
Wipe down exposed surfaces, store tools, and replace towels. Dispose of waste properly and sanitize gloves if reusable.
Tip: Keep parts organized to simplify future maintenance.
Got Questions?
What is the first thing I should do when the drain is slow?
Begin by shutting off the water, placing a bucket under the trap, and inspecting for obvious blockages. This prevents spills and gives you a clear starting point.
First, turn off the water and place a bucket under the trap to catch any blockage. Inspect for obvious clogs and plan your next step.
Can chemical drain cleaners help, and should I use them?
Chemical cleaners can damage pipes and may not reach deeper clogs. Mechanical methods (plunging and snaking) are safer and often more effective for household drains.
Chemicals can harm pipes and might not solve deep clogs. Start with plungers and snakes for a safer, more effective approach.
How do I know if the clog is in the main sewer line?
If multiple fixtures back up at once, or you notice sewage odors, the blockage may be in the main line. Call a plumber to assess with professional equipment.
If several fixtures back up or you smell sewer gas, the main line could be blocked. Contact a pro for a proper diagnosis.
Is it always the P-trap that causes clogs?
Not always, but the P-trap is a common choke point. If removing and cleaning it clears the drain, the trap was likely involved. Otherwise, check deeper in the line.
The P-trap is a frequent culprit, but if the clog persists after cleaning it, the blockage may be further down the line.
Are baking soda and vinegar effective for clogs?
Baking soda and vinegar are relatively safe and can help with minor buildups, but they’re not reliable for stubborn clogs. Use them as a maintenance tool, not a cure-all.
Baking soda and vinegar are safer but not a guaranteed fix for stubborn clogs. Think of them as maintenance.
How often should I maintain drains to prevent clogs?
Perform a quick weekly hot-water flush and a monthly trap inspection. Use a drain screen to catch hair and debris and avoid pouring grease down the drain.
Maintain drains weekly with hot water and inspect traps monthly. Use screens to catch debris and avoid grease.
Watch Video
The Essentials
- Identify the trap and inspect for blockages first.
- Use mechanical methods before chemical cleaners.
- Test each step with water to confirm progress.
- Prevent future clogs with regular maintenance.