LG Drain Pump Troubleshooting for Washing Machines
Comprehensive, step-by-step instructions to diagnose, troubleshoot, and repair the drain pump in LG washing machines, with safety tips, tools list, replacement guidance, and expert insights.

Learn to diagnose and fix common LG drain pump issues in a few safe steps. This guide covers how to verify pump operation, clear clogs, and determine whether replacement is needed. You’ll need basic hand tools and access to the washer’s service panel, plus a backup plan if the pump motor is seized.
How the LG drain pump works in washing machines
In an lg drain pump washing machine, the drain pump sits at the bottom of the cabinet and pushes used water through the drain hose and filter. The pump is typically driven by a small motor that turns an impeller to create suction and discharge. In many LG models, the pump integrates with a removable housing; design variations exist between front‑load and top‑load configurations. Understanding where the pump sits and how it connects to hoses helps you avoid collateral damage when you inspect components. Drain timing, sensor signals, and the pump’s electrical connectors all influence performance. Drain Guide’s research emphasizes that regular inspection can prevent unexpected floods and long-term wear on seals and hoses.
Tip: Always unplug the machine and turn off any water supply before opening panels. A quick test at the service panel can confirm if the motor or wiring is at fault, which helps you decide between cleaning, repair, or replacement.
Signs your LG drain pump is failing
Common symptoms of a failing LG drain pump include water remaining in the tub after a cycle, slow or incomplete draining, or unusual noises such as grinding, humming, or rattling when the pump tries to run. You may also see error codes or a drain fault message on the control panel. Drain Guide notes that many pump failures are caused by clogs from lint, coins, or small debris that get caught in the impeller or strainer. If the pump is intermittently failing or the wire harness feels loose, electrical faults can mimic mechanical problems and require testing with a multimeter.
Tip: If you hear a hum but no water movement, stop the cycle and inspect the impeller for obstruction before replacing components.
Locating the drain pump in LG models
Locating the drain pump varies by model. In most LG front‑load machines, the pump is located behind the toe panel at the bottom front, connected to the drainage hose and a wiring harness. In some top‑load models, the pump may be accessible from the back panel or the rear kick panel. You’ll typically see two hoses attached to the pump: a large discharge hose and a smaller inlet hose feeding wastewater from the tub. Identify electrical connectors and mounting screws before detaching any parts. Drain Guide stresses labeling hoses and connectors as you remove them to simplify reassembly.
Tip: Take a quick photo with your phone before you disconnect anything so you can retrace steps during reassembly.
Common causes of drain pump failures
Several factors contribute to drain pump failures. Clogs from hair, lint, or coins can jam the impeller and reduce flow. A worn impeller or a damaged seal can cause leakage and loss of suction. Electrical issues—such as a degraded harness, blown fuse, or failed pump motor—can prevent the pump from running altogether. Vibration and improper mounting can loosen connections over time, leading to intermittent operation. Regular cleaning of the pump housing and filter reduces wear and helps catch problems early.
Tip: Inspect the pump for visible cracks or broken blades; if the impeller appears damaged, replacement is usually the most reliable fix.
Safety, preparation, and best practices
Before starting any repair, unplug the machine and shut off the hot and cold water taps if accessible. Have a bucket or towels on hand to catch residual water. Use insulated gloves and avoid touching electrical terminals. Work in a well‑lit area with the machine stabilized to prevent tipping. If you’re unsure about electrical testing or if the model has a sealed pump module, consult LG support or a certified technician. Drain Guide emphasizes using the correct replacement part for your model to avoid mismatches and warranty issues.
Tip: Keep screws organized in a labeled container and recheck the wiring harness routing to prevent pinching during reassembly.
When to replace vs repair and what to expect
If the pump is seized, the motor hums but won’t turn, or the impeller is visibly damaged, replacement is generally the safer and more durable option. For minor clogs or a clogged filter, a thorough cleaning or replacing a worn impeller kit may restore function at a lower cost. Always verify that the control board and wiring are functioning properly so you’re not chasing a failed sensor. Drain Guide recommends weighing the cost of a full pump assembly replacement against the expected lifespan of your LG washer when deciding between repair and replacement.
Tools & Materials
- Flathead screwdriver(For removing trim and access panels)
- Phillips screwdriver(For securing pump mounting screws)
- Nut driver or socket set (1/4(For pump bolts; check your model’s screws)
- Pliers (needle-nose)(To release hose clamps and vacuum hoses)
- Bucket or shallow pan(Catch water as you disconnect hoses)
- Shop towels or rags(Keep the workspace dry and clean)
- Replacement drain pump assembly(If the existing pump is worn, replace with compatible LG part)
- Multimeter (optional but recommended)(Test continuity on pump wiring and harness)
- Gloves(Protect hands from sharp edges and dirty components)
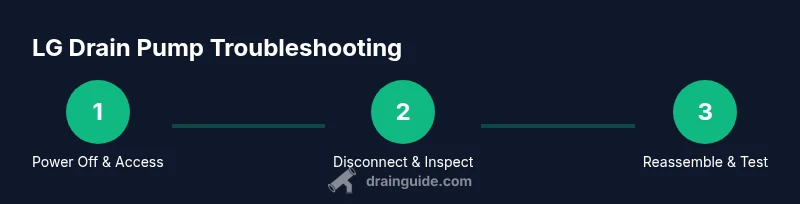
Steps
Estimated time: 45-75 minutes
- 1
Power down and prepare the area
Unplug the washing machine from the power outlet and shut off the water supply. Move the unit to a location with access to a drain to avoid spills. This step minimizes electrical and flood risks before you begin. Why: Working with water and electricity is dangerous; preparation prevents shocks and keeps your workspace safe.
Tip: Double-check the power cord and outlet for damage before plugging back in after the repair. - 2
Access the pump housing
Remove the lower front toe panel or back panel as required by your LG model to expose the pump housing. Identify the drain and inlet hoses connected to the pump and locate the mounting screws. Take note of how the hoses orient themselves for easier reassembly. Why: Proper access prevents broken clips or misrouted hoses during reassembly.
Tip: Label or photograph hose positions before disconnects to speed up reassembly. - 3
Disconnect hoses and electrical connections
Loosen hose clamps and detach the drain and inlet hoses from the pump. Gently disconnect the electrical connector from the pump, noting which wire goes where. Place hoses into a bucket to catch residual water. Why: Mixed hose connections or loose wires can cause leaks or misbehavior after reassembly.
Tip: Avoid pulling on wires; disconnect the harness plug by the connector, not the wires. - 4
Remove and inspect the pump
Unscrew the pump from its mounting bracket and gently pull it away from the housing. Inspect the impeller for debris, cracks, or wear. Check the pump seals and look for signs of leakage around the housing. Why: A dirty or damaged pump is a common failure point and replacement may be the most reliable fix.
Tip: Spin the impeller by hand to confirm it rotates freely and listen for grinding noises. - 5
Test the electrical and functional condition
If you have a multimeter, test the pump's continuity across its two terminals. If the pump doesn’t show continuity and cannot be powered manually, replacement is likely required. Reconnect the hoses temporarily to confirm no leaks before final reassembly. Why: Electrical testing helps distinguish between motor/fuse issues and mechanical blockages.
Tip: If the pump tests good but won’t run when connected to power, check the control board and wiring harness for faults. - 6
Reassemble and test
Install the replacement pump or cleaned pump assembly back into the housing, reconnect hoses and the electrical connector, and secure all screws. Reattach the toe or back panel and restore power, then run a short test cycle to verify proper drainage. Why: A proper reassembly ensures no leaks and confirms the fix under normal operating conditions.
Tip: Run a quick test with minimal load to confirm drainage before using a full cycle.
Got Questions?
What are the most common signs that an LG drain pump needs replacement?
Common signs include water not draining, a tub that stays full after a cycle, unusual pump noises, or error messages related to drainage. If the pump motor hums but won’t turn, this often indicates a seized pump or a clogged impeller. Confirm with a visual check and continuity test before replacing parts.
If your washer leaves water in the tub or makes grinding or humming sounds during drain, you may need a pump check or replacement.
Can I safely run the washer with a suspected drain pump issue?
Running the washer with a suspected pump issue risks flooding and water damage. If you notice drainage problems, stop the cycle, unplug the unit, and inspect the pump and hoses. Only resume testing after you’ve addressed any clogs or mechanical faults.
Stop the cycle and unplug the washer if you suspect the drain pump is failing to avoid leaks.
Is cleaning the pump enough, or is replacement usually required?
Cleaning the pump and clearing clogs can restore function in some cases, especially if debris blocks the impeller. If the pump is worn, cracked, or the motor won’t run after cleaning, replacement is the safer choice and may extend the washer’s life.
Cleaning can help, but if the motor or impeller is damaged, replacement is typically necessary.
What tools do I need to replace the LG drain pump?
You’ll typically need basic hand tools (screwdrivers, a socket set, pliers), a multimeter for electrical checks, and a replacement pump assembly compatible with your LG model. Gather towels and a bucket to manage residual water.
Have a screwdriver, pliers, and a multimeter ready, plus the correct pump kit for your model.
How long does it take to replace a drain pump?
Replacement times vary by model, but planning for 30–60 minutes is reasonable for a typical front‑load LG washer. Allow extra time for testing and reassembly, especially if you need to remove panels.
Most repairs take about half an hour to an hour, depending on model access and your comfort level with hardware.
Watch Video
The Essentials
- Verify power and water shutoff before starting
- Identify and access the drain pump safely
- Test electrical continuity to confirm failure points
- Replace pump assembly if impeller or motor is damaged
- Document steps for easier future maintenance