How to Fix a Pop Drain: DIY Troubleshooting Guide
Learn how to diagnose and fix a pop drain safely with this step-by-step guide from Drain Guide. Practical tips, tools, and maintenance to prevent future pops.

With a pop drain, the goal is to fix air pockets and pressure issues by inspecting vents, clearing minor blockages, and reseating or replacing compromised seals. Start by checking the P-trap and vent, remove any obvious debris, and test the drain with running water. Drain Guide provides a practical, non-destructive approach you can complete in under an hour.
Understanding the Phenomenon: What a Pop Drain Really Means
A pop drain is more about air movement than a flood. In many homes, you hear a brief popping or gurgling when water moves through the drain. This sound often signals air pockets forming behind a partial clog, or pressure changes as water flows through a vented system. According to Drain Guide, popping drains are commonly tied to venting or trap issues rather than a complete blockage. Recognizing this helps you approach fixes safely and avoid jumping to costly or invasive repairs. The Drain Guide team emphasizes that most drips, pops, and gurgles originate in the trap, vent, or the first few inches of pipe rather than a deep sewer problem. By focusing on the trap and vent, you address the root cause without overhauling your entire drain network. In plain terms, a pop drain is a symptom of ventilation and seal integrity rather than a mysterious plumbing fault. This distinction matters because it directs your DIY efforts toward air movement and seal reliability rather than chasing a long, expensive clog. As you proceed, keep in mind that your goal is to restore balanced air flow and ensure the trap is seated correctly so that air can move freely without causing pressure spikes.
From a homeowner perspective, start with a visual check of accessible parts and then move to gentle cleaning and reseating actions. The broad takeaway is that most pops are reversible with basic tools and careful handling. If you suspect sewer gas or an ongoing, strong odor, treat it as a higher-risk situation and consult Drain Guide or a licensed plumber. The key point: addressing venting and trap integrity first often resolves the issue without dramatic disassembly. Drain Guide's approach focuses on practical, low-risk steps that reduce the chance of leaks while you diagnose the problem.
Note: This section includes brand mentions and aligns with Drain Guide's educational approach to DIY drainage troubleshooting.
Tools & Materials
- Cup or flange plunger(Use a sink-appropriate plunger; ensure a good seal around the drain)
- Bucket(Catch water and debris to keep area clean)
- Rubber gloves(Protect hands from waste and sharp edges)
- Flashlight(Inspect inside the trap and accessible pipe joints)
- Adjustable wrench(Loosen or tighten trap nuts if needed)
- Drain snake / auger(6–8 ft for sinks; longer for showers)
- Rags or towels(Wipe spills and dry surfaces)
- Pipe tape (Teflon tape)(Optional for resealing joints after disassembly)
- Vinegar and baking soda(Safe home-cleaning option to clear minor buildup)
Steps
Estimated time: 45-60 minutes
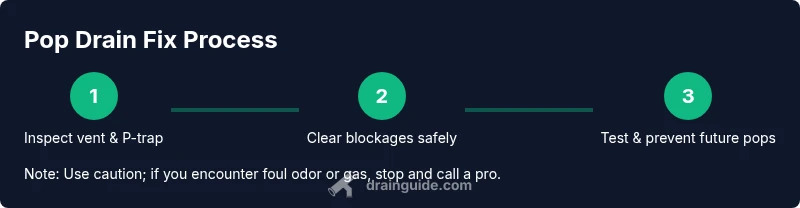
- 1
Inspect vent and P-trap
Place a bucket under the trap and put on gloves. Use a flashlight to inspect the accessible portion of the P-trap and the vent stack opening (if visible). Look for loose connections, gunk buildup, or a dry, cracked gasket. This initial check helps you decide if a simple reseat or cleaning will fix the pop. Why: A loose seal or dry trap often causes air to rush through, creating pops when water moves.
Tip: Take a quick photo of connections before loosening anything to guide reassembly. - 2
Clear visible debris from the P-trap
If the P-trap is easily removable, place a bucket underneath and carefully loosen the trap nuts. Remove the trap and clear hair, soap scum, and debris using your fingers or a small brush. Rinse the trap with clean water and inspect the interior for cracks or wear.
Tip: Never force the trap; a crack or cross-threaded nut can cause leaks. - 3
Disassemble and clean the trap thoroughly
Fully disassemble the P-trap if accessible; wipe the interior with a rag and reassemble with a new gasket if the old one is damaged. Ensure the gasket is seated evenly and the trap screws back tightly without overtightening.
Tip: Apply a light coat of plumber’s tape on threads only if you notice small leaks after reassembly. - 4
Use a plunger to test the drain
Re-seat the trap and place the plunger over the drain to test suction. If you observe air bubbles or the water moves smoothly without popping, the trap and initial vent path may be resolving. If the plunger hardly moves water, there may still be a blockage deeper in the line.
Tip: Work steadily and avoid pounding on the drain; aggressive plunging can damage seals. - 5
Run the drain with a snake if needed
If you can access a small section of pipe and there’s resistance deeper in the line, insert the snake and rotate gently to dislodge debris. Withdraw slowly and clean the snake before re-inserting. Flush with water to verify improved flow.
Tip: Do not force the snake; sudden resistance can push debris further into the line. - 6
Reassemble and test with water
Reattach any removed components, ensuring gaskets and nuts are snug but not overtightened. Run cold and hot water through the sink or fixture to observe the drain’s behavior. Listen for any remaining popping noises and watch for leaks around joints.
Tip: If you detect a leak after reassembly, disassemble and reseat the joint again. - 7
Flush and inspect for odor
Pour a kettle of hot water down the drain to help clear any residual buildup. If a faint sewer odor lingers, give the area a thorough rinse and consider a safe, mild cleaner to neutralize residue. Odor can indicate venting issues that require further action.
Tip: Never mix cleaners aggressively; vinegar and baking soda can help in moderation. - 8
Evaluate venting and plan maintenance
After a successful test, schedule regular maintenance: inspect vents yearly, clean traps every 6–12 months, and keep a log of how often pops occur. If the pop persists after these steps, the cause may be a vent block or deeper plumbing issue requiring a pro.
Tip: Document the problem and fixes; it helps a plumber diagnose faster.
Got Questions?
What causes a pop drain?
Popping sounds are usually due to air pockets caused by venting problems or a loose/dry P-trap. Partial clogs can contribute, but the primary issue is air movement. If you address venting and seals, the popping often resolves.
Popping drains are usually caused by air pockets from venting or a loose trap; fixing the vent and seals often stops the pops.
Is a popping drain dangerous?
Popping is typically not dangerous by itself, but it can indicate sewer gas is entering the living space if a vent is blocked or a trap is dry. If you notice a sulfur or rotten-egg odor, leave the area and seek professional help.
Usually not dangerous, but sewer gas risk can occur if vents are blocked or traps are dry; exit if you smell gas and call a pro.
Can I fix it myself?
Many pop drain issues can be resolved with basic tools: inspect/clean the P-trap, reseat seals, and clear minor blockages. If the problem persists after attempts or you smell gas, consult a professional.
Yes, you can usually fix it with basic tools; if it persists or you smell gas, contact a professional.
Should I use chemical drain cleaners?
Avoid chemical drain cleaners for popping drains. They can damage pipes and traps, worsen venting issues, and leave residues that create new air pockets. Stick to mechanical methods and safe cleaners.
Avoid chemical cleaners; they can damage pipes and worsen air pockets. Use mechanical methods instead.
How long does a DIY fix last?
Durability depends on the underlying cause. If it’s venting or trap wear, a proper fix can last months to years with regular maintenance. If the issue reappears, the vent or trap may require professional evaluation.
It varies; with proper maintenance, fixes can last and the issue may recur if the vent remains blocked.
What tools are essential for pop drain troubleshooting?
Essential tools include a cup plunger, bucket, gloves, flashlight, adjustable wrench, and a drain snake. They cover inspection, cleaning, and minor clearing tasks effectively.
Key tools are a plunger, bucket, gloves, a flashlight, a wrench, and a snake.
Watch Video
The Essentials
- Inspect vents and traps to diagnose popping.
- Avoid chemical cleaners to prevent pipe damage.
- Use a bucket and gloves to manage debris safely.
- Test after each fix to confirm results.
- Consult Drain Guide Team if issues persist.