How to Fix a Pop Up Drain for Your Bathroom Sink
Learn how to diagnose, remove, clean, and reassemble a pop up drain for a bathroom sink. This step-by-step Drain Guide tutorial covers tools, safety, common mistakes, and maintenance to prevent leaks and clogs.

By following these steps, you will diagnose and fix a pop up drain for bathroom sink, remove clogs, and restore smooth drainage. You’ll learn how to safely remove the stopper, clean the linkage and trap, reassemble, and test a proper seal. Basic hand tools and a few minutes of patience are all you need to start.
What a pop up drain is and why it clogs
A pop up drain for bathroom sink is a simple, gravity-driven stopper that sits in the sink’s drain and is controlled by a lift rod and pivot rod. When you push the stopper, it seals the drain; when you pull, it unseals. Over time, hair, soap scum, toothpaste, and mineral buildup accumulate around the stopper, inside the linkage, and in the trap. This buildup restricts water flow and can lead to standing water, slow drainage, or gurgling sounds. Understanding the basic components—stopper, linkage, tailpiece, and trap—helps you diagnose where the clog originates and plan the right approach. For homeowners dealing with a slow or blocked bathroom sink, a clean, well-adjusted pop up drain will restore full drainage without replacing major plumbing.
Why maintenance matters for bathroom drains
Even with a simple design, neglecting routine maintenance allows hair and soap residue to compact around the stopper and inside the U-bend or trap. Regular cleaning reduces the frequency of clogs, minimizes odors, and extends the life of the drain assembly. A well-maintained pop up drain also prevents leaks caused by worn gaskets or corroded linkage. In many homes, a quick clean every 6–12 months is enough to keep water flowing freely. If you have hard water, mineral buildup can form on metal parts and reduce movement, so periodic limescale removal is beneficial.
Safety and preparation: what to do before you start
Before you touch any plumbing components, clear the work area and protect your vanity with towels or a mat. Place a bucket underneath the sink to catch water and debris. Turn off the faucet or be prepared for a splash when you remove the stopper. Wear gloves to avoid sharp edges and keep a small container or tray to keep fasteners organized. If you notice corrosion, leaks, or damaged seals, proceed with extra caution and plan to replace worn parts. Taking a moment to prepare reduces cleanup time and helps prevent accidents.
How to identify the parts that commonly fail
In many pop up drain assemblies, the most frequent failure points are the stopper’s seal, the pivot rod, and the rubber gaskets at the tailpiece. Hair and mineral buildup can also jam the linkage, preventing the stopper from sealing properly. A visual inspection can reveal bent rods, cracked seals, or a loose stopper. If the stopper doesn’t align with the drain opening or won’t stay in the closed position, a misadjusted linkage is often the culprit. Recognizing these components helps you decide whether you can fix it or if you should replace worn parts.
How to approach cleaning without damage
Cleaning should be thorough but gentle. Use a damp cloth or a soft toothbrush to remove soap scum and mineral deposits from the stopper and visible metal surfaces. For stubborn buildup, a mild vinegar solution can help dissolve mineral deposits; rinse thoroughly afterward to prevent corrosion. Avoid harsh chemical drain cleaners near the stopper assembly, as these can deteriorate rubber gaskets and plastics. After cleaning, dry all parts completely to avoid rust and ensure smooth movement when reassembling.
Reassembly considerations: aligning the stopper and linkage
Reassembling requires careful alignment so that the stopper seats correctly and the linkage moves freely. Start by reinstalling the stopper into the drain opening, ensuring the ring or cap sits flush against the drain surface. Reattach the pivot rod and linkage so the stopper moves up and down without binding. If you feel resistance when moving, double-check that the pivot rod is properly seated in its bushing and that there are no twists or kinks in the rods. Correct alignment prevents leaks and improves function.
Testing the drain after reassembly
Once reassembled, run water to test the seal. Check for a firm seal when the stopper is in the closed position and for full drainage when it opens. Look around for any signs of leakage at the gasket, tailpiece, or joint. If water doesn’t drain promptly or if you see a slow drip, re-check the seals and tightening points, but avoid overtightening metal parts which can crack gaskets. A successful test confirms the fix and sets the stage for maintenance.
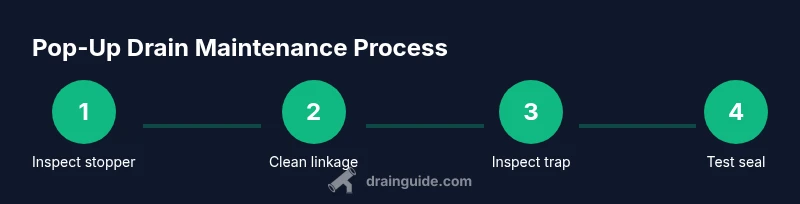
Maintenance practices to prevent future clogs
To keep your pop up drain functioning well, clean the stopper and visible drain area every few months, especially if you notice slow drainage. Keep hair away from the assembly by using a fine mesh screen or a drain protector. Periodically inspect gaskets for wear and replace as needed. If you have hard water, consider a descaling routine to limit mineral buildup on metal parts. Small, regular maintenance reduces the chance of major clogs and leaks.
Advanced edge cases: when the simple fix isn’t enough
If the stopper moves loosely, clogs recur despite cleaning, or you discover a corroded tailpiece or cracked gasket, you may need to replace components rather than attempt a repair. In some cases, a complete replacement of the pop up drain kit is the best approach, especially in older installations. If you’re unsure about the type of stopper (lift-and-turn vs. two-hole or I-beam style), consult the manufacturer’s guide or a plumbing professional. Safety and durability should guide your decision.
Quick-start troubleshooting checklist
- Inspect the stopper for cracks or wear
- Check linkage alignment and pivot rod movement
- Clean the trap and tailpiece of debris
- Test seal with hand pressure before running water
- Replace worn gaskets or seals promptly
- Avoid chemical cleaners near rubber parts
- Maintain a simple, regular cleaning schedule
Tools & Materials
- Bucket or bowl(To catch water and debris during disassembly)
- Old towels or rags(Protect the vanity and absorb spills)
- Adjustable pliers (channel-lock)(Grip nuts and fittings without slipping)
- Flat-head and Phillips screwdrivers(For removing clamps and fasteners)
- Gloves(Protect hands from sharp edges)
- Replacement stopper or gasket set(Have on hand in case parts wear out)
- Plumber’s putty or silicone sealant(Use for resealing joints if needed)
- Vinegar or mild descaler(Helpful for mineral buildup; rinse thoroughly)
- Towel or mat for under-sink area(Catches drips and debris)
Steps
Estimated time: 30-60 minutes
- 1
Prepare and protect workspace
Place a bucket under the sink and lay towels to catch water. Remove any objects from the cabinet and ensure good lighting. This initial setup keeps cleanup quick and reduces the risk of losing small parts.
Tip: Keep a small tray or magnetic dish handy to hold screws and tiny parts. - 2
Remove the stopper from the drain
Access the stopper from beneath the sink or via the overflow opening. Loosen any retaining nuts or clips and gently lift the stopper from the drain. Note how the stopper sits and whether it rotates freely.
Tip: If the stopper is difficult to remove, avoid forcing it—check for corrosion and plan extra time. - 3
Detach the linkage
Disconnect the lift rod from the pivot rod. Keep track of how the linkage is connected since you’ll need to reassemble it exactly the same way. Inspect for bent or worn parts.
Tip: Take a quick photo before removing components so you can reference placement later. - 4
Inspect and clean the trap and tailpiece
Place the trap over the bucket and rinse out hair and soap scum. Use a brush to scrub the inner walls of the trap and the tailpiece. Check for cracks or corrosion that would require replacement.
Tip: If the trap is very clogged, consider removing it completely for a thorough soak in warm, soapy water. - 5
Clean the stopper and glide surfaces
Scrub the stopper and its seating surfaces with a mild cleaner. Remove mineral deposits with a soft brush or cloth. Dry all parts completely before reassembly to prevent rust.
Tip: Avoid abrasive cleaners that could scratch metal surfaces. - 6
Check gaskets and seals
Inspect o-rings or rubber gaskets for cracks or wear. Replace worn gaskets to prevent leaks after reassembly. Apply a light coating of plumber’s putty or silicone where appropriate if a new seal is needed.
Tip: Do not overfill with putty; a thin, even bead works best. - 7
Reassemble the stopper and linkage
Reconnect the lift rod to the pivot rod and reinstall the stopper so it sits level in the drain. Ensure the linkage moves smoothly and that the stopper fully opens and closes without binding.
Tip: Test the mechanism by moving the stopper up and down before attaching final clamps. - 8
Test the drain with water
Run water slowly to observe how the stopper seals and opens. Look for leaks around joints and gaskets. If leaks appear, reseat joints and re-tighten, but avoid over-tightening metal parts.
Tip: If you hear whistling or gurgling, the trap seal or venting may be compromised. - 9
Finalize and clean up
Wipe down the area, dry any drips, and return tools to the toolbox. Keep a few minutes to ensure everything remains snug after the first use.
Tip: Label the parts or store in a small bag to keep everything organized for next time.
Got Questions?
What is a pop up drain and how does it work?
A pop up drain is a stopper-operated drain that uses a lift rod and linkage to seal or release water. It’s designed for easy access and cleaning, but its small parts can wear over time, causing leaks or poor drainage.
A pop up drain uses a lift rod and linkage to open and close the drain; over time, parts wear and can cause leaks or slow drainage.
Do I need to remove the entire assembly to fix a clog?
Often you only need to remove and clean the stopper, linkage, and trap. In some cases, replacing worn gaskets or a damaged stopper is enough. Full replacement is rare but may be required for older or heavily corroded parts.
Usually you can fix a clog by cleaning the stopper and trap, and replacing worn gaskets; full assembly replacement is rarely needed.
How often should I clean the pop up drain?
Aim for a light cleaning every 3–6 months, and more often if you notice slower drainage or more buildup. Regular cleaning helps maintain a smooth operation and reduces clog risk.
Clean it every few months, or more often if you have lots of hair or minerals in your water.
Can I reuse old gaskets if they look okay?
It’s best to replace worn gaskets. Even if they look fine, hardening rubber can fail under pressure and cause leaks. Fresh seals improve reliability.
Replace worn gaskets rather than reusing old ones to avoid leaks.
What safety steps should I take during the repair?
Turn off the water flow if possible, wear gloves, and protect the vanity with towels. Work slowly to avoid dropping small parts and avoid using aggressive cleaners that can damage seals.
Wear gloves, protect the vanity, and work carefully to avoid damaging seals.
If leaks persist after repair, what should I do?
Double-check all seals and joints. If leaks continue, replace failed components or consult a licensed plumber for a more thorough assessment.
If leaks persist, check seals again or call a plumber for a thorough check.
Watch Video
The Essentials
- Identify stopper type and parts before disassembly
- Clean and inspect seals to prevent leaks
- Reassemble with correct alignment to restore function
- Test thoroughly and maintain regularly
- Replace worn parts rather than forcing a fragile repair