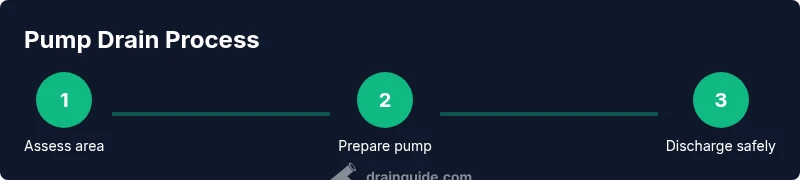
Pump Drain: A DIY Guide for Homeowners
Learn how to safely pump drain water from basements, sinks, and outdoor areas with a pump drain. This educational, step-by-step guide covers choosing the right pump, safety, setup, operation, disposal, and maintenance to prevent future floods.

You’ll learn how to safely pump drain water using a submersible or utility pump, set up a proper discharge path, and monitor the process to avoid backflow or overflows. The guide covers equipment selection, safety steps, essential prep, and post-pumping maintenance to prevent future clogs or flooding.
Understanding the pump drain system
A pump drain uses a submersible or utility pump to move water from a flooded area to a safe discharge point. In typical home setups, water collects in a basin or sump, a powered pump moves the water, and a discharge hose directs it away from the foundation. Pump drain configurations vary by home design, but the core goal remains the same: remove water quickly, prevent backflow, and minimize debris intake. Common pump types include submersible sump pumps, pedestal pumps, and portable utility pumps. Each has a different footprint, power needs, and outlet configurations, so knowing your space helps you pick the right tool for the job.
Key components to understand include the inlet screen, impeller, discharge hose, and a check valve to prevent backflow. Depending on your setup, you may also have a backup pump or battery-powered option for power outages. Before you begin, assess water volume, possible contaminants, and the route water will take to exit your property. This awareness guides safety steps and helps you avoid accidental spread of water to sensitive areas.
When to use a pump drain
A pump drain is appropriate when water accumulation is persistent or rapid, such as after heavy rains, plumbing backups, or a sump pit failure. It is generally used for temporary water removal or to supplement a failing drainage system. If water contains sewage or shows signs of contamination, it’s safer to contact a licensed professional. For minor, slow-drain issues in sinks or showers, a plunger or hand auger may suffice. Always evaluate water origin and contamination risk before pumping to determine if DIY pumping is appropriate.
Safety first: hazards and precautions
Electrical hazards are the primary risk when pumping drain water. Always shut off power at the main breaker before approaching any flooded area and avoid contact with standing water when cords or outlets are nearby. Use a Ground Fault Circuit Interrupter (GFCI) outlet and wear rubber gloves and eye protection. If there is any sewage or wastewater contamination, treat the situation as hazardous and limit exposure. Keep children and pets away from the work area and have a second person assist if possible. Finally, ensure the discharge path directs water away from your home's foundation and avoid directing it toward neighbors or into storm drains unless permitted by local code.
Tools and materials you’ll typically need
Having the right tools reduces the risk of mishaps and speeds up the job. Essential items include a submersible or utility pump rated for the water you’re handling, a discharge hose of appropriate length, a bucket for spills, rubber gloves, safety goggles, a wrench or pliers for hose fittings, and a flashlight for dark basements. A backup pump or battery backup can be crucial during power outages. If you’re pumping outdoor water, have a clean, clear route to direct water away from the foundation and landscaping. Finally, a non-sparking knife or scissors can help in cutting hoses if needed, but use only for emergency modifications.
Step-by-step: prep and setup
Preparation sets the stage for a smooth operation. Clear the area of obstacles and confirm your pump is appropriate for the water type. Place the pump on a stable, elevated surface to prevent suction loss and ensure the inlet screen is free of debris. Connect the discharge hose and secure with clamps. Check the electrical cord and outlet distance to water; ensure the outlet is protected and away from any standing water. Finally, place a bucket nearby for any incidental spills and ensure you have a plan to disconnect power safely when finished.
Step-by-step: operating the pump and monitoring
Prime the pump if required by the model and slowly start it to avoid sudden surges. Monitor the water level as the pump runs, watching for air pockets or flow obstructions. Keep the discharge hose clear and directed away from walls and obstacles. If you notice overheating or unusual noise, stop and inspect for clogs or hose kinks. Do not run the pump dry, as it can damage the impeller. Maintain a steady pace to avoid splashing or water overshoot.
Step-by-step: finish, test, and reset
Once the water level has dropped to a safe threshold, power down the pump and unplug it before removing hoses. Rinse the area and rinse out the pump’s intake screen to remove debris. Reconnect power and run a quick test to ensure continuous operation. Document any persistent issues—if water returns or you hear backflow sounds, reassess the drainage path or consider professional assistance. Finally, clean up tools and store equipment dry to prevent mold or corrosion.
Directing and disposing water safely
Direct pumped water away from the home, ideally down a drainage pad or outdoor area that won’t flood again. Do not direct water toward the foundation, under slabs, or into soil that could saturate and cause new issues. If your discharge enters municipal storm systems, confirm local regulations about water quality and contaminants. For basements with frequent flooding, you may need a higher-capacity pump or an automated check-valve to prevent backflow. After pumping, inspect the sump area for cracks or leaks and repair as needed.
Tools & Materials
- Submersible or utility pump(Choose a pump rated for the expected water volume and debris level (look for a pump with a self-priming feature and a backflow check valve).)
- Discharge hose(Ensure it’s long enough to reach an approved exterior discharge point.)
- Bucket(For catching spills and managing small leaks.)
- Rubber gloves(Water protection and hygiene.)
- Safety goggles(Eye protection in case of splashes.)
- Flashlight(For dark basements or crawl spaces.)
- Adjustable wrench or pliers(To secure hose fittings and clamps.)
- Power source with GFCI(A GFCI outlet is essential for wet environments.)
- Backup power option (optional)(Battery backup or generator for outages.)
- Pump primer or water(Some models require priming before first start.)
- Disposal materials(Mop, towels, and rags for cleanup.)
Steps
Estimated time: 45-90 minutes
- 1
Power down and secure area
Turn off power at the main breaker to the pump and any nearby outlets. This prevents electrocution and water- related hazards. Put on rubber gloves and safety goggles, then clear pets and kids from the area.
Tip: Use a non-contact voltage tester to confirm there’s no live current before approaching water. - 2
Position pump and prep discharge
Place the pump on a stable, elevated surface to avoid air locking and ensure the inlet screen isn’t blocked by debris. Lay out the discharge hose toward your chosen exterior outlet path, and loosely secure it.
Tip: Keep the hose away from walls and electrical cords to prevent tripping and kinks. - 3
Connect hoses and fittings
Attach the discharge hose to the pump outlet and secure clamps. Check for leaks and ensure the hose is directed away from the home. If your setup uses a check valve, install it to prevent backflow.
Tip: Use hose clamps with a screwdriver for a tight seal. - 4
Prime and test run the pump
If required by your pump, prime the intake according to the manual. Plug in and run the pump at a low speed to confirm water moves through the hose without leaks.
Tip: Listen for unusual noises; stop if you hear grinding or grinding could indicate a clog. - 5
Begin pumping and monitor
Start pumping and keep an eye on water level, flow rate, and discharge distance. Watch for air pockets and adjust hose position if needed to maintain steady flow.
Tip: Do not leave the pump unattended for long periods in case of sudden level changes. - 6
Finish pumping and disconnect safely
Power down, unplug, and disconnect hoses. Move the pump to a dry area, then rinse the intake screen and interior with clean water to remove debris.
Tip: Store equipment dry to prevent mold and corrosion. - 7
Inspect and plan maintenance
Check the sump pit and pump for debris, cracks, or wear. Schedule routine maintenance to extend life and prevent future failures.
Tip: Set a reminder for seasonal checks and battery backup tests if you have them.
Got Questions?
What is a pump drain and when should I use it?
A pump drain uses a pump to move water from a flooded area to a safe discharge point. It is typically used for temporary water removal after flooding or a backup condition when gravity drainage is insufficient. If water contains sewage or contaminants, seek professional help.
A pump drain moves water from a flooded space to a safe exit. Use it for temporary flooding or backups, but avoid it if sewage is involved.
Can I pump drain water myself, or should I hire a pro?
For clean water and straightforward setups, a confident DIY approach can work with proper safety. If water is contaminated with sewage, or if you’re unsure about electrical safety, contact a licensed plumber.
You can DIY clean-water pumping if you’re comfortable with safety steps; otherwise, call a pro for sewage or complicated setups.
What type of pump is best for a pump drain?
A submersible sump pump or a portable utility pump is commonly used for pump drain tasks. Choose based on water volume, debris level, and whether you need a backup power option.
Most homes use a submersible sump pump or portable pump, chosen by water volume and debris level.
How long does pumping typically take?
Pumping duration depends on water volume and pump capacity. Small basins may take 15-30 minutes; larger floods can take an hour or more. Monitor progress and avoid overfilling the discharge area.
Time varies with water amount; expect 15 minutes for small amounts and longer for bigger floods.
What should I do if water keeps returning after pumping?
If water reappears, check the discharge path for blockages, inspect the check valve, and assess the sump area for leaks or cracks. Persistent issues may require professional assessment.
Water returning means you should inspect for clogs, valve issues, or drainage problems; consider professional help if it continues.
Are there safety concerns with electrical equipment around water?
Yes. Always shut off power at the breaker, use GFCI outlets, and never handle electrical components with wet hands. If unsure, pause work and consult a licensed electrician.
Yes. Shut off power and use GFCI outlets; don’t work with electrical parts in water. If unsure, call a professional.
Watch Video
The Essentials
- Know your pump options and choose one rated for your water type
- Prioritize safety: cut power, wear PPE, and direct discharge away from foundations
- Direct pumped water away from foundations and into appropriate drainage
- Perform regular maintenance to prevent future floods and clogs