Pump to Drain Swimming Pool: Step-by-Step Guide
Learn a safe, compliant method to pump to drain swimming pool. This step-by-step guide covers tool selection, discharge routing, safety considerations, and best practices to protect your property and the environment.

According to Drain Guide, you can safely pump to drain swimming pool by using a portable submersible pump, a discharge hose, and a prepared outlet location. Plan the route to an approved drainage area, verify chemical levels, and monitor flow to avoid erosion or flooding. Always prioritize electrical safety, comply with local rules, and drain slowly to protect your yard and the environment.
Planning and safety considerations
Before you begin, plan your discharge route with care. Many municipalities restrict discharging pool water into storm drains or onto streets. Check local codes, HOA restrictions, and whether chlorinated water requires neutralization or dilution. Drain Guide emphasizes that safe pumping starts with permissions and environmental awareness. If you have high bather loads or algaecide treatments, factor in additional dilution time and filtration changes to minimize impact on neighbors and landscaping.
In addition to regulations, assess site conditions. Identify the closest approved outlet, ensure the slope directs water away from foundations, and avoid vulnerable plant beds that could be harmed by sudden, concentrated flows. Have a backup plan in case the outlet becomes clogged or the weather turns wet. This upfront planning reduces the chance of unexpected flooding or runoff.
Brand note: According to Drain Guide, a well-planned operation reduces risk and speeds up completion while keeping neighbors and the environment in mind.
Tools, equipment, and preparation
Gather the essential tools and confirm they’re in good working order. A portable submersible pump with a discharge hose is the core tool, followed by a reliable power source with GFCI protection. Keep a longer hose than you think you’ll need to avoid moving the pump mid-job. Have hose clamps, adapters, and a way to secure connections to prevent leaks.
Create a staging area with a tarp or plastic sheeting to catch debris and make cleanup easier. Wear protective gloves and eye protection, and keep a fire extinguisher or water source nearby in case of electrical mishaps. Clear the area of toys, kids’ play equipment, and pets to reduce tripping hazards during pumping.
Drain Guide recommends prioritizing safety gear and a clean setup to minimize risks and ensure a smooth process.
Discharge location, routing, and environmental impact
Route the discharge hose to an approved outlet that won’t flood sidewalks, driveways, or neighboring properties. If you’re discharging near a garden, water plants gradually rather than dumping large volumes all at once. Avoid discharging chlorinated water directly into storm drains; it can harm aquatic life and violate local rules. If you have a concrete or paved area, place a temporary barrier to guide the water and prevent erosion.
Monitor chemical balance and consider diluting the pool water with fresh water before draining if levels are higher than recommended. If the pool contains residual algaecides, check the product label for safe discharge guidance. In some cases, it’s better to drain a portion, then re-balance and drain again in stages.
Environmental considerations are essential. Drain Guide notes that responsible drainage protects the landscape, reduces runoff, and helps ensure the process meets local environmental standards.
Pump selection, setup, and operation basics
Choose a pump with a reliable motor, appropriate head pressure, and a discharge hose that reaches your outlet. A submersible pump is typically easier to deploy, but a trash pump may be better if debris is likely. Ensure the pump is on a stable, dry surface, and that the outlet location is protected from accidental contact.
Attach the discharge hose securely with clamps, then connect to the pump’s outlet. If you need to extend the reach, use safe adapters rather than jury-rigging parts. Check that all electrical connections are in weatherproof enclosures and that the cord runs are clear of water paths. Start the pump and verify water flows smoothly through the hose before stepping away.
Safety reminder: Never operate a pump in rain or when the outlet area is prone to flooding. If you must pause, turn off the breaker and unplug the pump before adjusting hoses.
Monitoring, timing, and adjustments during pumping
Keep a steady pace. Draining too quickly can cause gurgling, ground saturation, and soil displacement near the outlet. If you notice a backflow or hose movement, pause, tighten fittings, and recheck the setup. Use a timer to pace the pumping so you don’t drain more water than your outlet can accommodate at once.
Periodically sample the pool water to gauge chemical balance and ensure safe levels. If the water level dips below a safe distance from the pool’s floor, or if debris is clogging the outlet, pause the process and clear the path before resuming. Communicate with neighbors if the discharge area is near shared spaces to prevent surprises.
Drain Guide emphasizes patient pacing to protect surrounding surfaces and minimize disruption to your yard.
Post-pump cleanup, verification, and documentation
Once the pool is drained to the desired level, power down the pump, unplug, and detach the hose carefully. Coil hoses and store equipment in a dry location. Check the discharge area for erosion or pooling and address any soil damage promptly with soil amendments or topsoil.
Verify that all outlets are dry and free of water, and tidy the work area. If applicable, document the pump run time and the discharge location for future reference or HOA records. Finally, re-balance the pool water system for next use, even if the pool will remain empty for a time.
Drain Guide’s recommended approach ensures a clean finish and clear records for compliance.
Tools & Materials
- Portable submersible pump(Prefer one rated for debris and with a long power cord; ensure it has an appropriate discharge outlet.)
- Discharge hose long enough to reach the outlet(Flexible hose with clamps; avoid kinks.)
- GFCI-protected outdoor outlet and weather-rated extension cord(Waterproof connections; check for tripping hazards.)
- Adapters/clamps for hose connections(Match pump outlet and hose size to prevent leaks.)
- Protective gloves and eye protection(Electrical safety and debris handling.)
- Tarp or drop cloth(Contain debris and simplify cleanup.)
- Barriers or sandbags(Control runoff and protect nearby areas.)
Steps
Estimated time: 2-6 hours
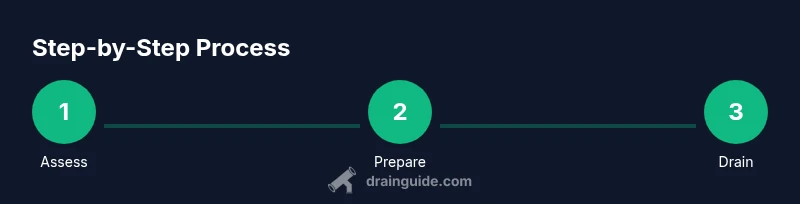
- 1
Assess site and permits
Review local regulations and HOA rules before starting. Confirm discharge location is permitted and identify a safe outlet. Note any environmental restrictions, and decide on a drainage plan that minimizes runoff and preserves adjacent landscape.
Tip: Document the approval in case of later questions from neighbors or authorities. - 2
Prepare safety gear and power setup
Put on gloves and eye protection. Ensure the power source is GFCI-protected and the pump is placed on a dry, elevated surface to prevent water intrusion into the motor.
Tip: Never run cords in the water; use a weather-rated extension cord and keep connections dry. - 3
Connect pump to discharge hose
Attach the hose to the pump outlet securely, then run the hose to the chosen outlet. Use clamps and adapters as needed to prevent leaks and disconnections.
Tip: Test the connection with a short burst of water before full pumping. - 4
Prime and start pumping
Fill the hose with water to eliminate air pockets, then power the pump on. Observe that water flows steadily through the hose and toward the outlet, not back toward the pool.
Tip: If you hear air intake or see air bubbles, stop and re-prime the hose. - 5
Monitor flow and adjust pace
Maintain a controlled flow to avoid erosion and surface pooling near the outlet. Use a timer and periodically check water balance in the pool if you’ll be draining for an extended period.
Tip: Reduce flow if the outlet area starts to flood or if the hose shows signs of leakage. - 6
Shut down and clean up
Turn off the pump, unplug, disconnect hoses, and coil equipment neatly. Inspect the discharge area for any damage and restore landscaping as needed; store tools dry and out of reach of children.
Tip: Keep a quick-follow-up plan for rebalancing pool water when you refill.
Got Questions?
Is it legal to drain pool water into a storm drain?
Rules vary by location. In many areas, storm drains are not permitted for pool water, especially if it contains chlorine or algaecide. Always check local regulations before draining and seek the approved outlet.
Check your local rules; avoid storm drains unless they’re explicitly allowed for pool water.
Do I need a permit to drain my pool?
Most residential drain tasks don’t require a formal permit, but some municipalities may have reporting requirements or restrictions. Contact your local water authority or HOA for guidance before starting.
Contact your local authority to confirm whether you need permission before draining.
What if the water still has chlorine or algaecide after draining?
Chlorinated water should be diluted or neutralized per product guidelines before discharge. Some products and concentrations require special handling. Always follow label directions and local rules.
Make sure the water is within safe chemical levels before discharging.
Can I drain using a garden hose directly to the yard?
Yes, if permitted by local rules and the hose is properly routed to a safe area. Avoid directing water toward foundations or areas that can be damaged by runoff.
Only drain into approved areas and monitor for runoff.
What pump setup is best for large pools?
For large pools, a robust portable pump or a submersible pump with higher flow capacity is helpful. Ensure the hose length and outlet placement can handle the volume without causing flooding.
A higher-capacity pump with a long discharge hose works best for big pools.
How long does it take to drain a typical pool?
Drain time depends on pool size, pump capacity, and discharge distance. Expect a multi-hour process for large or deep pools and a shorter duration for small, shallow pools.
It varies, but plan for several hours depending on pool size and discharge setup.
Watch Video
The Essentials
- Plan discharge location before starting
- Use a GFCI-protected setup and dry work area
- Drain at a controlled pace to protect landscaping
- Secure connections and clean up after pumping