How to Replace a Shower Drain: Step-by-Step Guide
Learn how to replace a shower drain safely with a clear, practical, DIY approach. This Drain Guide tutorial covers tools, installation options, and maintenance to prevent leaks and clogs.

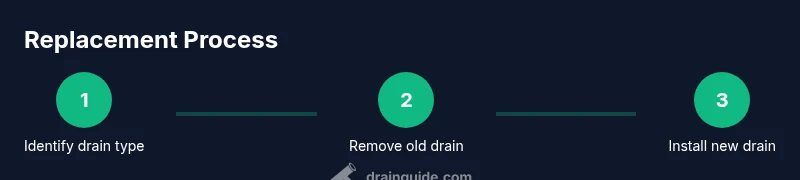
By replacing a shower drain, you fix leaks, reduce odors, and prevent clogs from building up. This guide walks you through identifying drain type, selecting the right replacement, and performing installation with careful caulking and pipe fitting. Before you start, shut off water, clear the area, and prepare safety gear.
Safety and Planning
Planning is your best defense against a leaky install. According to Drain Guide Team, a methodical approach reduces surprises and keeps costs under control. Start by locating the bathroom shutoff, then turn off the hot and cold lines to the shower. Remove nearby items, lay down towels, and place a drop cloth to catch spills. Wear gloves and eye protection, and have a bucket ready for residual water. Take clear photos of the current drain setup to guide reassembly. Check local codes for venting, trap depth, and tile thickness before you disassemble. A well-documented plan lowers the risk of mistakes and speeds up the process. Drain Guide’s guidance emphasizes confirming pipe size and flange type before purchasing parts.
Assessing Drain Type and Size
Next, identify the drain style you’re replacing. Common varieties include tile-in, clamping, and screw-in strainsers. Measure the drain opening diameter and the depth from tile surface to the pipe. Note whether the shower uses mortar bed, a foam tray, or a direct subfloor attachment, since this changes installation height. Compatibility matters: the wrong gasket size or thread pitch can leak even with a perfect seal. Drain Guide Team highlights that matching the new drain body to your pipe size and tile configuration simplifies sealing and reduces service calls.
Preparing for Replacement: Tooling and Seals
With a plan in place, assemble the tools and sealants you’ll need. Decide whether to use silicone caulk, plumber’s putty, or a hybrid sealant based on your tile material and pan type. For tile surrounds, silicone is the most common choice; metal drains may use different gaskets. Do a dry fit of the new drain before applying adhesive, checking clearance and alignment with the tile edge. This pre-check reduces the chance of a stuck, crooked drainage face and messy cleanup. Drain Guide’s best practices favor accurate measurement and a tidy, deliberate install to prevent leaks.
Installing the New Drain: Fit, Seal, and Secure
Begin by cleaning the flange seating surface and applying sealant where the drain will contact the tile. Thread the drain body into the pipe and tighten to the manufacturer’s torque spec, using Teflon tape on threaded connections. Wipe away excess sealant as you go to keep the surface clean. Ensure the flange sits flush with the tile and the gasket seats evenly. Install the strainer and cover, then inspect for evenness around the rim. Allow the sealant to cure according to product guidelines before testing. Drain Guide Team advises patience during curing to prevent early leaks.
Testing, Finishing, and Maintenance
Run water at a low flow and watch the drain for any drips around the flange or joints. If you notice leaks, tighten connections slightly or reseal and re-test. After a successful water test, finish by replacing trim or grout as needed and cleaning residual sealant. Create a routine: periodically remove the strainer to clear hair and debris, and recheck the sealant line every few months. Regular maintenance reduces the chance of future clogs and leaks, extending the life of your shower drain.
Post-Installation Checks and Common Issues
Even a careful install can encounter occasional issues. Leaks at joints usually point to under-tightened fittings or insufficient sealant, so recheck and retorque as necessary. Slow drainage often indicates hair buildup or an improper gasket; inspect the trap and elbow for blockages. If you hear gurgling, confirm the trap is filled with water and that the vent system isn’t blocked. Drain Guide’s team stresses keeping a simple maintenance schedule: clean the strainer monthly and reseal if you notice grout gaps or gaps around the drain. A proactive approach prevents serious problems down the line.
note":null}],
Tools & Materials
- Replacement shower drain assembly (compatible with your pipe size)(Choose a model with the correct thread size and gasket type)
- Silicone bathroom-grade sealant(Clear or color-matched to tile; cure time varies by product)
- Plumber’s putty(Auxiliary seal if needed with certain drains)
- Teflon tape (plumber's tape)(Wrap 3-4 wraps clockwise around threaded connections)
- Putty knife(For smoothing sealant bead)
- Utility knife(For trimming edge or removing old sealant)
- Adjustable wrench / channel-lock pliers(Tighten fittings without overtightening)
- Screwdriver set (Phillips and flat)(Remove metal strainer and screws)
- Bucket, towels, and rags(Catch water and keep area dry)
- Gloves and safety goggles(Protect hands and eyes during work)
- Replacement strainer screen(Some models wear out with use)
Steps
Estimated time: 60-120 minutes
- 1
Turn off water and prep area
Shut off the bathroom water supply and drain any standing water from the shower pan. Clear the space, protect the floor with towels or a drop cloth, and set out all tools you’ll need for the replacement. This reduces mess and helps you work efficiently.
Tip: Take a quick photo of the current setup for reference. - 2
Remove the drain cover and old assembly
Unscrew the drain cover, then detach the old drain body and gasket. Note how the pieces fit together for your replacement. If the cover is stubborn, apply a little heat-safe lubricant around the edge to break the seal.
Tip: Keep track of small screws and gaskets in a labeled container. - 3
Prepare the flange and measure
Measure the flange height and pipe depth to ensure the new drain will sit flush with the tile. Clean the seating surface and remove old grout or sealant. A dry fit helps confirm clearance before you apply adhesive or sealant.
Tip: Double-check tile thickness to avoid a protruding drain. - 4
Apply sealant and install the new drain
Apply a continuous bead of silicone around the flange. Thread the new drain body into place, using Teflon tape on threaded connections, and tighten to the manufacturer’s torque spec. Wipe away excess sealant as you go to keep the area clean.
Tip: Avoid over-tightening to prevent cracks in tile or drain body. - 5
Seal and install the strainer and cover
Install the gasket or O-ring, then place the strainer and the cover. Ensure the assembly sits evenly and flush with the tile edge. Allow the sealant to cure for the recommended time before testing.
Tip: Check alignment before the sealant cures. - 6
Test for leaks and finalize
Turn the water back on and run the shower briefly to check for leaks around the drain. If you see drips, reseal or tighten joints as needed and retest. Clean up and replace any trim or grout that may have been disturbed.
Tip: Record the test results and any adjustments for future repairs.
Got Questions?
Do I need a professional to replace a shower drain?
DIY can work for straightforward installs if you have basic plumbing skills and the right tools. For embedded tile or persistent leaks, consider a licensed plumber and always follow local codes.
DIY is fine for simple installs; hire a pro if you run into leaks or complex tile work.
What tools are required for DIY shower drain replacement?
You’ll typically need a replacement drain assembly, silicone sealant, plumber’s tape, a wrench, screwdriver, putty knife, bucket, towels, gloves, and a utility knife. Some installations require tile-cutting tools.
Have your full tool set ready before you start.
How long does a shower drain replacement take?
A typical DIY replacement takes about 60-120 minutes depending on tile work and access. Allow more time if you need to remove and repair surrounding grout or tile.
Most homeowners finish in about an hour or two.
How do I know what replacement drain to buy?
Measure the opening diameter, thread size, and tile thickness. Choose a unit that matches the pipe and supports your tile layout. Check compatibility with your strainer and grate.
Match diameter and threads; verify tile height compatibility.
Can I replace a shower drain with a different style?
Yes, you can switch to a different drain style if it fits the plumbing and tile setup. Ensure the new flange seals properly and aligns with the pan depth.
A different style can work if it fits the plumbing and tile.
What common problems occur after replacement?
Leaks at joints, slow drains from gasket failure or debris, and misaligned covers are common. Inspect, reseal if needed, and maintain by cleaning the strainer regularly.
Leaks and slow drainage are common; test and maintain.
Watch Video
The Essentials
- Plan and shut off water before starting.
- Match drain type and size to your plumbing.
- Seal properly with silicone and allow cure time.
- Test for leaks before finishing the job.