How to Unclog an AC Drain Line: A DIY Guide
Learn how to unclog an AC drain line safely with a step-by-step approach, essential tools, and prevention tips. Drain Guide explains methods, safety, and when to call a pro.

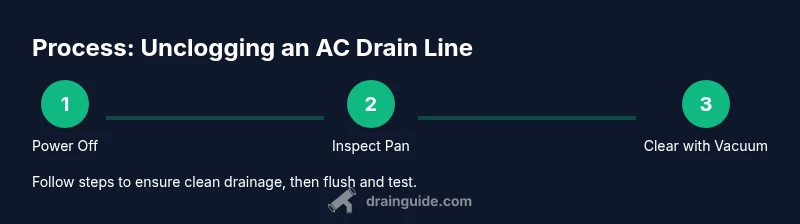
You will learn how to unclog an AC drain line safely and effectively using common household tools. This guide covers identifying clogs, safety steps to avoid electrical shocks, and a step-by-step method (wet/dry vacuum, flexible brush, and flushing with a vinegar-water solution). You’ll also know when to call a professional.
Understanding the AC drain line and why clogs happen
The condensate drain line is a small, gravity-fed pipe that carries away the humidity collected by your air conditioner. When algae, mold, mineral buildup, or debris accumulate, the line can slow or stop the flow. This not only triggers overflow in the drip pan but can also promote mold growth in the HVAC cabinet. Regular inspections and simple flushing routines can keep the line clear and protect indoor air quality. In this article, we focus on safe, practical methods you can perform as a homeowner, with clear steps and warnings to avoid electrical hazards.
To start, make sure you understand the layout: the evaporator coil typically drains into a condensate line that leads to a floor drain, a condensate pump, or an exterior outlet. If you notice water on the floor, a musty odor, or gurgling sounds, the drain line may be blocked. A clogged line is a common maintenance issue and, when addressed promptly, is easy to resolve using routine tools and careful technique.
Common signs of a blocked AC drain line
- Water leaks near the furnace or indoor air handler
- A strong musty odor or visible mold around the condensate pan
- Gurgling or slow drainage from the condensate line
- Algae buildup or debris visible at the line opening
- A little or no airflow effect on humidity control
These symptoms indicate a potential clog or restriction in the drain line. Do not ignore them, because continued moisture can lead to structural damage and mold growth. Regular checks, especially during high-humidity months, prevent small issues from becoming expensive repairs.
Safety considerations for DIY maintenance
Working with an air conditioning system involves electricity, water, and moving parts. Always start by turning off power to the unit at the breaker panel to avoid electric shock. If you have a furnace in the same cabinet, turn off the associated switch and, if possible, disconnect the outdoor condenser power. Wear eye protection and gloves to avoid splashes from cleaning solutions. Do not use high-pressure water or household chemicals that might corrode the line. If you smell refrigerant or hear hissing, exit the area and contact a licensed technician.
This guide provides safe, practical steps for typical residential systems and emphasizes when to seek professional help for stubborn clogs or safety concerns.
Methods overview: options for clearing the line
There are several approaches to unclogging an AC drain line, depending on access and the type of obstruction. Common homeowner methods include mechanical clearing with a wet/dry vacuum, using a flexible drain snake to dislodge debris, and flushing the line with a safe cleaning solution. In some cases, a non-corrosive, enzyme-based cleaner helps maintain line health without harming seals. Always start with the least invasive method and observe the results before attempting more aggressive procedures.
How to maintain a clear drain line after clearing
After clearing the line, run the system to verify drainage and dry the condensate pan to prevent standing water. Inspect the line for cracks or loose fittings and seal any minor leaks promptly. Consider placing a condensate trap or filter if your setup allows, and schedule seasonal inspections to keep mold and mineral buildup at bay. Regular flushing with a mild cleaning solution helps prevent future clogs, especially during peak humidity. Drain Guide recommends a routine maintenance plan tailored to your climate and system type.
Tools & Materials
- Wet/dry shop vacuum(Prefer a unit with a dry output port or a blower attachment to avoid water exposure in the vacuum body)
- Flexible drain snake or auger(14–25 ft length is typical for residential lines)
- Allen wrench or screwdriver(For accessing service panels if needed)
- Safety gloves(Water exposure and cleaning agents require hand protection)
- Eye protection(Prevent splashes from cleaning solutions)
- Bucket or towel(Catch drips and keep the area tidy)
- Mild cleaning solution (vinegar-water mix or enzyme-based cleaner)(Use a non-corrosive cleaner; avoid bleach in closed systems)
- Flashlight(Better visibility in the condensate pan and line opening)
- Old towel or rags(Mop up spills and wipe fittings)
Steps
Estimated time: 60-120 minutes
- 1
Power off the system and locate the drain line
Switch off electrical power to the indoor air handler and outdoor condenser. Find the drain line where it exits the unit or enters a trap. Confirm you have a clear, dry area to work in and note the line orientation so you don’t accidentally loosen fittings while probing. Why: This prevents electric shock and accidental spills as you work. Time estimate: 2-4 minutes.
Tip: If you’re unsure which breaker controls the unit, switch off the main at the panel and label the breaker to avoid re-energizing the circuit. - 2
Inspect the condensate pan and opening for visible blockages
Look for algae, slime, or debris at the pan drain opening. Use a flashlight to inspect the interior of the line as far as you can safely reach. Do not insert tools too far; you don’t want to damage the line or fittings. Why: Early detection helps choose the safest clearing method. Time estimate: 4-6 minutes.
Tip: Keep a towel handy to catch any residual water and prevent floor damage. - 3
Attempt vacuum clearing from the pan end
Attach the wet/dry vacuum to the drain line opening from the indoor unit or condensate tray. Create a tight seal and run the vacuum briefly to pull out loose debris. If you feel strong resistance, stop and move to a snake method rather than forcing a blockage free. Why: Vacuum suction often clears loose buildup without disassembly. Time estimate: 5-8 minutes.
Tip: Hold the hose steady and avoid moving the unit during suction to prevent dislodging fittings. - 4
Use a drain snake to dislodge stubborn clogs
Gently insert the snake into the drain line, rotating as you advance. When you meet resistance, withdraw a few inches, then reinsert and push farther. Slowly feed the snake to avoid puncturing the line. Pull back to see debris and flush it away with a small amount of water. Why: Snakes reach deeper into the line where algae and mineral buildup accumulate. Time estimate: 8-12 minutes.
Tip: Do not force the snake; if you can’t advance beyond a certain point, stop and switch to flushing. - 5
Flush with a mild cleaning solution
Prepare a vinegar-water mixture (1:1) or enzyme cleaner per product instructions. Slowly flush the line to carry out loosened debris and kill residual biofilm. Rinse with plain water if the line permit, ensuring there is no standing liquid in the pan. Why: A gentle flush helps prevent immediate re-clogging. Time estimate: 5-7 minutes.
Tip: Never mix bleach with ammonia or acidic cleaners inside the drain system. - 6
Re-test drainage and dry the area
Restore power and run the unit for several minutes to confirm drainage is clear. Check the condensate pan for dampness or leaks and wipe any water that collects. If the line still drains slowly or you see moisture, stop and reassess before proceeding further. Why: Testing confirms success and prevents lingering moisture. Time estimate: 5-8 minutes.
Tip: Pour a small amount of water into the pan to observe the flow; sudden backup indicates a remaining blockage. - 7
Inspect line fittings for leaks
Check all joints and clamps around the drain line for signs of leakage. Tighten fittings carefully with appropriate tools and replace any damaged gaskets. Ensure the line exits in a safe, watertight location. Why: Leaks can cause damage and attract pests. Time estimate: 3-5 minutes.
Tip: If a fitting is cracked, replacing it may be safer than attempting a quick seal. - 8
Document maintenance and plan future checks
Record the date, steps taken, and results in your maintenance log. Schedule a seasonal check to coincide with peak humidity. Regular upkeep reduces the risk of repeated clogs and protects indoor air quality. Why: A log helps you track improvements and plan preventive care. Time estimate: 2 minutes.
Tip: Set a reminder on your phone or calendar for annual checks. - 9
Consider professional help for persistent clogs
If clogs recur within a few months, or you notice persistent leaks, contact a licensed HVAC technician. There may be underlying issues such as improper slope, damaged lines, or mold growth that require advanced diagnostics. Why: Persistent problems may indicate a larger system issue. Time estimate: 0 minutes (decision point).
Tip: A pro can perform a hydrostatic test and provide a long-term solution. - 10
Apply preventive measures to maintain line health
Use a monthly maintenance routine: flush with small amounts of cleaner, replace or clean any filters as needed, and ensure proper condensate slope. Keep the area around the unit clean and dry to reduce debris entry. Why: Prevention lowers the chance of future blockages. Time estimate: 5 minutes per month.
Tip: Avoid storing debris near the unit to minimize future clogs. - 11
Flush the system after major cleaning
After a thorough cleaning, perform a final flush to remove residual biofilm. Run the unit through a brief cooling cycle to confirm steady drainage and air flow. Why: This confirms long-term line health after intervention. Time estimate: 5 minutes.
Tip: Keep a vent/area dry to prevent new mold growth during the test. - 12
Review safety protocol and close the project
Return all panels, clear the work area, and safely store tools. Re-check the power is off until reinserting breakers. Document any safety notes for future reference. Why: Finishing safely ensures no hazards remain. Time estimate: 2-3 minutes.
Tip: If you feel unsure about any step, stop and consult a professional.
Got Questions?
What is the typical cause of AC drain line clogs?
Most clogs form from algae, mold, and mineral buildup in the condensate line. Debris from the unit can also accumulate over time, especially in humid climates. Regular maintenance reduces the frequency of clogs.
Most clogs come from algae and mineral buildup in the condensate line. Regular maintenance helps prevent this.
Can I use bleach to clear the drain line?
Bleach is not recommended for sealed HVAC components. If you choose to use a cleaner, prefer a non-corrosive enzymatic or vinegar-based solution and flush thoroughly with water afterwards. Avoid mixing cleaners.
Bleach isn’t recommended for most AC drain lines; use milder cleaners and flush well.
Should I always hire a professional for clogs?
Not always. Simple clogs often resolve with DIY methods, but recurring clogs, mold growth, or unfamiliar system layouts warrant a licensed HVAC technician.
DIY can work for simple clogs, but recurring issues should be checked by a pro.
What safety steps are essential before starting?
Power off the unit, wear eye protection and gloves, and ensure the area is dry. Do not work near exposed refrigerant lines and call a pro if you smell gas or observe leaks.
Always power off, wear protection, and avoid refrigerant exposure—call a pro if you suspect leaks.
How often should I inspect the AC drain line?
Inspect during seasonal HVAC checks or whenever you notice signs of a clog. Regular flushing every few months can reduce the chance of clogs.
Check it seasonally and flush every few months to prevent buildup.
What are signs I need a professional even if I cleared the line?
If water continues to pool, you hear gurgling, or odors persist, there may be an underlying issue such as improper slope or a cracked line that requires professional assessment.
Persistent pooling or odors signal a likely deeper problem needing a pro.
Watch Video
The Essentials
- Identify overflow signs early and shut off power.
- Use safe tools and follow a step-by-step approach.
- Clean with gentle cleaners; avoid aggressive chemicals.
- Test drainage after each method and know when to call a pro.