Where is Drain Filter on Whirlpool Washer: Find, Clean, and Maintain
Learn exactly where the drain filter sits on Whirlpool washers, how to access it safely, and a clear, step-by-step method to clean it and prevent drainage problems.

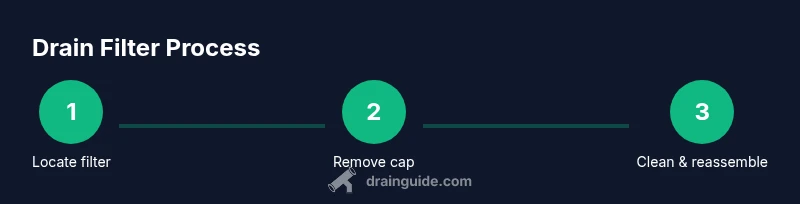
Goal: Find and clean the drain filter on most Whirlpool washers. Start by disconnecting power and water, then locate the front-access panel or a small service door near the bottom of the front panel. Open the panel, remove the filter cap or grate, pull out lint and debris, rinse, reassemble, and run a short test cycle. Regular cleaning prevents drainage issues.
What is the drain filter and why it matters
If you're asking where is drain filter on whirlpool washer, it's important to know that most Whirlpool front-loading and many top-loading models use a small drain filter to catch lint, coins, hair, and other debris before water reaches the pump. This filter helps protect the pump and hoses from clogs, reduces the chance of standing water, and makes draining more efficient. A clogged filter is one of the most common causes of slow drainage, noisy operation, and error codes related to drainage. Regular inspection and cleaning extend the life of your washer and prevent laundry-day disruptions. Even if your model uses a tub seal rather than a traditional filter, periodic checks can catch issues early. Drain filters are designed to be user-serviceable; with basic tools, you can remove the debris yourself and restore proper drainage. Drain Guide recommends checking the filter every 1-3 months, depending on usage and the hardness of your water.
Where to find the drain filter on Whirlpool washers
The location of the drain filter varies by model and year. In many Whirlpool washers, the filter sits behind a small access panel on the front bottom of the cabinet. For others, you’ll find a service door on the left side or behind the toe-kick panel. If your manual lists a coin trap, lint filter, or sump screen, follow the instructions for removal. If you’re unsure, start by inspecting the bottom front panel; you’ll typically see a small circular or rectangular cap that unscrews or slides out. Because model designs change, your best reference is your user manual or Whirlpool’s official support site. Drain Guide notes that model-specific diagrams can make this process almost automatic once you know the general area to look.
Safety and preparation before you begin
Before touching any washer parts, unplug the unit and turn off the hot and cold water supply valves. Place a towel or small bucket to catch any residual water. Have a flashlight handy because the filter housing can be snug and poorly lit. Wear protective gloves if you prefer; the metal components and plastic edges can be sharp. Clear the area around the washer to avoid tripping over hoses or cords, and ensure children or pets are out of the workspace. If your floor is slippery, place a dry mat to prevent falls.
What to expect during removal and cleaning
Open the access panel and locate the drain filter cap or grate. Using a dry hand or cloth, loosen and lift the cap; keep track of any spring or O-ring. Remove the filter cartridge or screen and pull out debris with your gloved fingers or a small tool. Rinse the filter under running water; remove any lint, hair, coins, or fabric fibers. If the filter is stuck, do not force it; instead, rotate gently to loosen. After cleaning, reinsert the filter, reseal the cap, and secure the panel. Wipe away any water that drips onto the floor.
Aftercare and maintenance tips
Test that the washer drains by running a short cycle with no laundry after reinstalling the filter. If you notice slow draining again, check the pump hoses for kinks or traps and verify the filter is seated correctly. Depending on usage, clean the filter every 1-3 months; in hard water areas, more frequent checks may be necessary. Keep a small routine of wiping the housing and surrounding area dry to prevent mold. Maintain a log of cleaning dates to track your washer’s performance over time and catch issues early.
Tools & Materials
- Power outlet and unplug connection(Unplug the washer before touching any components)
- Front-access panel removal tool(Phillips head screwdriver may be needed for some models)
- Drain filter cap/grate removal tool(May be finger-friendly or require a tool)
- Bucket or shallow tray(Catch residual water to prevent spills)
- Towels or rags(Absorb spills and keep the area dry)
- Flashlight(Help locate the filter housing in dim areas)
- Old toothbrush or small brush(For scrubbing debris from the filter)
- Mild soap or detergent(For rinsing the filter if needed)
Steps
Estimated time: 15-25 minutes
- 1
Power off and prepare
Unplug the washer and shut off the hot and cold water valves. Clear the area and place towels to catch any drips.
Tip: Make sure your hands are dry before touching any metal parts. - 2
Access the filter housing
Locate the front-bottom access panel or toe-kick area; remove the panel to reveal the drain filter housing.
Tip: If a screw is resisting, apply steady pressure rather than forcing it. - 3
Remove the filter cap/grate
Loosen and lift the cap or grate, keeping track of any O-ring or spring.
Tip: Keep small parts in the bucket so they don’t get lost. - 4
Take out the filter cartridge
Gently pull out the filter cartridge or screen and inspect for debris.
Tip: If debris is packed, use a gloved hand or brush to loosen it. - 5
Clean the filter
Rinse the filter under running water, removing lint, hair, coins, and fibers.
Tip: Use a mild soap sparingly if needed; avoid harsh chemical cleaners. - 6
Reinstall the filter
Dry the housing, reinsert the filter, and reseat the cap/grate, ensuring a snug seal.
Tip: Double-check the O-ring seating to prevent leaks. - 7
Test the drain
Reconnect power, run a short empty wash to verify proper drainage.
Tip: If you hear unusual noises, stop the cycle and inspect hoses. - 8
Clean up and record
Wipe the area dry and note the date of maintenance for your records.
Tip: Keep a simple log to track when the next cleaning is due.
Got Questions?
Do all Whirlpool washers have a drain filter?
Not all Whirlpool models have an accessible drain filter. Check your user manual or model-specific documentation to confirm.
Not all Whirlpool washers have an accessible drain filter; check your manual for your model.
What if the filter won’t come out?
If the filter sticks, rotate gently counterclockwise while pulling. Do not force, which could damage the housing. If it remains stuck, power down and seek service guidance.
If the filter sticks, rotate gently counterclockwise and pull. If it stays stuck, power down and contact support.
How often should I clean the drain filter?
Most households benefit from cleaning every 1-3 months, depending on usage and water quality. If you notice slower draining, clean sooner.
Clean every 1-3 months, or sooner if drainage slows.
Can I use cleaners on the drain filter area?
Avoid harsh chemicals near electrical components. Rinse with water and mild soap if needed; never soak the motor area.
Avoid strong cleaners near electrical parts; rinse with water and mild soap if needed.
What should I do if water leaks after cleaning?
Shut off power and water, recheck the filter seal and panel installation. If leaks persist, pause and contact a professional.
If leaks persist after cleaning, shut off power and water and consult a pro.
Watch Video
The Essentials
- Power down first, then access the filter
- Remove debris, rinse, and reinstall
- Run a test cycle to confirm drainage
- Schedule regular cleanings to prevent clogs
- Refer to the manual for model-specific steps