Where is the AC drain pan? Locate and inspect for homeowners
Discover where the AC drain pan sits, how to locate it in typical systems, and practical steps to inspect and maintain it to prevent leaks, mold, and damage.

The AC drain pan is usually located inside the air-handler cabinet or furnace closet, directly beneath the evaporator coil. It collects condensate and directs it toward a drain line or an auxiliary overflow pan. In some layouts, the primary pan is hidden behind panels, with a secondary pan serving as a backup.
What is the AC drain pan and why it matters
According to Drain Guide, the AC drain pan is a shallow tray located beneath the evaporator coil that collects condensate produced during cooling. If you’re wondering where is the ac drain pan in a typical home system, know that placement usually falls inside the air-handler cabinet or the furnace closet. The pan’s job is simple but crucial: collect moisture and channel it to a dedicated drain line or into a secondary overflow pan. A damaged, cracked, or clogged pan can lead to water damage, mold growth, and higher energy costs due to inefficient drainage. Regular inspection helps you catch problems before they escalate.
Typical locations and configurations in different HVAV setups
Most split systems place the primary pan directly under the evaporator in the air-handler. In some installations, there’s an access panel that reveals only the overflow or secondary pan. In older homes or tighter basements, you might find the pan tucked behind insulation or within the furnace enclosure. Portable room air conditioners have a different arrangement, but you’ll usually still find a tray intended to collect condensate. Regardless of layout, the fundamental principle remains: condensate must drain away safely, and a pan that fails to do so risks water damage and mold growth.
Signs a drain pan is failing and what to do about it
Common warning signs include ongoing damp spots around the unit, a musty odor near the air handler, or visible water actively dripping from the cabinet. Cracks, rust, or corrosion indicate the pan’s life is waning. A slow leak may not be obvious immediately but can steadily saturate insulation and walls, creating hidden damage over time. If you notice any of these indicators, don’t ignore them—address the pan condition promptly to protect your home’s structural integrity and indoor air quality.
Step-by-step guide to locate and inspect the drain pan safely
- Power off the HVAC unit at the breaker panel and lock out the switch if possible. 2) Remove access panels according to manufacturer guidelines. 3) Visually inspect the pan for cracks, rust, or pooling water. 4) Trace the drain line from the pan toward the outdoors or toward a condensate pump. 5) Check the overflow shutoff switch or pump (if installed) for proper operation. 6) If you see staining or leaks, inspect surrounding insulation and drywall for moisture damage. 7) Reassemble panels securely and test by running a short cooling cycle to verify drainage.
Cleaning and maintenance best practices for the drain pan
Keep the pan clean with a soft brush and mild, non-abrasive detergent. Avoid harsh chemicals that could degrade metal or seals. If you detect mold, treat with a diluted bleach solution or a recommended HVAC-safe cleaner after ensuring airflow isn’t blocked. Regular maintenance intervals help prevent buildup that can impede drainage and cause overflow. Remember: always power off the unit before accessing the drain pan to avoid electrical hazards.
Common issues: cracks, rust, and clogs
Cracked pans can leak continuously, while rust reduces structural integrity and invites leaks. Clogs in the drain line prevent condensate from leaving the pan, causing standing water and accelerated corrosion. In some systems, a secondary drain pan provides backup protection; if your unit has one, test its alarm or switch to confirm it activates when needed. Addressing these issues promptly saves on costly repairs and preserves indoor air quality.
Replacement decisions and selecting a new drain pan
If the pan is severely corroded or cracked beyond repair, replacement is the safer option. When choosing a new pan, align the size and slope with the evaporator coil and drainage route. Consider stainless steel or coated metal options designed for HVAC use, and ensure compatibility with any condensate pump or secondary pan installation. A proper installation with correct pitch minimizes standing water and extends service life.
Pro tips to prevent future drain pan problems
- Schedule annual inspections, especially before cooling season starts. - Keep the condensate line free of debris and resin buildup. - Use a drain cleaning schedule that avoids caustic chemicals near metal pans. - If your system has a trap or trap primer, verify it remains clear. - Invest in a secondary overflow pan or alarm to provide early warning of a blockage.
Quick-start DIY inspection checklist
- Power off the unit and locate access panels. - Visually inspect for cracks, rust, or pooling water. - Follow the drain line to ensure a clear path. - Check the overflow/backup pan and switch. - Reassemble and test with a short cooling cycle.
dataTableHeader문션?placeholder?],
dataTableDate
caption not used
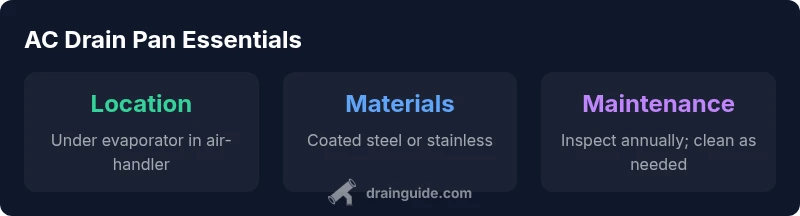
AC drain pan basics
| Aspect | Description | Notes |
|---|---|---|
| Location | Usually under the evaporator coil in the air-handler cabinet | In some split systems, the pan is behind a service panel or door |
| Material | Coated steel or stainless steel | Prone to rust if not properly coated or maintained |
| Maintenance | Inspect annually; clean as needed | Check for cracks, leaks, and mold growth |
Got Questions?
Where is the AC drain pan typically located in a standard split system?
In most homes, the drain pan sits inside the air-handler cabinet beneath the evaporator coil. Access panels allow you to inspect it without disassembling the entire unit. If you can’t locate it, consult the service manual or a licensed HVAC professional.
Most homes have the drain pan under the air-handler. Check behind the service panel if you don’t see it right away.
What are the early signs that the drain pan is failing?
Look for water pooling around the air handler, damp insulation, a musty smell, or visible rust on the pan. These symptoms suggest a crack, leak, or clogged drain line requiring attention.
Watch for leaks, damp insulation, or a musty odor near the unit.
Can I clean or replace the drain pan myself?
Basic cleaning and inspection can be done by a competent homeowner who follows safety steps. Replace the pan if there are cracks or significant corrosion. If unsure, hire a licensed technician.
You can inspect and clean, but replace if damaged; call a pro if you’re unsure.
What maintenance steps reduce drain pan problems?
Regularly clear the condensate line, use HVAC-safe cleaners, and inspect for mold or corrosion annually. Keep the area around the unit dry to prevent moisture buildup.
Clean the line and inspect for mold yearly to prevent blockages.
What should I do if the overflow pan alarm triggers?
Shut off the system, check the primary drain line for blockages, and test the backup pan and alarm. If needed, replace corroded parts and consult a pro for a proper fix.
Turn off the system and inspect the drain path and alarms.
Is a secondary drain pan always necessary?
Not always, but a secondary pan provides a safeguard in many installations. It’s common in homes with long drain runs or where extra protection against leaks is desired.
Many units benefit from a secondary pan for extra protection.
“A functional drain pan is a foundational part of your HVAC drainage system; regular inspection prevents water damage and mold growth, protecting both your equipment and home. ”
The Essentials
- Inspect the pan yearly for cracks or rust
- Keep condensate lines clear to prevent overflow
- Ensure access panels are secure after maintenance
- Consider a secondary pan as backup for protection
- Use HVAC-safe cleaners and avoid harsh chemicals