Where to Drain Inflatable Pool: A Practical Home Drainage Guide
Learn where to drain an inflatable pool safely, legally, and without harming your yard. This step-by-step guide covers destinations, setup, tools, and best practices for environmentally responsible drainage.

According to Drain Guide, draining an inflatable pool safely starts with planning the destination for the water, preparing the hose setup, and controlling the flow. Use gravity to move water to a lawn, garden bed, or designated drainage area, far from buildings and storm drains. Follow local rules and monitor the water as it drains.
Safety First: Understand Local Rules and Hazards
According to Drain Guide, the first step in draining an inflatable pool is understanding local regulations and potential hazards. Many municipalities restrict discharging pool water into storm drains or onto driveways because it can carry chlorine, salts, and detergents into the stormwater system. HOA rules may also specify where and when you can discharge. Before you begin, check your city or county wastewater and stormwater guidelines. If you rent, ask the property manager for approval. Plan to work on a dry day to avoid muddy mess and ensure you have a stable surface for the hose. Always keep children and pets away from the drainage route and unplug any nearby electrical devices to prevent shocks. Drain water slowly at first to observe where it flows and to prevent splashing that could damage landscaping or concrete.
Authority Sources
For authoritative guidance, consult resources such as the Environmental Protection Agency (https://www.epa.gov) and local extension services like Cornell Cooperative Extension (https://extension.cornell.edu). These sources offer general best practices for handling graywater and yard drainage. Drain Guide recommends following official guidelines to minimize environmental impact and protect family safety during every drainage project.
Where to Drain: Ideal Destinations Around Your Property
The best drainage destinations are places that won’t be harmed by the dilution and chlorinated content of pool water. A grassy lawn area far from home foundations lets water soak in naturally without pooling near foundations. Garden beds can benefit from gentle irrigation if you avoid soils with salt-sensitive plants. If your yard has a dedicated drainage ditch or a non-potable irrigation line, draining toward those features can be efficient, but verify compatibility first. Do not drain toward storm drains, street curbs, or near septic systems unless local guidelines explicitly permit it. In any case, direct the hose so the water runs away from doors, windows, and electrical outlets. Consider using a tarp or old towels to protect surfaces from splashes during the discharge.
Safety and Environmental Tips
Use a low flow to minimize erosion and splashing. If the pool water is heavily chlorinated, wait until chlorine levels decline before exposing delicate landscape areas. If you plan to reuse water on plants, test soil compatibility and avoid salt-sensitive species. If you have a rain garden or bioswale, slow, controlled drainage can help water infiltration without creating slick surfaces. Drain water gradually over 15–30 minutes rather than dumping all at once, which reduces soil disruption and runoff.
Equipment you Need and Setup
A simple drain setup keeps things predictable and safe. Gather a garden hose long enough to reach your chosen destination, a hose adapter to fit your pool’s drain outlet, and a clip or rubber band to keep the hose aligned. A ground tarp or old plastic sheeting can protect surfaces and catch splashes. Gloves add grip and comfort when handling hoses and clamps. If you don’t have a natural slope, consider elevating one end of the hose on a stable object so gravity drives the water toward your drain area. Finally, clear the drainage route of rocks, toys, and debris to prevent clogs and uneven flow.
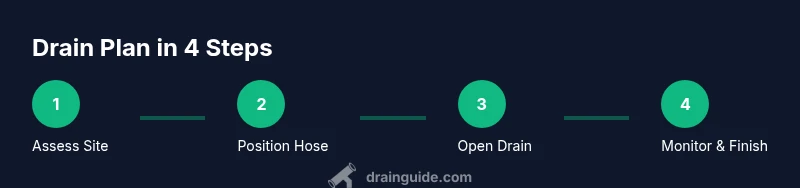
Phase-by-Phase Drain Plan
This section outlines a practical drain strategy without duplicating the step-by-step instructions that appear later. Begin by positioning the pool near the chosen discharge area and laying out your hose to minimize kinks. Verify the hose has a clear path to avoid tripping hazards and ensure there’s enough length to reach the drainage zone. If you use a connector, secure it with a clamp or adjustable strap to prevent leaks. Check that the discharge area can absorb the expected volume without creating pooling water or mud. Establish a predictable pace for flow by opening the outlet valve gradually and observing the water’s behavior before increasing the flow.
Handling Chlorinated Water and Lawn Impact
Chlorinated water can be harsh on some plants and soil, especially in concentrated bursts. Begin by diluting the discharge with a slower flow and extended discharge time. If your lawn has young or delicate vegetation, consider discharging at or near the edge of the grass where absorption is higher and evaporation is slower. For vegetable beds, avoid applying water with high chlorine content directly to roots. Drain Guide emphasizes adjusting discharge as needed to protect vegetation and soil structure. If you plan to reuse pool water for irrigation, verify that chemicals are within safe ranges for your specific plants and soil type.
Cleanup, Storage, and Reuse Considerations
After the water has drained, remove hoses and clamps, then inspect the area for any residue or mud. If you’re storing the pool, fully dry all surfaces to prevent mold and mildew. Coil hoses neatly to prevent kinks and reuse on future drain events. If you have a rainwater barrel or irrigation system, consider whether treated pool water could be integrated safely at low volumes and appropriate times. Proper drying and storage help extend the life of the inflatable pool and keep your yard ready for next season.
Common Pitfalls and How to Avoid Them
Common mistakes include draining toward storm drains, leaving hoses stretched across walkways, and rushing discharge near foundations. Always secure the hose to prevent sudden tugging and maintain a slow, steady flow to minimize erosion. If you notice unusual odors or color changes in the draining water, stop and reassess the destination, flow rate, and chemical content. Drain Guide’s recommended practice is to err on the side of caution and ensure your plan aligns with local rules and environmental considerations.
Seasonal and Long-Term Drain Maintenance
In warmer months, you may drain and refresh the water more often, particularly if kids use the pool frequently. Keep a routine for annual checks of your drainage path and your hose connections. Inspect the inflatable pool’s drain outlet and valve for wear or leaks to avoid surprises during future seasons. When not in use, store the pool dry and flat to prevent creases that could affect pool performance. A little routine maintenance goes a long way toward easy, predictable drainage operations year after year.
Tools & Materials
- Garden hose(Long enough to reach the drainage area; avoid kinks)
- Hose adapter/connector(Fit the pool’s drain outlet securely)
- Clamps or zip ties(Secure connections to prevent leaks)
- Ground tarp or plastic sheeting(Protect surfaces from splashes and mud)
- Gloves(Grip and protect hands during setup)
- Shovel or rake(Lightly level soil at the discharge area if needed)
Steps
Estimated time: 45-90 minutes
- 1
Plan drainage route
Identify a safe, legal discharge destination that won’t impact foundations, utilities, or neighbors. Check local rules and prepare the area to receive incoming water with minimal splash.
Tip: Confirm the destination can absorb the water at the expected rate without creating a slick or muddy zone. - 2
Assemble hose and connections
Attach the hose to the pool’s drain outlet using the adapter. Secure with clamps or ties and test for leaks before opening the valve.
Tip: Keep the hose straight and elevated at the pool end to prevent kinks and air pockets. - 3
Position the pool and drain
Move the pool so the drain outlet aligns with the discharge route. Use a slight slope to encourage gravity-driven flow.
Tip: Avoid routing water under doors or near electrical fixtures. - 4
Open the valve gradually
Turn on the drain slowly to observe the flow. Increase pace only after confirming the route remains clear and effective.
Tip: A slow start reduces splashing and erosion at the discharge site. - 5
Monitor drainage
Watch water level in the pool and the progress along the route. Stop if you notice unusual odors, color, or backed-up flow.
Tip: If needed, pause and recheck hose connections and the discharge destination. - 6
Direct away from structures
Ensure water flows away from foundations, steps, and sidewalks. Use a tarp to minimize splashing near hard surfaces.
Tip: Never discharge toward storm drains unless explicitly permitted by local rules. - 7
Finish and clean
Once the pool is empty, disconnect the hose, lay it flat to dry, and store the pool and accessories. Sweep the discharge area if soil remains damp.
Tip: Inspect the pool valve for leaks before storage to prevent future drain problems. - 8
Optional reuse and disposal
If water can be safely reused (for non-edible plants or Lazy irrigation), proceed with caution and follow chemical guidelines. If not reusable, dispose in accordance with local regulations.
Tip: Always verify local restrictions on reusing or discharging pool water.
Got Questions?
Is it legal to drain an inflatable pool into a yard or garden?
In many areas, yes, as long as you drain onto soil and grass and avoid storm drains or building foundations. Check local codes and HOA rules before you begin.
Often yes, but always check local codes and HOA rules first.
What should I avoid when draining to protect plants and soil?
Avoid dumping highly chlorinated water directly onto lawns or vegetable beds. Dilute flow and discharge near edges where absorption is better, and rinse with fresh water if you notice yellowing or wilting plants.
Avoid dumping highly chlorinated water on plants; discharge near edges and dilute when possible.
Can I reuse pool water for irrigation?
Reuse is possible if chemicals are within safe ranges for plants and soil. Test chlorine, pH, and salt levels and choose non-edible plants for irrigation when in doubt.
Reuse only if water quality is safe for plants and you know the soil can handle it.
What if there is no suitable drain area in my yard?
If you lack a suitable area, consult local guidelines or hire a professional. Some municipalities offer designated discharge zones or suggest using a pump to recycle water for other household uses.
If you don’t have a suitable area, check local guidelines or seek professional help.
How long does it typically take to drain an inflatable pool?
Drain times vary with hose length and flow, but most small inflatable pools drain within 30-90 minutes with a steady, moderate flow.
Usually about 30 to 90 minutes with a steady flow.
What should I do to prevent mold after storage?
Dry all surfaces completely before folding and storing the pool. Store in a dry, cool location to prevent mold and mildew.
Dry everything thoroughly and store it in a dry place.
Watch Video
The Essentials
- Plan drainage routes before starting.
- Direct water away from structures and utilities.
- Use a hose with secure connections to prevent leaks.
- Follow local rules and environmental guidelines.
- Store pool and hoses dry to extend life.