Who Drains Water Heaters: A DIY Guide for Homeowners
Learn who should drain water heaters, why it matters, and a safe, step-by-step method for homeowners to remove sediment and protect system efficiency.

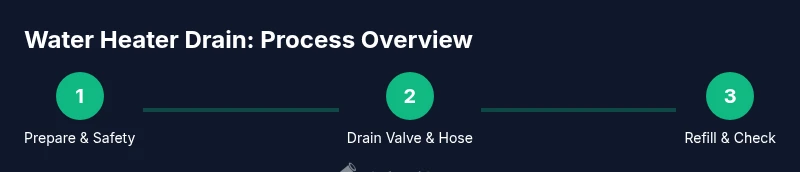
When it comes to maintenance, who drains water heaters? In most homes, a confident homeowner or a licensed professional can do it. Draining removes sediment that hinders heat transfer, improves efficiency, and extends the unit’s life. This guide outlines who can drain, what tools you need, and a safe, practical process you can follow.
Who Drains Water Heaters and Why It Matters
The phrase 'who drains water heaters' often comes up among DIY homeowners planning maintenance. According to Drain Guide, draining a water heater helps remove sediment that settles at the bottom of the tank, which can insulate the water from the heat source and cause the heater to work harder. Over time, this can reduce efficiency, cause uneven heating, and shorten the unit's life. Both homeowners and licensed professionals may perform this task, depending on their comfort level, the heater type (gas, electric, or tankless), and access to the right tools. In many homes, a standard storage tank benefits from an annual drain and flush, but heavy usage, hard water, or older tanks may require more frequent attention. Understanding who drains water heaters and when is the first step to keeping your system safe and efficient. Drain Guide emphasizes planning, safety, and following the manufacturer’s instructions to avoid damaging components or triggering leaks.
Who Typically Drains Water Heaters: Homeowners or Pros
There isn’t a universal rule about who should drain a water heater. For straightforward electric or gas storage tanks, a confident homeowner can manage the job with clear instructions and basic tools. A licensed plumber or HVAC technician is often preferred for sealed systems, complex venting, or tight spaces where access is limited. The key is to match the approach to the heater’s design and your comfort level. Drain Guide notes that, when performed properly, draining is a safe maintenance step that helps conserve energy and prevent future problems.
When and How Often to Drain a Water Heater
Sediment naturally accumulates as water sits in the tank. If your water is hard or the heater is older, you may notice reduced hot water output or longer heat times. A common recommendation is to drain and flush a standard storage tank once a year, but hard-water areas or high-use households may benefit from more frequent intervals. If you notice rusty water, unusual noises, or leakage around the drain valve, drain the tank and inspect the valve area. Drain Guide suggests scheduling a drain day on a calm weekend to avoid rushing through the process and to allow time for a full flush if needed.
Safety, Setup, and Pre-Drain Essentials
Safety should come first. Before you drain, turn off the heater’s power source (electric at the breaker or gas regulator) and close the cold-water supply to the tank. Allow the tank to cool so you don’t scald yourself. Gather your materials and identify a safe place for water discharge that won’t cause electrical hazards or water damage. If you’re unsure about gas venting or combustible surroundings, pause and call a pro. Drain Guide emphasizes doing a quick safety check and following the manufacturer’s instructions for your model.
What Happens During and After the Drain
During the drain, you’ll attach a hose to the drain valve and direct water to a floor drain or outside. After the tank drains, you may selectively open the cold-water inlet to flush out remaining sediment, then drain again. Once clear, close the valve, remove the hose, and restore power or gas. Allow the tank to refill gradually and vent air by opening a hot faucet nearby. Finally, restore full operation and check for leaks around valves and connections. Regular draining helps maintain efficiency and extend the heater’s lifespan.
Common Mistakes and How to Avoid Them
Common mistakes include rushing the job, draining a hot tank, failing to vent air, or neglecting to re-seat connections properly. Always test the drain valve slowly to prevent water hammer and potential leaks. If the drain valve is difficult to open, don’t force it—apply gentle heat with a hair dryer or call a professional. Finally, never drain into an area with electrical components exposed or onto a surface that could cause slipping or damage.
Tools & Materials
- Garden hose(1/2 in or 3/4 in hose that fits the drain valve; at least 6 ft long)
- Bucket or pail(To catch initial hot water and sediment)
- Rags or towels(For spills and drying connections)
- Gloves and eye protection(Protect hands and eyes from hot water and splashes)
- Screwdriver (flathead or Phillips)(If needed to loosen valve components)
- Wrench or pliers(Optional for stubborn fittings)
Steps
Estimated time: 45-75 minutes
- 1
Turn off power and water supply
Locate the heater’s power switch or circuit breaker and switch it off. Close the cold-water supply valve to stop new water from entering the tank. Allow the unit to cool if it’s hot to avoid burns. This is the foundation for a safe drain.
Tip: If you have an electric heater, confirm the breaker is off with a live-test before touching any components. - 2
Attach the hose to the drain valve
Place the drain hose on the drain valve’s outlet and tighten the connection to prevent leaks. Position the other end of the hose where it can safely drain away from people and electrical equipment.
Tip: Keep a bucket under the initial water discharge if you’re worried about splashing. - 3
Open a hot water faucet to vent air
Open a hot water faucet somewhere in the house to allow air to escape and prevent a vacuum from forming inside the tank. This helps the tank drain more smoothly and quickly.
Tip: If no hot taps are available, loosen the drain valve slightly to release air gradually instead. - 4
Open the drain valve gradually and drain the tank
Carefully open the drain valve to start draining. Let the water flow out completely; avoid forcing the valve if it’s stiff. If you notice gas or electric interference, pause and reassess.
Tip: Open slowly to minimize splashing and avoid sudden surges that could cause hoses to whip. - 5
Flush and refill to remove sediment
Close the drain valve temporarily and briefly turn on the cold-water supply to flush the tank. Repeat several times until the water runs clearer. Then close the inlet and reopen the drain to empty again.
Tip: You can repeat this step a couple of times for heavily sedimented tanks. - 6
Finish up and restore service
Close the drain valve, remove the hose, and restore power or gas to the heater. Allow the tank to refill gradually and bleed air by opening a hot faucet again until water flows steadily.
Tip: Check for leaks around valves after reassembly and test heater operation at a safe temperature.
Got Questions?
What is the purpose of draining a water heater?
Draining removes sediment that reduces heat transfer and efficiency. It can extend the life of the heater and prevent overheating. Regular draining is a common maintenance practice for many homes.
Draining your water heater removes sediment, which helps the heater work more efficiently and last longer.
Can a homeowner drain a water heater themselves?
Yes. A standard storage tank can be drained by a confident homeowner using the right tools and safety steps. Always follow the manufacturer’s instructions and pause if you feel unsure.
Yes. Homeowners can drain a storage tank safely if they follow the steps and use proper safety precautions.
What are the risks of not draining a water heater?
Sediment buildup can reduce heating efficiency, increase energy use, and shorten the unit’s lifespan. It may also cause noisy operation or hot spots in the tank.
Neglecting to drain can lower efficiency and shorten the water heater’s life due to sediment buildup.
How often should I drain my water heater?
For most homes, draining once per year is a good target. In hard-water areas or with older tanks, more frequent draining may be beneficial.
Typically, drain once a year, more often if you have hard water or an older tank.
Do I need a plumber if I see leaks after draining?
If you notice persistent leaks around fittings or valves after draining, it’s wise to call a licensed plumber. Leaks can indicate worn gaskets, loose connections, or a damaged drain valve.
If leaks persist after draining, contact a licensed plumber to inspect fittings or the drain valve.
What should I do if the drain valve won’t open?
Do not force the valve. Turn off power and water, wait, and try again. If it remains stuck, call a professional to avoid damaging the tank.
If the drain valve won’t budge, stop and call a pro rather than forcing it.
Watch Video
The Essentials
- Drain to remove sediment and improve efficiency
- Homeowners can perform basic draining with care
- Vent air, regulate flow, and recheck connections
- Refer to manufacturer instructions for your model