What to Do When Sink Won't Drain: A Troubleshooting Guide
Urgent, practical guide to diagnose and fix a sink that won't drain. Learn quick checks, step-by-step mechanical clearing, safety tips, and prevention to restore flow fast.

The most likely culprit is hair and soap buildup forming a partial clog in the trap or drain line. Start with simple steps: remove the pop-up stopper, clear visible debris, and flush with hot water or a plunger. If that doesn’t work, try a plumber’s snake or a vent-safe snake. If the sink still won’t drain, call a professional.
What typically causes a sink to stop draining
A sink that won’t drain is usually the result of buildup inside the drain path. In kitchens, grease, soap scum, and food particles accumulate in the trap and pipes; in bathrooms, hair is the main culprit. Over time these deposits form a partial obstruction that slows or stops flow. A vent blockage or a poorly pitched drain can also contribute, especially in multi-story homes. If you’re asking what to do when sink won’t drain, start with the simplest checks and move toward physical cleaning. Addressing the root cause quickly saves water, reduces mess, and minimizes the chance of a full clog. Drain Guide emphasizes methodical, safe steps over guesswork.
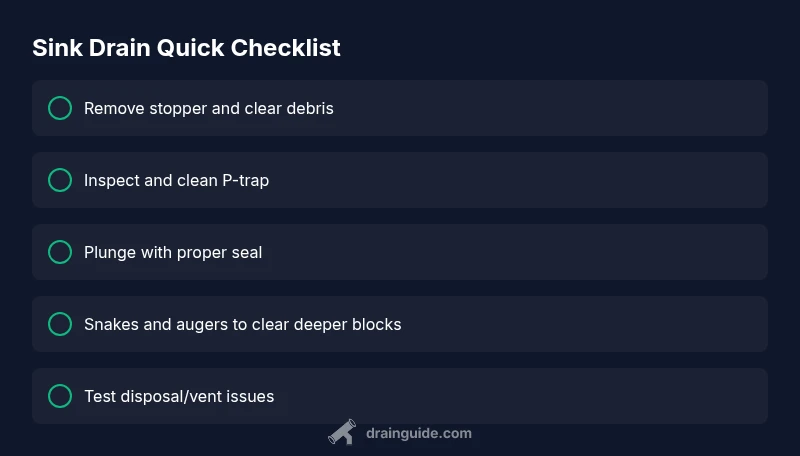
Quick checks you can do before disassembly
Before taking apart the plumbing, try these fast checks that solve many cases:
- Inspect the pop-up stopper or bathroom grid; ensure it isn’t misaligned or seized.
- Remove visible debris from the stopper and the drain opening.
- Rinse with hot water to melt grease and flush minor accumulations.
- If you have a double kitchen sink, check the adjacent side’s flow as a clue to whether the blockage is downstream.
- Try a plunger designed for sinks; ensure a tight seal and use several firm, controlled pushes.
If the sink still won’t drain after these steps, you’re ready to move to more involved cleaning. Safety: wear gloves and eye protection when dealing with dirty water.
Step 1: Inspect and clean the P-trap
The P-trap is the U-shaped pipe under the sink and is a common clog point. Place a bucket underneath, loosen the slip nuts with adjustable pliers, and slowly remove the trap. Clear out hair, food scraps, and gunk with a brush, then rinse the trap with hot water. Reassemble and run water to check for leaks.
Tip: take a photo of how the trap fits before disassembly so you can reassemble accurately.
Step 2: Clear the stopper assembly
Pop-up stoppers in kitchen or bathroom sinks can trap debris. Remove the linkage, pull out the stopper, and clean any hair or gunk from the seal and threads. Reinstall snugly but not overtight. After reassembly, run hot water to see if flow improves.
Tip: keep small tools away from your eyes; use a flashlight to inspect hard-to-reach areas.
Step 3: Plunge smartly
A plunger can break up minor clogs without chemicals. Fill the sink with a small amount of water to cover the plunger base, seal well, and push with steady pressure for 20–30 seconds. If you have a double sink, block the other drain with a plug to maintain suction. Repeat a few times.
Tip: if the water won’t rise, add a bit more water to improve suction before plunging.
Step 4: Snaking the drain
A drain snake (plumbing auger) reaches past minor blockages in the pipes. Insert the stiff end into the drain and rotate while pushing forward. When you feel resistance, back off and pull out debris. Rinse with hot water as you retract to clear fragments.
Tip: wear gloves; never force the snake into a hard obstruction—rotate and back out gently.
Step 5: Garbage disposal and vent considerations
If you have a garbage disposal, run it with cold water to check for grinding noise and jams. Do not put fibrous or starchy materials down the disposal. A blocked vent can also cause slow drainage; if you hear gurgling in the drains, a vent line might be blocked and may require professional attention.
Tip: avoid chemical cleaners near disposals because fumes can be hazardous.
Step 6: Chemical cleaners and when to avoid them
Chemical drain cleaners can be tempting, but they pose risks to skin, eyes, and septic systems. Never mix cleaners, and avoid caustic formulas in PVC pipes. If your sink still won’t drain after mechanical clearing, or you suspect a vent or sewer issue, it’s time to call a licensed plumber. Urgent situations like multiple fixtures backing up may require immediate service, especially in homes with septic systems.
Tip: use mechanical methods first; reserve chemicals as a last resort and always follow label directions.
Step 7: Final test and cleanup
After clearing, reassemble all components, run hot water for several minutes, and monitor for any leaks. Check the other fixtures in the house to ensure there’s no shared venting issue. Keep notes about what worked for future reference and prevention.
Step 8: When to call a professional
If the clog persists after a thorough mechanical approach, or you notice repeated backups, it’s wise to call a licensed plumber. Persistent slow draining can indicate deeper issues like sewer line problems, vent stack failures, or mis-pitched pipes that require specialized equipment.
Steps
Estimated time: 45-90 minutes
- 1
Prepare and gather tools
Clear the area, lay down towels, and assemble a bucket, adjustable wrench, pliers, gloves, and a flashlight. If you have a garbage disposal, consider turning off the switch at the outlet to avoid accidental activation. This prep reduces mess and protects you during disassembly.
Tip: Pro tip: keep a spare container nearby to collect dirty water; it saves cleanup time. - 2
Inspect the P-trap
Place a bucket under the trap, loosen slip nuts, and carefully remove the trap. Clean out hair and gunk with a brush, rinse with hot water, and reassemble. After sealing, run water to check for leaks.
Tip: Pro tip: photograph the trap’s orientation before removal to ensure correct reassembly. - 3
Clear the stopper assembly
Remove the linkage, pull out the stopper, and clean the seal and threads. Reinstall snugly, then run hot water to test flow. Confirm the stopper moves freely without catching.
Tip: Pro tip: inspect the seal for wear; replace if violated to prevent future leaks. - 4
Plunge the drain
Seal the drain with a plunger and push with steady pressure for 20–30 seconds. If you have a double sink, block the other side. Repeat a few times, then check for improvements.
Tip: Pro tip: add a small amount of water if the plunger loses suction. - 5
Snake the drain
Insert the auger into the drain and rotate while advancing. When you meet resistance, back off and pull out debris. Rinse with hot water as you pull the snake out to clear fragments.
Tip: Pro tip: wear gloves and keep hands away from sharp edges of the snake. - 6
Check disposal and vent issues
If you have a disposal, run it with cold water to ensure it’s clearing. For vent issues, look for gurgling or slow drainage in other fixtures; a blocked vent may need a professional. Avoid introducing any chemical cleaners near disposals.
Tip: Pro tip: never grind fibrous materials like celery or corn husks in disposals to prevent jams. - 7
Chemical cleaners and alternatives
Chemicals can damage pipes or septic systems; use them only as a last resort and follow label directions carefully. They may loosen clogs temporarily but rarely solve the root problem.
Tip: Pro tip: if you must use a cleaner, choose a non-caustic formula and ventilate the area. - 8
Call a professional if needed
If the clog persists or you suspect a vent/sewer issue, a licensed plumber can diagnose with camera inspection and professional tools. Time-sensitive backups require prompt action in homes with septic systems.
Tip: Pro tip: obtain an upfront estimate and ask about any additional diagnostic steps before work begins. - 9
Verify, document, and maintain
Run the tap for several minutes to ensure a steady flow. Document what worked for future reference and schedule periodic maintenance like trap cleaning and debris screening.
Tip: Pro tip: schedule routine maintenance every 6–12 months to prevent buildup.
Diagnosis: Sink won't drain
Possible Causes
- highHair, soap scum, and grease buildup in the trap or pipes
- highBlocked P-trap or pipe downstream
- mediumVent blockage or improper drain pitch
Fixes
- easyDisassemble and clean the P-trap; remove debris and reassemble
- mediumUse a plumber’s snake to clear the blockage farther down the line
- hardInspect and clear the vent line or call a pro if vent blockage is suspected
Got Questions?
What should I do first when my sink won't drain?
Start with quick checks: remove the stopper, clear obvious debris, and flush with hot water. If flow remains slow, proceed to trap cleaning and gentle plunging.
Start by checking the stopper and debris, then flush with hot water. If it’s still slow, move to trap cleaning and gentle plunging.
Can a blocked vent cause a sink to stop draining?
Yes. A blocked vent can slow or back up drainage, especially on multi-story homes. Look for gurgling sounds and slow fixtures elsewhere, and consider professional vent cleaning if suspected.
A blocked vent can slow drainage, especially in multi-story homes. Check for gurgling and slow fixtures, and call a pro if you think the vent is blocked.
Are chemical drain cleaners safe for kitchen sinks?
Chemical cleaners pose safety risks and can damage pipes or septic systems. Use mechanical methods first and only as a last resort, following label directions exactly.
Chemical drain cleaners can be hazardous and may damage pipes. Use mechanical methods first and follow the label if you must use them.
When should I call a plumber for a sink clog?
Call a plumber if the clog persists after thorough mechanical clearing, or if you suspect vent or sewer issues or backups in multiple fixtures.
Call a plumber if the clog persists after mechanical clearing or you suspect vent or sewer problems.
Will baking soda and vinegar help with clogs?
A mild fizzy treatment can help loosen minor buildup, but it’s not a guaranteed fix for stubborn clogs. Use as a preventative measure, not a primary cure.
Baking soda and vinegar may help mild buildup, but it’s not a guaranteed cure for stubborn clogs.
Can a sink clog involve the garbage disposal?
Yes. A clog can form upstream of the disposal or in the disposal itself. Run cold water while testing and avoid fibrous materials that bind up the unit.
Clogs can involve the disposal; run cold water and avoid fibrous materials to prevent jams.
Watch Video
The Essentials
- Identify and address the simplest causes first
- Prioritize mechanical clearing over chemicals
- Check the trap and stopper before disassembly
- Use a snake for deeper blockages
- Call a plumber for persistent or complex issues