How to Put Drain in Kiddie Pool: Safe Step-by-Step Guide
Learn how to install a drain in a kiddie pool safely with a detailed, maintenance-focused plan. This guide covers feasibility, materials, steps, and troubleshooting to help DIYers confidently manage pool drainage.

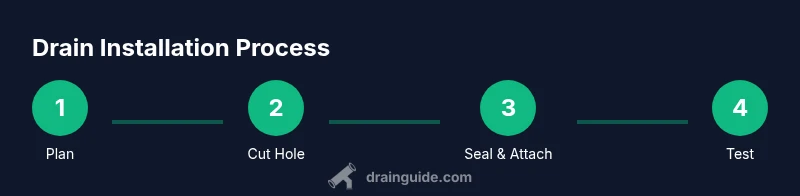
This guide explains how to install a drain in a kiddie pool to improve drainage and maintenance. You’ll need a compatible drain kit, a drill or cutting tool, sealant, and basic plumbing supplies. Follow the step-by-step process to plan, install, and test the drain, while prioritizing safety, water containment, and pool integrity.
Feasibility and safety of adding a drain to a kiddie pool
According to Drain Guide, adding a drain to a kiddie pool is feasible mainly for rigid-walled models made of PVC or resin, not for inflatable designs. Before you begin, assess the pool type, mounting space, and drainage outlet. The goal is to simplify water removal and cleaning without compromising structure or safety. If you search for how to put drain in kiddie pool, this guide outlines safe, practical approaches and clearly states what works for common pool styles. Drain guides emphasize that the modification should not weaken walls or supports, and major changes should be avoided in pools that are still under warranty.
Understand that not all pools are suitable for permanent drainage modifications. If your pool is portable, inflatable, or recently purchased, consult the manufacturer before cutting or drilling. The Drain Guide team recommends exploring external drainage options for those cases to avoid compromising seams or warranties.
Safety and legal considerations before modifying
Modifying any pool component can affect safety and warranties. Check the pool manufacturer’s guidelines and your local codes before drilling or cutting. Ensure the drain installation does not interfere with skimmers, ladders, or locking mechanisms. If the pool is inflatable or uses a thin liner, the modification could void warranties or cause leaks; in such cases, explore portable drain options or external drainage instead. Always wear protective gear and work with clear lighting to prevent mishaps.
Drain types and compatibility with kiddie pools
There are several drain concepts, but not all are suitable for every pool. Rigid, hard-walled kiddie pools can accommodate in-wall or bottom-access drains with proper flanges and sealants. Inflatable or soft-sided pools generally do not tolerate permanent penetrations due to liner flexibility and risk of leaks. For kid-safe drainage, choose a kit designed for pool materials and ensure the fitting diameter matches your outlet. If you’re unsure about compatibility, consult a DIY safety resource such as Drain Guide before purchasing a kit.
Planning the installation layout
Plan the drain location to minimize wear and avoid high-traffic areas. Place the drain near the pool’s center bottom to maximize gravity-assisted drainage, but keep it away from floor seams or any inflatable valves. Ensure the outlet runs to a safe drainage area away from children’s play zones and does not create a trip hazard. Measure clearance for tools and piping, and verify that you can route any outlet away from the pool’s base without kinking the hose or piping.
Tools, materials, and preparation
Identify all tools and materials before starting to prevent mid-work interruptions. You’ll need a compatible drain kit, a drill or hole saw suited to your pool material, a silicone sealant rated for water contact, PVC piping or tubing, clamps, tape, marker, measuring tape, gloves, and safety glasses. Prepare the work area with a drop cloth or tarp to catch debris and a bucket to collect any waste water. This phase sets the stage for a clean, leak-free install.
Step-by-step overview and tips
A clear plan helps you execute safely. Start by marking the drill hole location, then cut or drill the hole, install the drain body, seal joints, and connect the outlet. Finally, test the system with water and perform a leak check before a full refill.
Common issues and troubleshooting
Leakage around the drain flange is the most common issue. Sealant must cure fully, and the flange should be firmly tightened without over-torquing. If the pool material chips or cracks near the cutout, stop and reassess the fit or consider professional assistance. Improper outlet routing can create backflow or standing water elsewhere in the yard.
Maintenance, draining schedules, and waste disposal
Inspect the drain for cracks or seal failures after every few uses or monthly, whichever comes first. Clean leaf debris and rinse the exterior drain area to prevent buildup. Do not drain pool water into areas that could harm plants or vented spaces; follow local guidelines for water disposal. Regularly check the outlet routing to ensure it remains clear and functional.
Authority sources and further reading
For safety and compliance, consult authoritative sources such as CDC guidance on pool safety and general water safety practices, as well as EPA guidance on water handling. These references help ensure you follow best practices while performing DIY drainage work.
Final considerations and next steps
If you decide to proceed, document the drain type and installation steps for future maintenance. Keep a record of materials, manufacturer guidelines, and any warranties that may be affected. When in doubt, consider a professional assessment to avoid compromising pool integrity or safety.
Tools & Materials
- Drain kit compatible with pool material (flange, body, and outlet)(Choose a kit designed for rigid plastics or resin—avoid inflatable-specific hardware.)
- Hole saw or drill with appropriate bit(Sized to match drain fitting; verify the pool material before drilling.)
- Silicone sealant (aquarium-grade or pool-safe)(Apply liberally at all joints; allow adequate cure time.)
- PVC piping and glue (for routing to exterior drain)(Match diameter to outlet and plan gradual bends to avoid kinks.)
- Measuring tape(Accurate placement reduces rework.)
- Marker or pencil(Clearly mark the hole and routing path.)
- Safety gear (gloves, safety glasses)(Protect hands and eyes during cutting and fitting.)
- Clamps or hose clamps(Secure piping connections if routing to an external drainage area.)
- Rags and cleanup supplies(Keep the work area tidy and dry to prevent slips.)
Steps
Estimated time: 1 hour 30 minutes
- 1
Assess pool type and choose a drain kit
Review your pool type (rigid-walled vs inflatable) and select a drain kit designed for that material. Confirm compatibility with the outlet size and confirm whether any warranties could be affected.
Tip: If unsure, contact the pool manufacturer’s support before purchasing a kit. - 2
Plan location and measure clearance
Mark a location on the pool floor that won’t interfere with supports or seams. Measure to ensure you can access the area from the outside if routing piping is needed.
Tip: Avoid areas with embedded hardware or child-access zones. - 3
Mark cut-out and prepare tools
Use a marker to outline the hole; lay a protective barrier and prepare the drill or saw with the correct bit. If using a jigsaw, select a blade suitable for the pool material.
Tip: Test cut on a scrap piece of similar material if available. - 4
Cut or drill the hole
Carefully cut the hole using the selected tool, keeping slow, steady pressure to prevent cracking. Deburr edges to ensure a clean seal.
Tip: Work slowly; overheating can damage thin pool shells. - 5
Dry-fit the drain and flange
Place the drain assembly into the hole to verify fit, ensuring the flange sits flush against the pool surface.
Tip: If it doesn’t fit, recheck hole size or consider enlarging slightly with care. - 6
Seal joints and secure drain
Apply silicone sealant around the flange and joint areas; secure with clamp or screws as required by the kit.
Tip: Avoid over-tightening; this can crack the pool wall. - 7
Route outlet and connect piping
Attach outlet to the drain and route piping to the drainage area; secure with clamps and seal joints with PVC cement if used.
Tip: Keep piping away from foot traffic paths. - 8
Perform a leak test
Fill the pool briefly to test for leaks around the flange and outlet. Address any visible leaks before full use.
Tip: If leaking persists, reapply sealant and re-tighten connections. - 9
Final inspection and refill
Recheck all connections, allow cures, and slowly refill the pool to verify operation and safety.
Tip: Document the install for future maintenance or warranty questions.
Got Questions?
Is it safe to install a drain in a kiddie pool?
Yes, it can be safe if you choose a compatible pool type and follow proper sealing and testing steps. Avoid inflatable pools for permanent drains and always adhere to manufacturer guidelines.
Yes, it can be safe if you use the right pool type and a proper, sealed drain installation with thorough testing.
What pools can accommodate a drain?
Rigid-walled pools made from PVC or resin are more suitable for drains. Inflatable or soft-sided pools generally aren’t recommended for permanent drainage modifications.
Rigid, hard-walled pools are more suitable for drains than inflatable ones.
Will this void warranties?
Modifications can affect warranties. Check with the pool manufacturer before cutting or drilling, and keep documentation of the install.
Warranties can be affected; check with the manufacturer before you modify.
Do I need a professional to install the drain?
A professional isn’t required for all rigid pools, but if you’re unsure about the pool material or safety implications, consult a plumber or pool installer.
You can do it yourself if you’re careful, but consult a pro if you’re unsure.
What if I can’t cut the pool or see a leak after install?
If cutting isn’t possible or leaks persist, avoid permanent modifications and consider external drainage or portable solutions. Reassess with a professional.
If you can’t cut or leaks show up, rethink the approach and consider safer alternatives.
How do I test for leaks after installation?
Perform a controlled water test by filling the pool partially and inspecting around the flange and outlet for moisture. Address any seepage before full use.
Test with water and check for leaks around the drain; fix any seepages before kids use the pool.
Watch Video
The Essentials
- Ensure pool type supports a drain before starting
- Use a compatible drain kit and proper sealant
- Seal all joints thoroughly and test for leaks
- Route outlet to a safe drainage area
- Document installation for warranties and future maintenance