How to Clean a Dishwasher Drain Hose
Learn how to clean a dishwasher drain hose to prevent backups, with practical steps, safety tips, and maintenance routines from Drain Guide. Includes tools, step-by-step actions, and FAQs for DIY homeowners.

Objective: You will clean the dishwasher drain hose to prevent backups and improve drainage. You’ll need basic tools, a bucket, and gloves. According to Drain Guide, a clogged drain hose is a common cause of slow draining and standing water. This guide shows safe, step-by-step methods to inspect, clean, and reinstall the hose.
Why Cleaning the Dishwasher Drain Hose Matters
A clean dishwasher drain hose is essential for reliable drainage and preventing standing water at the end of a cycle. Over time, food particles, soap scum, and mineral deposits can accumulate inside the hose, restricting flow and eventually causing backups into the dishwasher tub or even the sink. According to Drain Guide, routine maintenance of the drain hose minimizes the risk of clogs and costly service calls. For homeowners, understanding how the hose routes from the dishwasher to the disposal or sink trap helps you diagnose drainage issues quickly and avoid unnecessary repairs. In many homes, the hose is hidden behind cabinets, so a visual inspection during a routine clean is a smart habit. This article uses practical language and clear steps to make the process approachable for DIY enthusiasts and busy homeowners alike.
Key terms worth knowing include the hose clamp, the disposal knockout plug (if you have a garbage disposal), and the p-trap under the sink. A healthy drain hose supports a steady flow, reduces the chance of odor buildup, and keeps your dishwasher functioning as designed. Drain Guide’s guidance emphasizes safety, careful disassembly, and reassembly with secure connections to maintain a leak-free system. As you work, maintain a tidy workspace and wear gloves to protect your hands from sharp edges and dirty water.
Signs Your Dishwasher Drain Hose Needs Attention
Watching for early warning signs can save you time and frustration. Slow draining, standing water after running a cycle, gurgling noises, or water backing up into the dishwasher are common indicators of an issue with the drain hose or its connections. It’s also wise to inspect for kinks or crushing behind the appliance, which can impede flow even if the hose is technically clear. If you’ve recently swapped detergents or changed water hardness, you might notice differences in drainage performance. In some cases, the hose may be loose or the clamps may corrode or loosen over time. Troubleshooting begins with a visual check, followed by a careful inspection of hose connectors at both ends. Diagnosing promptly helps prevent bigger problems such as mold growth or a flooded kitchen.
Safety First: Prep and Protective Steps
Prioritize safety before you touch any plumbing component. Unplug the dishwasher from power and if possible, switch off the house circuit that powers the unit. Have a bucket and towels handy to catch water, especially if the hose is full or you’re detaching it from a disposal or sink drain. Wear gloves to protect your skin from cleaning residues and to keep your hands clean. Work in a well-lit area so you can clearly see clamps, joints, and the hose’s interior. Keep a smartphone or camera nearby to reference hose routing if you need to reassemble parts in the correct orientation. By planning ahead, you reduce the chance of accidental leaks and ensure a safer, smoother maintenance experience.
Cleaning Methods: Manual Rinse, Brushes, and Gentle Cleansers
A thorough cleaning usually starts with a manual rinse to remove loose debris, followed by a targeted brush to scrub the interior walls. A flexible bottle brush or pipe brush can reach inside the hose. Warm water with a small amount of mild dish soap works well to dissolve grease without damaging the rubber or plastic. For mineral deposits, consider flushing with a mild acidic cleaner approved for plastics (do not use harsh solvents). Avoid caustic drain cleaners that can degrade hoses and damage seals. If you notice stubborn buildup, you may repeat the rinse and brush steps until the interior shines clean. Finally, flush with clean water to remove any soap or cleaner residue, then proceed to reattach the hose.
Reattachment and Leak Testing: Securing the Path for Drainage
When the hose is clean, reattach it to its original connections. Ensure clamps or locking rings are snug but not overtightened, which can cut the hose or damage fittings. If the hose was connected to a garbage disposal, confirm that the knockout plug is removed and that the connection is secure. Reinstall any splash guard or locking clip as present on your model. After everything is reconnected, run a short test cycle with a small amount of water to verify there are no leaks and that the water drains promptly into the sink or disposal. If leaks appear, retighten clamps or inspect for cracks in the hose.
Maintenance and Prevention: Keep It Flowing Year-Round
To minimize future clogs, perform a quick inspection every few months or when you notice changes in drainage. Use a rinse aid sparingly and run hot water through the dishwasher to help keep the hose clear. Consider placing a small filter over the dishwasher’s intake or checking for hard water buildup in your area that could contribute to mineral deposits inside hoses. Keeping the area behind the dishwasher clean and dry reduces the chance of mold growth and makes future maintenance safer and easier. A proactive approach saves time and helps your appliance operate more efficiently.
Tools & Materials
- Bucket(To catch water and keep the area dry)
- Old towels or rags(Limit mess and protect flooring)
- Gloves(Protect hands from grime)
- Flashlight(Illuminates tight spaces)
- Screwdrivers (flathead and Phillips)(Loosen hose clamps and fittings)
- Pliers(Grip clamps and hose fittings)
- Dishwasher drain hose (replacement if damaged)(Optional if hose shows cracks)
- Hose clamps or zip ties(Secure connections without leaks)
- Mild dish soap(Gentle cleaning agent)
- Flexible brush or bottle brush(Reach inside the hose interior)
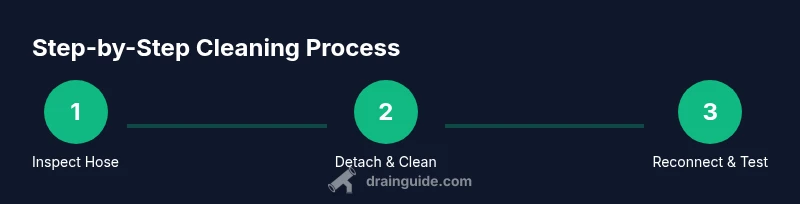
Steps
Estimated time: 30-45 minutes
- 1
Power off and access
Unplug the dishwasher and pull it gently away from the cabinet to access the back where the drain hose runs. This reduces the risk of electric shock and gives you room to work. Take a photo of the hose orientation if needed for reassembly.
Tip: Double-check the circuit is off and keep a dry towel handy. - 2
Inspect hoses and clamps
Look for kinks, cracks, or signs of wear along the drain hose. Check clamps and fittings for corrosion or looseness. If the hose is visibly damaged, plan to replace it.
Tip: Note the exact clamp positions to ease reassembly. - 3
Detach from the sink or disposal
Loosen the hose clamp at the drain end and disconnect the hose from the disposal or sink drain. Have a bucket ready to catch any remaining water.
Tip: Keep one hand on the hose end to prevent it from snapping back. - 4
Rinse and brush interior
Rinse the hose with warm water. Use a flexible brush to scrub the interior walls and remove buildup. Repeat until the interior looks clean and clear.
Tip: Avoid forcing debris; let water do most of the work. - 5
Flush and dry the hose
Flush the hose with clean water to remove loosened debris. Dry the exterior and interior with a towel before reassembly to prevent mold.
Tip: A dry hose reduces mold risk during reattachment. - 6
Reconnect and secure clamps
Attach the hose back to the disposal or sink drain and tighten clamps or locking rings securely. Ensure the knockout plug is removed if connected to a disposal.
Tip: Do not overtighten; aim for a snug, leak-free fit. - 7
Test for leaks
Run a short wash cycle with minimal water to confirm there are no leaks at the joints. Check under the sink for drips and adjust as needed.
Tip: Watch carefully for the first minutes after starting the cycle.
Got Questions?
How can I tell if the dishwasher drain hose is clogged?
Look for standing water after a cycle, slow drainage, or gurgling sounds. Inspect hoses and connections for debris or kinks to confirm a clog.
Look for standing water, slow draining, and gurgling sounds to identify a clogged hose.
Can I use vinegar or baking soda to clean the hose?
Vinegar and baking soda can help loosen buildup when flushed with water. Avoid harsh chemical cleaners that can damage hoses and seals.
You can flush with warm water and mild cleaners like vinegar, but avoid harsh chemicals.
How often should I inspect the drain hose?
Regular checks are wise, especially if you notice changes in drainage. Inspect and clean the hose when you suspect buildup or after heavy use.
Check the hose when you notice slower drainage or after heavy usage.
Do I need to replace the hose if it's cracked?
Yes. A cracked hose should be replaced to prevent leaks. Use the correct hose size and compatible clamps for a secure fit.
A cracked hose should be replaced to prevent leaks.
Is it safer to unplug the unit before cleaning?
Yes. Unplugging the unit removes live power from the start and reduces risk while you work on connections.
Yes, unplug the unit before starting the cleaning task.
Will cleaning the hose fix leaks around the disposal?
Cleaning helps with drainage but leaks around the disposal usually indicate loose connections or a damaged seal that may need replacement.
It can help, but check the seals and connections for leaks.
Watch Video
The Essentials
- Inspect hoses for wear and secure clamps before reassembly.
- Use gentle cleaners and thorough rinsing to avoid residue.
- Test cycles help confirm a leak-free, properly draining system.
- Regular maintenance reduces future clogs and service calls.