Washing Machine Drain Hose Cleaning: Step-by-Step Guide
Learn how to safely clean your washing machine drain hose, prevent clogs, and protect your plumbing with a practical, step-by-step DIY approach.

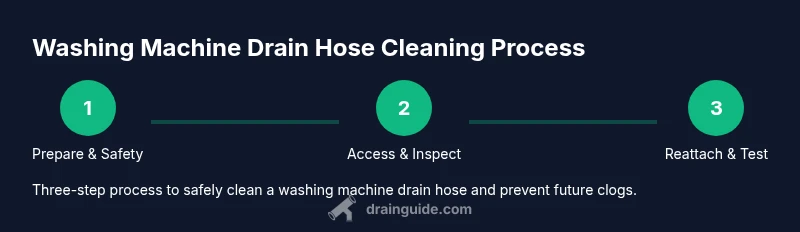
With the right steps, you can clear a clogged washing machine drain hose and prevent backups. This guide covers safe prep, common signs of trouble, and a practical cleaning routine you can perform with common household tools. You’ll finish with a clearer hose, reduced odors, and smoother drain flow. No special tools required.
Understanding the drainage path and why hose cleaning matters
The drain hose is the conduit that carries used wash water from the washer to your home's drainage system. A clean, unobstructed hose helps prevent backups, odors, and mold growth in the laundry area. According to Drain Guide, the health of your drainage system hinges on regular attention to the hose and its connections. Most issues start with lint, soap scum, hair, or mineral deposits that gradually narrow the flow. When you clean the hose, you restore efficient draining and extend the life of your washer. In addition to preventing clogs, maintaining the hose reduces the risk of leaks and water damage in surrounding areas. A little routine maintenance goes a long way toward a quieter, more reliable laundry cycle. Keeping the hose in good shape also protects your home's plumbing from unexpected backups.
Signs your drain hose needs cleaning
Watch for symptoms that suggest buildup inside the hose or standpipe. Slow draining indicates that the interior is constricted. Gurgling sounds during a cycle point to trapped air due to partial blockages. Water backing up into the washer tub or spilling onto the floor is a clear warning sign. A persistent damp or musty odor near the laundry area is another clue that debris remains after a wash. If you observe any of these signs, plan a hose-cleaning session to restore proper drainage and minimize strain on pumps and seals.
Safety first: prep and space preparation
Before touching any hoses, power down the machine and unplug it if possible. If your wiring is accessible, shut off the circuit or unplug from the outlet. Turn off the water supply to the washer to avoid accidental leaks. Move the appliance slightly away from the wall to access the drain hose and clamps. Place towels, a shallow tray, and a bucket to catch drips. Work in a well-lit area and keep children and pets away. Wear gloves and non-slip shoes to stay safe on a wet floor. With the area prepared, you’re ready to choose a cleaning approach.
Cleaning approaches: manual inspection, flushing, or combined methods
There isn’t a single universal method, but most situations respond well to a combination of approaches. Start with a manual inspection and light scrubbing to remove visible lint at the hose end. Then flush the hose with a steady flow of water to push debris toward the standpipe. If a stubborn clog remains, use a small flexible drain snake carefully to break up buildup. The best results usually come from a mix of methods, applied patiently and methodically.
Step-by-step approach: preparing, removing, and cleaning
This practical sequence can be completed in 30–60 minutes. Begin by unplugging the washer, then move the machine slightly to access the back. Detach the drain hose from the washer and from the standpipe, keeping a bucket ready to catch water. Inspect the hose for cracks or bulges as you remove it. Rinse the interior with running water, using a soft brush to dislodge residue. If you encounter stubborn deposits, insert a flexible drain snake gently and rotate to break them up. Reattach the hose and clamps securely, then wipe away any residue on the fittings before testing.
Detailed cleaning methods: manual scrub, flush, and snake as needed
Manual scrub: Use a soft brush and mild detergent to remove lint from the outer and inner surfaces of the hose ends. Flush: Run clean water through the hose while it’s supported above a bucket to collect debris. Snake: If buildup persists, insert a small-diameter snake into the hose and rotate while applying gentle pressure. After cleaning, rinse again and inspect the fittings for leaks. Regular checks prevent surprises and keep drainage smooth.
Reattachment, testing, and leak checks
Reconnect the drain hose to the washer and to the standpipe, ensuring clamps are snug but not overtightened. Restore power and run a short cycle with no laundry to observe flow and listen for leaks at joints. Check that the hose has a natural downward slope toward the standpipe to prevent standing water. If you see water on the floor, shut off supply and recheck connections before retrying. Document any worn parts or clamps for future maintenance.
Maintenance and prevention tips
Make hose inspections a regular habit by setting reminders every few months. Clean the hose ends and remove visible lint to keep airflow clear. Use a lint trap on the hose end if your model supports it, and avoid overloading the washer, which can accelerate debris buildup. Keep the laundry area dry by wiping spills promptly and ensuring the hose sits without sharp bends. The purpose is to keep the drainage path clear and odors at bay. Drain Guide's team recommends incorporating hose checks into your routine home maintenance.
Authority sources and further reading
- U.S. Environmental Protection Agency (EPA): https://www.epa.gov
- Centers for Disease Control and Prevention (CDC): https://www.cdc.gov
- Occupational Safety and Health Administration (OSHA): https://www.osha.gov
Drain Guide Analysis, 2026 emphasizes practical, safety-conscious maintenance and suggests routine checks as a core habit for households.
Tools & Materials
- Safety gloves(Nitrile gloves; protect hands from grime and moisture)
- Bucket(To catch water and collect debris)
- Old towels or rags(Mop up spills and place under the work area)
- Screwdriver (Philips or flathead)(To loosen hose clamps if present)
- Garden hose(For flushing the hose if possible)
- Drain snake / flexible brush(To clear stubborn buildup without damaging the hose)
Steps
Estimated time: 45-60 minutes
- 1
Power down and prepare
Unplug the washing machine from the outlet and shut off the water supply if possible. Move the unit slightly away from the wall to access the drain hose. Place towels and a bucket within reach to catch drips and keep the area dry.
Tip: Keep the power off until the hose is reconnected to avoid electric shock. - 2
Access and inspect the hose ends
Locate both ends of the drain hose—the washer end and the standpipe/sink end. Look for cracks, bulges, or obvious kinks. If you see damage, plan for replacement rather than attempting a repair.
Tip: Take a quick photo of hose connections to assist reassembly. - 3
Detach the hose from washer and standpipe
Loosen the hose clamps with a screwdriver and gently pull the hose off. Let water drain into the bucket. Inspect clamps and fittings for corrosion or wear.
Tip: Keep the hose ends aimed into the bucket to minimize spills. - 4
Rinse exterior and interior
Rinse the hose ends under running water to remove loose lint. Scrub the interior with a soft brush if accessible. If internal access is limited, perform a thorough rinse with water and a spray bottle.
Tip: Avoid using excessive force that could loosen fittings. - 5
Clear stubborn buildup with a snake if needed
If you encounter stubborn clogs, insert a flexible drain snake and rotate gently to break up buildup. Avoid forcing the snake, which can damage the hose or fittings. Remove the snake slowly and clean debris from the tip.
Tip: Work in short increments to avoid over-stressing the hose. - 6
Reattach hose to washer and standpipe
Slide the hose back onto the washer nipple and secure clamps. Reconnect the other end to the standpipe or sink and tighten fittings to a snug fit without over-tightening.
Tip: Leave a slight downward slope for proper drainage. - 7
Test for leaks and proper drainage
Plug the washer back in, restore water supply, and run a short cycle with no load. Watch for leaks at the joints and confirm that water flows freely through the hose into the standpipe.
Tip: Have a towel ready to catch any initial spills. - 8
Document and plan future maintenance
Wipe the area clean, reposition the washer, and store tools. Note any wear on hoses or clamps and plan to replace damaged parts. Set a reminder to inspect the hose every few months.
Tip: Keep a spare hose clamp handy for quick repairs.
Got Questions?
What are common signs of a clogged washing machine drain hose?
Common signs include slow draining, gurgling sounds, and water backing up into the washer or nearby drain.
Watch for slow draining, gurgling sounds, or backups.
Is it safe to use a drain snake in a washing machine hose?
A small flexible drain snake can help remove buildup, but avoid forcing it and damaging the hose.
Be gentle and don't force it.
Do I need to unplug the washer before starting?
Yes. Unplug the unit and shut off the water supply before handling any hoses.
Always unplug before starting.
How often should I clean the drain hose?
Check for buildup and clean as needed based on usage; schedule periodic inspections.
Check and clean as needed.
Can I inspect the drain hose from the outside without moving the washer?
In many models you can access by pulling out the unit; check for kinks and bulges.
Yes, you can check without removing the machine in some cases.
What should I do if water backs up after cleaning?
Shut off power, check connections, ensure hose is properly seated; if the problem persists, contact a professional.
If backup continues, call a pro.
Watch Video
The Essentials
- Inspect the hose regularly for wear.
- Clean debris to maintain drainage.
- Test after cleaning to confirm flow.
- Replace damaged hoses to prevent leaks.