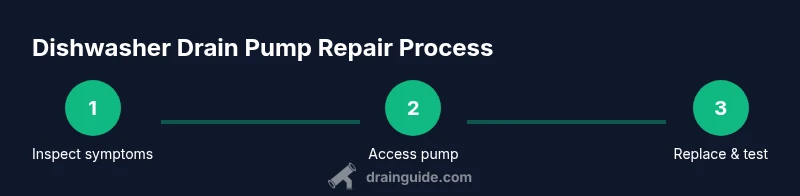
Dishwasher Drain Pump Repair: Step-by-Step Guide
Learn how to diagnose, replace, and test a dishwasher drain pump with step-by-step instructions, safety tips, and maintenance advice from Drain Guide.

By the end of this guide, you will be able to diagnose a faulty dishwasher drain pump, source a compatible replacement, and perform a safe, code-compliant repair. You'll learn how to verify the problem with simple tests, disconnect power and water supplies, and reassemble your dishwasher with confidence. This process emphasizes safety and thorough testing to prevent reoccurrence.
What causes a dishwasher drain pump to fail?
A dishwasher drain pump can fail for several reasons, and understanding the root cause helps prevent repeat failures. Signs include water remaining in the tub after a cycle, a buzzing or humming from the bottom of the appliance, or an obvious leak around the pump area. According to Drain Guide, the most common culprits are debris or food particles that jam the impeller, a clogged intake screen, a worn impeller, or a damaged gasket seal. Over time, hard water deposits can also accumulate, reducing pump efficiency and increasing motor load. If the motor overheats or the pump housing cracks, replacement is usually the only reliable fix. Note that many draining problems mimic issues elsewhere in the drainage system, such as a clogged garbage disposal connection, kinked drain hose, or a blocked air gap. Before assuming the pump is at fault, inspect these components and perform a quick test to confirm the exact failure point.
Safety first: unplug, depressurize, water shut-off
Unplug the dishwasher from the wall outlet and, if possible, switch off the circuit at the breaker. If your model has a water inlet valve accessible from the front, close the water supply to stop any further filling. Use towels or a small container to catch any remaining water in the sump so you do not create a slip hazard. Wear safety glasses when handling exposed wiring or sharp edges. This stage minimizes the risk of shock or accidental leaks during the repair and keeps your kitchen clean while you work.
Diagnosing the pump vs. other drain issues
Start by verifying that the problem is the drain system and not a clog upstream. Check the drain hose for kinks, the air gap if your setup includes one, and the filter and sump for debris. If the pump hums or tries to run but water remains in the tub, the impeller or motor could be at fault. A simple continuity check with a multimeter can help confirm electrical failure, but visual inspection often reveals loose wires, a damaged plug, or a cracked housing. Remember that drain problems can mimic other issues like a clogged garbage disposal connection or a blocked standpipe in some homes. A thorough inspection of all drainage components reduces unnecessary pump replacements.
Tools and replacement parts you’ll need
Essential items include a replacement dishwasher drain pump compatible with your model, a new gasket or seal kit, replacement drain hose and clamps, and basic hand tools such as screwdrivers, a nut driver, and pliers. Have a bucket and towels ready to manage spills, a flashlight to inspect dark corners, and a multimeter if you want to test electrical continuity. Keep a camera or notes to document how hoses and connectors are arranged for easy reassembly. Check model-specific manual notes to ensure the pump and seals match your machine.
Accessing the pump compartment
Most dishwashers place the drain pump behind a toe-kick or lower access panel. Remove the screws securing the panel and gently pull it away to expose the pump and hoses. Take photos of each hose connection and the electrical plug before disconnecting anything. If yours uses a bottom mount, you may need to remove a mounting bracket or support rail. Store screws in a labeled container to avoid mix-ups. This preparation helps you work methodically and reduces the chance of leaks once reassembled.
Replacing the pump and seals
Disconnect the electrical connector and the hoses from the old pump, then remove the mounting screws and lift the pump out. Compare the new unit to the old one to confirm it has the same inlet and outlet size, orientation, and mounting hole pattern. Install the new gasket or seal, place the pump, and secure it with screws. Reattach hoses with new clamps as needed and ensure there are no kinks in the hose routing. Reconnect the electrical connector and test fit before final tightening.
Reconnecting hoses and testing the new pump
Reattach all hoses in their original positions, secure clamps, and reconnect the electrical plug. Lower the toe-kick panel and plug the unit back into power or switch the circuit back on. Run a short wash cycle with the drain hose positioned correctly to verify proper drainage. Look for leaks around the pump and along hose joints, and listen for abnormal sounds that could indicate an air lock or loose connections.
Post-repair testing and common troubleshooting
After a successful test cycle, inspect the area for leaks and ensure the drum drains completely. If water remains, recheck hose connections, clamps, and the pump mounting. If the pump still refuses to drain, test the pump motor with a multimeter for continuity; a no-read or short may indicate a bad motor. Debris in the impeller or air lock in the drain line are common culprits that can persist even after a pump change. Revisit each step if drainage is incomplete.
Maintenance to prevent future failures
Regularly clean the filter and sump area to prevent debris from reaching the impeller. Use a dishwasher-safe rinse aid and periodically run a cleaning cycle with a vinegar and baking-soda solution to reduce mineral buildup. Inspect the drain hose for kinks and ensure 90-degree bends are avoided to maintain flow. Replacing worn clamps and seals promptly improves longevity and prevents leaks.
When to call a professional
If you are uncomfortable with electrical work or if water leaks persist after replacement, seek professional help. A licensed technician can verify the control board and wiring are not causing the issue and confirm compatibility with your dishwasher model.
Tools & Materials
- Replacement dishwasher drain pump(Ensure compatibility with your specific model and confirm inlet/outlet orientation)
- Gasket/seal kit(Replace all seals to prevent leaks)
- Replacement drain hose(Match length and diameter to your model; replace if cracked)
- Hose clamps(Stainless steel preferred for durability)
- Screwdrivers (Phillips and flat-head)(Various sizes to fit screws on the access panel and pump mounting)
- Nut driver or socket set(Needed for mounting bolts or nuts on some models)
- Pliers (needle-nose)(Helpful for hose clamps and small connectors)
- Multimeter(Optional for electrical continuity checks)
- Bucket(Catch any residual water during the swap)
- Towels or rags(Prevent spills and keep the area dry)
- Flashlight(Inspect dark corners of the pump housing)
- Silicone grease(Lightly lubricate O-rings if recommended by the pump manufacturer)
Steps
Estimated time: 60-90 minutes
- 1
Power down and drain the unit
Unplug the dishwasher and, if possible, switch off the dedicated circuit. Use towels to soak up any standing water in the tub and sump. This step reduces the risk of shock and makes it safer to work around the pump area, which can contain live components.
Tip: Have a bucket or shallow tray handy to manage residual water. - 2
Disconnect power and water
Carefully unplug the unit and shut off the water supply feeding the dishwasher. If your model has a water inlet valve accessible from the front, close it before you start removing panels. Label any connectors to simplify reassembly.
Tip: Double-check the circuit is de-energized with a tester before touching wiring. - 3
Access the pump area
Remove the toe-kick panel or bottom access door to reveal the pump and attached hoses. Take photos of each hose and the electrical connector from multiple angles to guide reassembly. Work slowly to avoid tearing hoses or damaging clips.
Tip: Keep track of small screws by storing them in labeled containers. - 4
Disconnect pump from hoses and electrical
Gently loosen hose clamps and detach the drain hoses from the pump. Disconnect the electrical connector connected to the pump’s motor. If wires are tight, loosen clamps before removing the pump from its mounting.
Tip: Do not force fittings; if a hose is stubborn, apply a small amount of penetrating oil and let it sit. - 5
Remove old pump and inspect mounting
Unscrew the pump mounting screws and lift the unit clear of the mounting bracket. Inspect the mounting area for corrosion or cracks and note the location of any ground wire or bracket attachment. Compare the old pump with the new unit for size and alignment.
Tip: Check for cracked housings or damaged impellers on the old pump. - 6
Install new pump and gasket
Place the new pump in position, align mounting holes, and secure with screws. Install the gasket or seal kit as directed by the manufacturer. Reconnect the hoses and clamps, ensuring a snug, leak-free fit.
Tip: Hand-tighten clamps first, then snug with a screwdriver—avoid overtightening. - 7
Reconnect hoses and electrical
Attach the drain hoses to the new pump, secure hose clamps, and reconnect the electrical plug. Ensure there are no kinks or twists in any hose route. Route wiring away from hot surfaces and moving parts.
Tip: Use zip ties to tidy the harness but leave enough slack for vibration. - 8
Test run and inspection
Restore power and run a short cycle to check for drainage and leaks. Observe the pump for proper operation and listen for unusual sounds. If any leaks appear, power down and reseat connections before attempting another test.
Tip: Be prepared to stop the test if a strong burning smell or smoke appears.
Got Questions?
Is pump repair safe for beginners?
Yes, if you follow basic safety steps: unplug, drain water, and use the correct replacement pump for your model. If the electrical work feels uncertain, seek professional help.
Yes, beginners can do it by following safety steps and using the right pump.
What are the signs of a failing drain pump?
Common signs include water not draining, a buzzing or loud motor, or water leaking near the pump area. If you hear unusual noises or see damp spots, inspect the pump and hose connections.
Look for poor drainage, buzzing sounds, and leaks as key indicators.
Can I reuse my old pump if it seems fine?
Reusing an old pump is not recommended if there are signs of wear, cracks, or damaged seals. Replacing with a new pump ensures reliability and reduces risk of future leaks.
It’s best to replace worn parts rather than reuse a questionable pump.
How long does a typical drain pump repair take?
For a typical model with straightforward access, expect 60-90 minutes. More complex models or limited access can take longer.
Most repairs take about an hour or so, depending on access and model.
Will replacing the pump fix all draining problems?
Not always. If the drain hose is clogged, the disposal connection is blocked, or the control board has issues, a new pump alone may not solve the problem.
A new pump solves pump-specific failures; other drainage issues may persist.
Watch Video
The Essentials
- Power down first and drain residual water
- Label and document every connection for accurate reassembly
- Test drainage after installation to confirm success
- Replace all seals to prevent future leaks
- Regular maintenance reduces future pump failures