How to Diagnose and Replace a KitchenAid Dishwasher Drain Pump
Learn how to diagnose, test, and replace a KitchenAid dishwasher drain pump with step-by-step guidance, safety tips, and practical troubleshooting for homeowners.

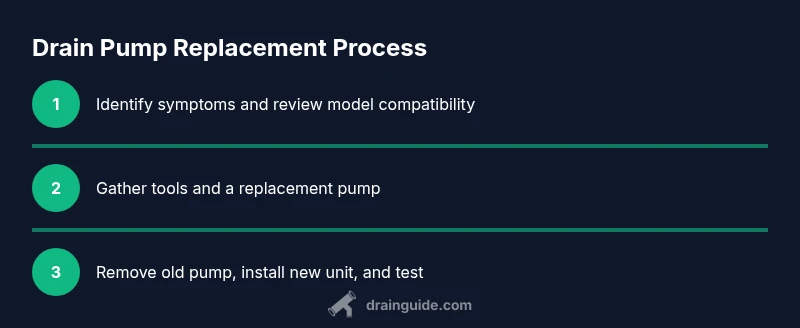
This guide shows you how to diagnose and replace a KitchenAid dishwasher drain pump. You'll learn how to safely power off, locate the pump, test for electrical continuity and clogs, disconnect hoses, remove the old pump, install a replacement, and verify proper draining with a short test cycle. No professional experience required.
What is a KitchenAid dishwasher drain pump and how does it work?
The drain pump is a small electric motor-driven impeller that pushes water out of the dishwasher during the drain phase. In most KitchenAid dishwashers, the drain pump is located near the bottom of the appliance, behind a kick panel or access panel. The pump is powered by the dishwasher's control board and shares a connection with the drain hose and a check valve. When the dishwasher completes a wash cycle, the control board activates the pump to expel dirty water into the household drain. Debris, grease, or a worn impeller can cause the pump to lose efficiency or fail completely. According to Drain Guide, understanding where the pump sits and how it’s wired is the first step in any successful diagnosis. This knowledge helps you distinguish a pump problem from a faulty sensor or clogged hose, and it informs the tools you’ll need and the precautions you’ll take.
If you’re dealing with a KitchenAid dishwasher drain pump issue, recognizing the pump’s role is essential. The drain pump works in tandem with the circulation pump and solenoids to ensure the dishwasher empties water at the right times. A failing pump can mimic other drainage problems, which is why a careful, model-specific approach matters. In practical terms, you’ll want to confirm that the pump housing is intact, that the impeller spins freely, and that the electrical connector is secure. Knowing these fundamentals helps you decide whether you’re simply clearing a clog or replacing a worn unit.
note”:null,
Tools & Materials
- Flat-head screwdriver(To remove the lower access panel and loosen screws on the pump housing)
- Phillips-head screwdriver(For interior screws securing the pump assembly)
- Nut driver or socket set(To release hose clamps and mounting brackets)
- Multimeter(Check pump coil continuity and resistance; set to ohms)
- Replacement KitchenAid dishwasher drain pump kit(Ensure compatibility with your model number; verify with the model label)
- Towels or absorbent rags(Place under the area to catch water during disassembly)
- Bucket(Optional for collecting water during clamp removal)
- Gloves(For grip and to protect hands from sharp edges)
Steps
Estimated time: 60-90 minutes
- 1
Power down and drain the machine
Unplug the dishwasher at the wall outlet or switch off the circuit breaker. Shut off the household water supply to prevent more water from entering the appliance. Remove the toe-kick panel or access panel and wipe up any standing water so you can safely work around the pump area.
Tip: Taking a photo of hose/wire routes before disconnecting helps with reassembly. - 2
Gain access to the drain pump
Remove the bottom rack if needed and locate the drain pump housing behind the lower panel. Gently remove screws securing the panel and set it aside. Clear any debris that might obscure the pump or hoses.
Tip: Keep track of screws and small parts by magnetizing a tray or labeled container. - 3
Disconnect hoses and electrical connections
Carefully release hose clamps and detach the inlet/outlet hoses from the pump. Disconnect the electrical connector from the pump, keeping note of its orientation. Label hoses if routing isn’t obvious to avoid misconnection during reassembly.
Tip: Never yank on hoses; gently loosen clamps with a screwdriver to prevent hose damage. - 4
Remove the old drain pump
Unbolt the pump from its mounting bracket and carefully pull it free. Inspect the mounting lips for wear and check the inlet screen for blockages. If you detect damage to the housing or impeller, replace the whole unit.
Tip: Inspect the impeller for breaks or warping; a damaged impeller is a common reason for poor draining. - 5
Install the new drain pump
Position the new pump in the mounting bracket, secure with screws, and reconnect the hoses in their original orientation. Reattach the electrical connector firmly and ensure there are no loose wires.
Tip: Ensure the gasket seating is even to prevent leaks. - 6
Test the assembly and verify drainage
Restore power and run a short diagnostic cycle with no dishes in the unit. Check for leaks, listen for the pump’s operation, and confirm that water drains completely within the cycle time window.
Tip: If water remains after the test, recheck hose connections and clamps for leaks.
Got Questions?
What are the common signs of a failing KitchenAid drain pump?
Common signs include standing water after a cycle, unusual draining noises, slow drainage, and occasional error codes related to draining. A non-spinning or stuck impeller often indicates a pump motor problem, while a burned smell suggests motor failure. Always rule out clogged hoses or mis-seated seals first before declaring the pump failed.
Look for standing water after washing, odd draining noises, or error codes—these point to a drain pump issue, though hoses should be checked first.
Can I replace the drain pump myself, or should I hire a professional?
If you’re comfortable with basic appliance repair and can safely shut off power and water, replacing the pump is a doable DIY task. Ensure you have model-specific parts and follow the manufacturer’s instructions. If you’re unsure about electrical work or the unit is under warranty, hire a professional.
You can do it yourself if you’re comfortable with basics, but don’t hesitate to call a pro if you’re unsure.
How do I know if my KitchenAid model uses this drain pump?
Check your model number on the label inside the door frame or the bottom edge. Then consult KitchenAid’s official parts catalog or Drain Guide compatibility guides to confirm the exact pump part number for your model.
Find your model number and look up the right pump part to ensure compatibility.
How long does a drain pump replacement take on a typical kitchenAid dishwasher?
Most DIY replacements take between 60–120 minutes depending on access to the pump and how stubborn hose clamps are. A professional service may vary based on the unit and accessibility.
Most people spend about an hour or two doing it themselves.
What safety precautions should I follow when replacing the pump?
Always unplug the machine and shut off the water supply before starting. Use gloves to protect your hands, and wear eye protection if you’re removing panels that could shed sharp edges.
Power off, water off, and protect yourself with gloves and eye protection.
Is a pump replacement worth it if my dishwasher is old?
If the dishwasher is 10–15 years old or has multiple failing components, you may consider replacement. A pump replacement can extend life, but evaluate overall efficiency, repair costs, and savings.
Consider the age and overall condition of the machine before deciding on repair vs. replacement.
Watch Video
The Essentials
- Verify pump symptoms before replacement
- Follow safe power-down procedures to avoid shock
- Keep tools organized and labeled for an efficient repair
- Test drain performance after replacement to confirm success