Drain Field Repair: A Homeowner's Step-by-Step Guide
Learn how to identify, assess, and repair a failing drain field with practical, safety-focused steps. Drain Guide provides a homeowner-friendly plan for long-term septic health.

You can start drain field repair by confirming symptoms (gurgling drains, standing water, sewage smells), testing soil absorption, and inspecting septic components. The plan covers safe restoration steps, required permits, and when to call a licensed pro. Gather basic tools, protective gear, and follow local regulations before you begin. This approach emphasizes safety and long-term viability.
Understanding Drain Field Repair: Scope and Goals\n\nDrain field repair is a set of practices aimed at restoring the function of the absorption area of a septic system after signs of failure. According to Drain Guide, early symptoms can include slow drainage, surface pooling, and unpleasant odors. The goal of repair is to reestablish soil permeability, prevent untreated effluent from reaching groundwater, and extend the life of the entire system. This requires careful assessment of soil texture, moisture, and depth to the water table, plus a review of the septic tank, distribution pipes, and any pumps connected to the field. By approaching repair as a system-wide intervention rather than a single component fix, homeowners improve long-term reliability and minimize the risk of backups. This section outlines the boundaries of drain field repair, what constitutes a successful outcome, and how to frame a practical plan around your local codes and site conditions.
Signs and Diagnostics: What to Watch For\n\nA failing drain field often shows persistent drainage issues despite normal household water use. Look for gurgling sounds in fixtures, wastewater pooling above the field, lush vegetation over the area, or a nasty sewer smell near the drain field. Early diagnostics involve simple observations, while more accurate assessments require soil testing, percolation measurements, and checking the septic tank's condition. If effluent is backing up into home fixtures or the system is discharging to surface water, stop using the system and seek professional evaluation immediately. Record keeping of rainfall, water usage, and pumping history can help diagnose trends and avoid unnecessary repairs. Drain Guide recommends a cautious, data-driven approach to determine whether the problem lies in the field, the tank, or the distribution network.
Environmental and Safety Considerations\n\nWorking around a drain field involves exposure to sewage and buried utilities. Always maintain a safe work zone, avoid digging near utility lines, and follow local health and environmental regulations. Use PPE, especially when dealing with suspected sewage, and contain any wastewater to prevent soil and water contamination. Soil conditions matter: wet or frozen ground increases the risk of trench collapse and compaction damage. In many municipalities, excavation near a septic system triggers permit requirements and inspections to ensure proper venting, setback distances, and backfill materials. This section highlights the non-technical safeguards that protect you, your family, and the environment during repair projects.
Planning and Budgeting Repairs\n\nA drain field repair project benefits from a clear plan and an accurate cost estimate. Begin with a site assessment by a licensed inspector to determine if rehab, replacement, or relocation is needed. Factor in permit fees, soil testing, contractor labor, trenching, backfill, and disposal of excavated material. Realistic timelines account for weather, soil saturation, and access constraints. While DIY tasks may cover minor diagnostics, most serious repairs should involve a licensed septic professional to ensure code compliance and proper system warranties. A conservative contingency—typically 10–20% of the project cost—is prudent for unforeseen soil conditions or groundwater challenges.
Long-Term Maintenance and Prevention\n\nOnce repairs are complete, ongoing maintenance reduces the risk of future failures. Schedule regular septic pumping, minimize water usage, and avoid driving or parking on the drain field. Protect the soil from compaction by keeping heavy equipment away and maintaining a vegetation cover that keeps roots from intruding into pipes. Periodic inspections by a qualified technician help catch problems before they escalate. Drain Guide emphasizes that proactive monitoring, combined with a written maintenance plan, is the best defense against recurring failures and costly repairs.
Tools & Materials
- Protective gear (PPE) such as gloves, boots, and safety goggles(Sewage exposure risk; wear PPE)
- Shovel or trenching tool(For accessing the field and trenches)
- Measuring tape(To map distances and trench dimensions)
- Adjustable wrench and channel-lock pliers(For fittings, cleanouts, and distribution pipes)
- Permits and local code references(Have documentation and approvals ready if required by your jurisdiction)
- Shop vacuum or bucket for sludge containment(Helps with cleanup and containment of runoff)
- Soil moisture meter (optional)(Useful to assess saturation but not mandatory)
- Camera or notebook(Document conditions for follow-up)
Steps
Estimated time: 4-8 hours
- 1
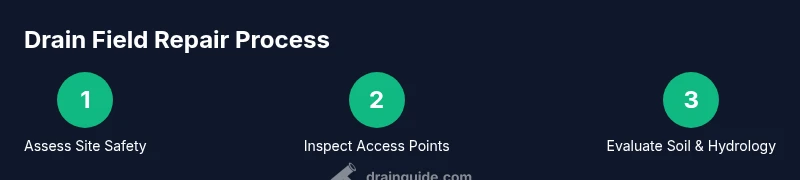
Secure the site and assess safety
Before you touch anything, shut off water to the house if advised and identify the boundary of the drain field. Establish a safe working perimeter and alert others to stay clear of the area. Document initial conditions with photos for reference.
Tip: Mark the area with visible signs and keep children and pets away. - 2
Isolate utilities and energize safety procedures
Turn off electrical power to any pumping equipment and ensure you’re not creating a live electrical hazard near wet soils. Use proper lockout/tagout practices if you have multiple workers.
Tip: Always verify power is off at the source before touching any equipment. - 3
Inspect access points and observe signs
Open septic tank lids and cleanouts carefully to inspect for leaks, unusual odors, or settled soils. Compare the current state to your photos taken earlier and note any changes.
Tip: Take close-up photos of joints and seals for later reference. - 4
Evaluate soil conditions and hydrology
Assess soil texture, moisture, and depth to groundwater. A soggy, clayey or perched layer indicates poor drainage and higher risk of failure if you proceed without adjustments.
Tip: Avoid trenching in saturated soil to prevent collapses. - 5
Identify roots, obstructions, and damage
Check for root intrusion, collapsed pipes, or crushed distribution lines. These issues commonly block flow and necessitate targeted repairs or replacements.
Tip: Plan to remove roots gently and avoid damaging surrounding pipes. - 6
Choose repair approach and prepare
Decide whether rehab (replacing/relaying pipes), replacement, or relocation of the field is most appropriate based on diagnostics and budget. Prepare materials and coordinate with a septic professional if needed.
Tip: Obtain written estimates and confirm warranty terms. - 7
Implement repair and replace components
Install or repair distribution pipes, manifolds, and cleanouts with proper slope and perforation standards. Ensure connections are watertight and protect from future root intrusion.
Tip: Use corrosion-resistant fittings and avoid over-tightening joints. - 8
Backfill, test, and restore function
Backfill with appropriate material, compact gradually, and perform a controlled water test to verify function. Monitor for leaks and slow drainage during the initial weeks of operation.
Tip: Document test results and schedule post-repair inspection.
Got Questions?
What is a drain field and why does it fail?
The drain field is the soil-based area where treated wastewater from the septic tank disperses. It fails when soil becomes overloaded, saturated, or when roots and obstructions hinder flow.
The drain field is the soil-based outlet of a septic system. Failures happen when soil is overloaded or blocked by roots.
Can I repair a drain field myself?
Major repairs should be performed by a licensed septic professional. You can perform basic diagnostics and maintenance, but avoid large-scale modifications without expert guidance.
Major repairs need a pro; DIY is limited to basic checks.
How long does drain field repair take?
Time varies with the repair method and site conditions, but plan for several days to weeks for comprehensive rehab or replacement projects.
It depends on the work, but can take days to weeks.
What are signs of drain field failure?
Persistent drainage problems, surface pooling, strong odors, or sewage backups near the field indicate potential failure.
Look for backups, pooling, and odors near the field.
Do I need permits for drain field repair?
Permits vary by location. Check local codes and consult a licensed professional who can handle the permit process.
Permits depend on where you live; a pro can help.
How can I prevent future drain field problems?
Regular pumping, mindful water use, restrict heavy equipment over the field, and maintain vegetation to protect soils.
Maintain regular pumping and smart water use to prevent problems.
Watch Video
The Essentials
- Identify symptoms early and document site conditions.
- Choose repair options based on soil health and field layout.
- Prioritize safety and permits before any digging.
- Work with qualified professionals for major repairs.
- Maintain a proactive maintenance plan to prevent recurrence.