Drain Soap Dish: Step-by-Step Guide to Clear, Clean, and Prevent Clogs
Learn how to drain a soap dish, remove buildup, and prevent clogs with simple, safe steps. Drain Guide provides practical, step-by-step guidance for a cleaner sink and happier plumbing.

By the end of this guide, you’ll know how to drain a soap dish, remove gunk, and prevent future clogs using safe, kitchen-friendly methods. Gather basic tools, a few pantry items, and a sink-safe cleaner. This quick answer previews the practical steps Drain Guide recommends for reliable results. You’ll learn to sanitize, inspect the trap, and choose safer cleaners.
Why drain soap dish maintenance matters
A soap dish sits at the edge of your sink, capturing runoff and promoting a dark, damp micro-habitat if neglected. Soap scum, mineral deposits from hard water, and tiny hairs can accumulate around the drain opening and inside the nearby gaps. Over time, this buildup can slow drainage, promote odors, and invite mold. According to Drain Guide, a clean, well-maintained soap dish drain reduces localized clogs and helps keep kitchen plumbing flowing smoothly. A few minutes of routine care—rinsing, scrubbing with a soft brush, and drying the area after use—goes a long way toward preventing bigger problems. The Drain Guide team found that homeowners who perform a quick weekly check see fewer issues with the sink’s drainage and fewer odors. This short investment now pays off with fewer maintenance calls and less time spent dealing with stubborn clogs in the future. In this guide, you’ll learn how to drain a soap dish safely, what tools you’ll need, and the best practices to keep your kitchen drain clean and odor-free.
Common causes of clogged soap dish drains
Most soap dish clogs start small but grow if ignored. The soap film itself can form a soft plug at the drain opening, catching hair and food particles that rinse from the sink. Hard water minerals combine with soap to form a crusty residue that adheres to the dish and pipe walls. If a dish is left wet, moisture supports mold and bacteria, which can contribute to unpleasant smells and occasional gurgling in the sink. Additionally, a large or heavy soap dish can jam against the drain plate, redirecting water movement and promoting standing water in the basin. Regular kitchen usage compounds these effects; daily tasks add more soap scum and debris that eventually travels toward the trap or pipe. Recognizing these patterns helps you intervene early with a targeted cleaning, preventing a minor buildup from becoming a full blockage.
Safe tools and materials for soap dish maintenance
Before you begin, assemble a few basic tools and materials that are safe for most kitchen drains. Rubber gloves protect your hands from cleaners and bacteria. A soft-bristle brush or old toothbrush helps lift soap film without scratching surfaces. A sponge or microfiber cloth is ideal for wiping and drying. Optional but helpful items include baking soda for gentle scrubbing and deodorizing, white vinegar for a light disinfecting rinse, and hot water for flushing away loosened debris. For stubborn clogs, a rubber-plugged drain snake or flexible wire can assist, though you should avoid forcing tool insertion if you’re unsure about pipe configuration. Keep pliers or tweezers handy to remove visible hair or debris safely. Always verify that any tools you use are appropriate for your sink material (stainless, porcelain, enamel) to avoid scratches.
How to clean and restore the soap dish drain using household items
Start by removing the soap dish and rinsing it under warm water to dislodge loose debris. Create a paste with baking soda and a small amount of water, then scrub the dish, the drain rim, and the surrounding area with a brush. Rinse thoroughly with hot water to flush away loosened film. If buildup persists, sprinkle baking soda into the drain and pour a kettle of hot water or very hot tap water down the drain; wait 5–10 minutes, then flush again. For extra effectiveness, pour a small amount of white vinegar and let it fizz for a few minutes before rinsing. Dry the soap dish and nearby surfaces completely before reassembling. If you notice lingering odors or slow drainage, consider inspecting the trap behind the sink or consulting a professional for deeper cleaning.
Troubleshooting stubborn buildup and odors
Persistent buildup or odors may indicate a deeper issue beyond the soap dish itself. If the sink remains slow after thorough cleaning, check for hair in the trap and around the P-trap if accessible. Do not mix chemical cleaners haphazardly; avoid combining bleach with ammonia or vinegar in enclosed spaces. A gentle, regular maintenance routine reduces the likelihood of recurring problems. If a clog recurs despite your best efforts, there may be a more significant blockage in the drain line, requiring professional equipment such as a plumber’s auger or camera inspection. In most cases, however, a disciplined cleaning schedule and careful ingredient choices keep the soap dish drain functioning well.
Preventive maintenance routine you can follow
Adopt a simple weekly habit to prevent buildup: rinse the dish, wipe the rim, and dry the area after use. Consider placing a mesh screen in the soap dish outlet to catch hair and particles. Use hot water periodically to rinse away soap film and avoid leaving the dish wet overnight. For hard-water areas, a monthly soak with a baking soda solution can help maintain clarity and odor control. If you have a reusable dish, opt for moisture-wicking materials that dry quickly. Finally, keep a small stash of safe cleaners on hand and label them clearly to prevent accidental mixing. A proactive approach minimizes rare outages and keeps your kitchen drainage smooth.
Authority sources and further reading
- https://extension.illinois.edu
- https://extension.oregonstate.edu
- https://www.epa.gov
Note: These sources offer general guidance on household cleaning, safe chemical use, and drain maintenance. Always adapt recommendations to your specific plumbing configuration and material type.
Tools & Materials
- Rubber gloves(Protects hands from cleaners and bacteria)
- Soft-bristle brush or old toothbrush(Gently scrubs soap scum without scratching)
- Sponge or microfiber cloth(For wiping and drying surfaces)
- Baking soda(Deodorizes and scrubs without harsh chemicals)
- White vinegar(Mild disinfectant; do not mix with bleach)
- Hot water kettle or pot(Flushes debris and helps dissolve buildup)
- Drain snake or flexible wire(Useful for stubborn clogs in accessible areas)
- Pliers or tweezers(Safely remove hair or debris)
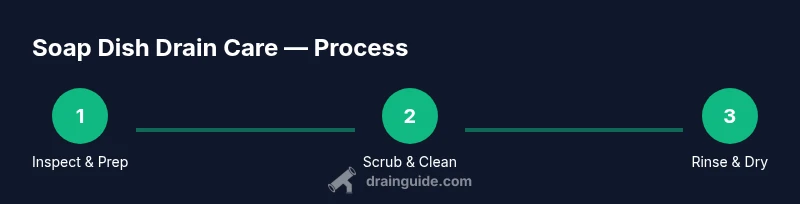
Steps
Estimated time: 25-40 minutes
- 1
Clear the area and prep safety gear
Put on gloves and lay down towels to catch spills. Remove the soap dish and clear the sink area so you can work without slipping or losing small parts.
Tip: Keep a small trash bag handy for debris; it helps keep the workspace tidy. - 2
Remove the soap dish and inspect
Take the dish off the sink and inspect the outlet and surrounding rim for visible hair, soap film, or mineral crust. Photograph the setup if you’re unsure about reassembly.
Tip: Document the orientation of the dish to ease reinstallation. - 3
Rinse and scrub the dish
Rinse the dish under warm water, then scrub with a soft brush using a baking soda paste if needed. Pay attention to the outlet opening and edges where grime tends to accumulate.
Tip: Avoid metal brushes; they can scratch enamel or ceramic surfaces. - 4
Flush and dissolve buildup
Rinse with hot water to flush away loosened debris. If crust remains, apply baking soda directly into the drain area and pour hot water over it; wait 5–10 minutes before another flush.
Tip: Do not mix baking soda with vinegar directly in the drain for prolonged periods. - 5
Optional deeper clean
For stubborn residue, pour a small amount of white vinegar, let it fizz for a few minutes, then rinse again with hot water. If you can access the trap, remove any obvious buildup with pliers or tweezers.
Tip: Only remove traps if you’re confident in reassembly and you have a wrench or appropriate tools. - 6
Dry, reassemble, and test
Dry the soap dish and surrounding area completely. Reinstall the dish, run warm water through the sink, and observe drainage and odor. If clear and dry, you’re finished.
Tip: Keep the area dry to prevent mold between uses.
Got Questions?
Why does my soap dish drain slow down?
Slow drainage is usually caused by soap scum buildup, hair, and mineral deposits that form a plug. Regular cleaning with hot water and gentle scrubbing helps prevent clogs from forming. If the problem persists, a deeper inspection of the drain path may be needed.
A slow drain is usually from soap scum and hair buildup. Regular cleaning with hot water and a gentle scrub often fixes it; if not, deeper inspection may be required.
Can I use vinegar and baking soda together?
Vinegar and baking soda can be used separately for cleaning, but avoid creating a long-lasting chemical reaction in closed plumbing. If used together, rinse thoroughly between applications and do not rely on them as a substitute for mechanical cleaning when a clog is present.
You can use them separately, but don’t rely on them to clear a stubborn clog; rinse well between uses.
Is it safe to remove the P-trap to clear a soap dish clog?
Only attempt removing a P-trap if you are confident in your plumbing knowledge and can reassemble it correctly. Work over a pan to catch water, and wipe down components before reassembly. If you’re unsure, call a professional.
Only do it if you’re comfortable with plumbing; otherwise, call a professional.
How often should I clean a soap dish drain?
Aim for a quick weekly rinse and wipe, with a deeper clean every 1–2 months depending on usage and water hardness. Regular maintenance helps prevent clogs and odors.
Clean weekly, with a deeper clean every month or two depending on use.
What should I avoid when cleaning the drain around a soap dish?
Avoid mixing bleach with ammonia or vinegar in closed spaces, and don’t use harsh metal tools that can scratch finishes. Stick to gentler scrubbing pads and plastic or rubber tools when possible.
Don’t mix strong cleaners; use non-scratch tools and gentler cleaners.
When should I replace the soap dish itself?
Replace the soap dish if it cracks, holds odors after cleaning, or fails to drain properly despite maintenance. A damaged dish can harbor bacteria and contribute to ongoing odors.
Replace the dish if it’s cracked or keeps smelling bad even after cleaning.
Watch Video
The Essentials
- Tackle soap dish buildup early to prevent clogs.
- Use safe, household cleaners and avoid mixing chemicals.
- Regular drying and occasional baking soda rinses reduce odors.
- If slow drainage persists, inspect traps and consider professional help.
- Maintain a simple weekly routine for best results.