Drain System in Basement: Troubleshooting & Fixes Guide
Learn how to inspect, diagnose, and repair a drain system in basement with safety tips and maintenance routines to prevent flooding, mold, and water damage.

This guide helps you diagnose, inspect, and repair a drain system in basement to prevent water intrusion. You'll start with safety, gather basic tools, locate the main cleanout, assess traps, check sump pump operation, and perform clearings if needed. Follow step-by-step instructions with warnings to avoid hazards. This quick answer outlines the essential goals and safety prerequisites, so you can decide if you can complete the tasks or if you should hire a professional.
Why proper basement drainage matters
A sound drain system in basement is essential to keep moisture out of living spaces, protect foundation walls, and prevent mold growth. Water intrusion from high groundwater, rain, or plumbing leaks can compromise structural integrity and trigger costly repairs. The Drain Guide team emphasizes that maintenance, not just installation, pays dividends over time. Regular inspection helps you spot early warning signs—dripping pipes, damp concrete, distinct odors, or damp patches—that precede bigger problems. In homes with finished basements, poor drainage can ruin possessions and degrade air quality. By prioritizing a reliable drainage strategy, you create a safer, drier, healthier home for years to come.
The core components of a basement drainage system
Most basement drainage relies on a combination of interior and exterior elements designed to channel water away from living areas. Key parts include floor drains or channel drains, a sump pit with a pump, discharge lines, traps to prevent sewer gases, and a venting path to balance pressure. In some homes, perimeter drain tiles (weeping tiles) collect groundwater around the foundation before it enters the interior drain network. The goal is continuous water removal, proper sealing at joints, and careful slope toward the sump or the discharge point. Drain Guide analysis suggests keeping these parts well-maintained and free of debris to minimize clogs and backflow risk.
Common failure modes and what they indicate
Clogs often arise from hair, sediment, or mineral buildup. Backups can point to a blocked main line or a leaking seal. A constantly running sump pump may indicate a failing float switch, a clogged impeller, or an overwhelmed pump during heavy rain. Sewer gas odors suggest venting problems or a compromised trap seal. Another frequent issue is a discharge line that is blocked or frozen, especially in cold climates. Recognizing these patterns early can prevent water damage and help you communicate clearly with a professional if needed.
Safety first: essential precautions before you start
Working on a basement drainage system involves electricity, water, and confined spaces. Always shut off power to sump pumps and nearby electrical outlets before touching any equipment. Wear protective gloves, goggles, and non-slip footwear. Ensure good ventilation and keep a bucket or towels handy for spills. If you suspect sewer backups or hazardous gas, leave the area and contact a qualified plumber immediately. Budget time for a careful, methodical approach instead of rushing through steps that could create hazards.
Tools, materials, and setup you’ll need
Having the right tools ready prevents delays. A basic kit includes a flashlight, a sturdy plunger, a plumber’s snake (drain auger), a sturdy bucket, rubber gloves, safety goggles, adjustable wrench, channel-lock pliers, a utility knife, and a consumer-grade enzyme-based cleaner for organic clogs. For exterior work, you may need a shovel, a tamping bar, and a hose to test discharge. Keep rags or towels on hand to wipe spills and protect flooring. If you’re unsure about the sewer line, prepare a plan to engage a professional sooner rather than later.
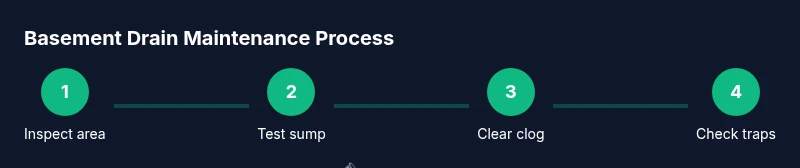
Step-by-step diagnosis: where to start and how to proceed
Begin with a visual survey of the entire drainage path: check floor drains, sump basin, discharge lines, and visible piping for cracks or leaks. During a rain event, observe the water flow—does it drain steadily or back up somewhere? Next, test the sump pump by pouring water into the basin to trigger the float switch. Listen for the pump operation and check that the discharge hose is not kinked. If you hear water filling the pit or observe slow drainage, proceed to clearing the line with a snake or manual plunger. Finally, inspect all Traps and re-run a water test to see if the seal and drainage path are functioning properly.
How to clear clogs safely and effectively
For minor clogs, a plunger positioned over the drain and a firm, steady push-pull can often dislodge obstruction. If that fails, insert a drain snake into the pipe and rotate the handle to break up the clog. Avoid forceful jerks that can damage pipes. Enzyme-based cleaners can help organic matter but avoid harsh chemical drain cleaners, especially in enclosed basements, as fumes can accumulate and damage seals. After clearing, flush with water and observe the flow. Repeat if necessary, but stop if the clog recurs frequently—this signals deeper issues that require professional attention.
Sump pump checks, backups, and what to monitor
Inspect the sump pump’s electrical connection, power source, and alarm or backup battery if present. Verify that the check valve on the discharge line prevents backflow and that the pipe runs to a suitable outdoor outlet or drainage point away from the home. If you experience frequent floods or power outages, consider a backup pump or a battery-backed sump system. Routine testing—at least monthly—helps confirm readiness for heavy rainfall. Keep the discharge area clear of debris and ensure proper slope away from the foundation.
Maintenance plan: ongoing care to keep drainage healthy
Create a simple routine to inspect basements drains, traps, and visible pipes every 1–3 months, depending on climate and occupancy. Clean out visible debris from floor drains and verify that seals are intact. Annually inspect the sump pump, test performance, and service any mechanical components per the manufacturer’s guidelines. Consider professional camera inspections if you notice recurring issues, as hidden blockages or pipe corrosion may not be visible from the surface. Documentation of maintenance dates helps you track when to repeat certain tasks.
When to call a professional and what to expect
If you notice persistent odors, repeated backups, or signs of structural water intrusion, consult a licensed plumber. A professional can perform a camera inspection, verify sewer line integrity, and assess drainage slope and venting. Expect a diagnostic visit to include an inspection of traps, cleanouts, and the sump system, followed by a written plan and cost estimate. By understanding the scope and options, you can decide whether a repair, replacement, or more extensive waterproofing is necessary.
Tools & Materials
- Flashlight(Bright, hands-free preferred)
- Rubber gloves(Chemical and biohazard protection)
- Safety goggles(Eye protection during every step)
- Plunger (cup/plunger)(Cover floor drain thoroughly)
- Drain snake / auger(Manual or handheld with secure handle)
- Adjustable wrench(For loosening clamps and fittings)
- Channel-lock pliers(Grip stubborn joints)
- Utility knife(Access points or cleanouts)
- Bucket and towels(Catch leaks and wipe spills)
- Enzyme-based cleaner (optional)(Safer alternative to harsh chemicals)
- Sump pump check valve (if needed)(Replace if flow reverses)
- Backup power option (optional)(Battery backup for sump pump)
Steps
Estimated time: 60-90 minutes
- 1
Power down and secure area
Turn off the circuit feeding the sump pump and unplug it if it’s plug-in. Clear the area of valuables and ensure good lighting. This reduces the risk of electrical shock and keeps you focused on the task.
Tip: Tag the switch to prevent accidental re-energizing during the repair. - 2
Inspect the immediate area for hazards
Visually check for exposed wiring, cracked pipes, or standing water around the sump pit and floor drains. If you identify live wires or significant water, pause and seek professional help.
Tip: Wear waterproof footwear and avoid touching wet surfaces with bare skin. - 3
Locate access points and the main cleanout
Find the cleanout on the main drain line and beside any floor drains. If the cover is difficult to remove, use a basin wrench or pliers with care to avoid damaging threads.
Tip: Document the layout with a quick sketch to prevent future confusion. - 4
Test the sump pump operation
Pour a small amount of water into the sump pit to trigger the float switch. Listen for the pump to start and check that water is expelled through the discharge line.
Tip: If the unit does not run, check the power source, switch, and fuse or breaker. - 5
Clear clogs with plunger and snake
Begin with a solid seal over the floor drain and plunge firmly. If resistance remains, insert the drain snake and rotate slowly to break up the clog. Avoid forcing the snake.
Tip: Withdraw the snake gradually to collect the debris for disposal. - 6
Verify traps and run a water test
Run water through all drains, checking for proper flow and no odor. Inspect trap seals in basement sinks or floor drains and reseal if necessary to prevent sewer gas entry.
Tip: If odor persists, there may be a venting issue or a compromised trap.
Got Questions?
What commonly causes basement drain clogs?
Hair, sediment, and mineral buildup are frequent culprits. Tree roots and debris from gutters can also enter the system, especially if exterior drains are overwhelmed.
Common clogs are caused by hair, sediment, and minerals; roots and debris can worsen the issue after heavy rain.
Can I use chemical drain cleaners in a basement drain?
Chemical cleaners can damage seals and pipes, and fumes can accumulate in enclosed spaces. Use enzyme-based cleaners when possible and prefer mechanical clearing methods first.
Avoid harsh chemicals in basements; try mechanical clearing first and consider enzyme cleaners if needed.
How often should I inspect basement drainage?
Perform a quick inspection after heavy rainfall and a more thorough check every 3–6 months, depending on usage and climate.
Check after rain and periodically every few months to stay ahead of issues.
When is it necessary to replace a sump pump?
If the pump runs constantly, no longer keeps water below a threshold, or fails during a test, replacement is usually warranted.
If it runs constantly or fails the test, replace the sump pump.
What should I do if sewer gas is detected in the basement?
Turn off nearby electrical devices, evacuate if necessary, and call a licensed plumber. Sewer gas indicates a trap or venting issue that requires professional assessment.
If you smell sewer gas, leave the area and contact a plumber promptly.
Is a backup sump pump worth the investment?
A backup pump provides protection during power outages or during storms when the primary pump is overwhelmed. Assess your risk and budget.
A backup pump can be a smart safety net for power outages and heavy rains.
Watch Video
The Essentials
- Inspect main components and cleanouts before work.
- Test sump pump, check discharge and check valve.
- Clear clogs safely with plunger and snake; avoid harsh chemicals.
- Document maintenance for future reference.
- Call a professional for persistent backups or sewer odors.