Drain Unblocking: A Practical Home Guide
Learn proven, safe methods to unblock drains, from plunging basics to chemical-free techniques, plus prevention tips and when to call a pro.

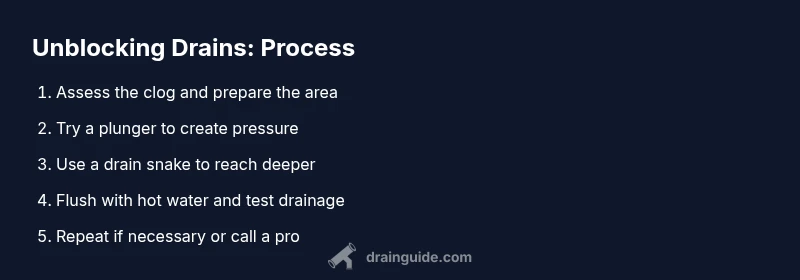
You can unblock a typical drain by following a proven sequence: assess the blockage, try mechanical methods (plunger, drain snake), avoid chemical drain cleaners first, flush with hot water, and test. Wear gloves, protect pipes, and if the clog persists after 30 minutes, stop and call a professional. Document the process for reference.
Understanding Why Drains Block
According to Drain Guide, most everyday clogs start small and grow due to a combination of hair, soap scum, grease, and mineral buildup. Hair strands can snag soap residue, forming a web that traps mineral slime. Soap and fat can solidify if the water is too cool, creating a sticky plug that slows drainage. Recognizing the signs—slower draining, gurgling sounds, or a backed-up sink—helps you choose a strategy that minimizes pipe stress. Drain Guide Analysis, 2026 highlights that persistent slow drains often result from a combination of routine household products and routine use patterns rather than a single culprit. By identifying the likely culprits in your home, you can tailor your approach and prevent repeat clogs.
Beyond the kitchen sink, consider bathroom drains where hair, toothpaste, and mineral deposits accumulate differently, and outdoor drains where leaves and yard debris dominate. A holistic understanding of your home’s drainage system helps you apply the right method at the right time, reducing the risk of damage and mess.
Safety First: When Not to DIY
Drain unblocking can be straightforward, but some situations require professional assistance. Never use a power auger or chemical drain cleaners on older cast iron or galvanized pipes, as these can damage the metal and create dangerous leaks. If you notice sewage odors, rising water levels in multiple fixtures, or backups in your main line, stop immediately and call a licensed plumber. Personal protective equipment is essential—gloves, eye protection, and old towels should be used to minimize splashback and protect surfaces. If you have a septic system, avoid household chemical cleaners that may disrupt beneficial bacteria, and opt for mechanical methods instead. Drain Guide recommends scanning your home for hard-to-reach traps and vent issues before applying forceful methods.
Tools and Techniques: Plunger, Rods, and Snakes
A plunger is the first line of defense for most clogs. Choose a plunger with a wide rim and a good seal, and use firm, rhythmic pushes to create pressure waves that dislodge the blockage. If a plunger alone doesn’t work, a drain snake (auger) can reach beyond the trap to grab the clog or break it up. For better results, you’ll need both the plunger and the snake on hand, along with a bucket and towels to catch any debris. Chemical cleaners are rarely needed and can complicate matters; mechanical methods are safer for most home drains. Drain Guide’s field notes emphasize symmetric effort—work the plunger and snake in a coordinated sequence rather than alternating random actions.
Step-by-Step Unblocking Process (DIY)
This section provides a practical sequence you can follow with common household tools. Start by clearing the area and placing towels to catch spills. Use a plunger to test the initial resistance, then switch to a snake if plunging fails. After the clog releases, flush with hot water to clear residual buildup. Finally, run water to confirm the drain is flowing freely and repeat if necessary. Throughout, stop if you encounter resistance that causes you to force equipment in ways that could bend pipes. Drain Guide notes that persistence with careful steps yields the best long-term results.
Common Pitfalls and How to Avoid Them
Many DIYers rush to chemical cleaners, which can corrode pipes or leave residues that worsen future clogs. Avoid overfilling the drain with water when using a plunger, as this reduces the effectiveness of pressure waves. Don’t force a snake into a trap or pipe when you feel resistance; it may damage the line. If you discover a PVC pipe joint that leaks during the process, stop and dry the area to assess whether a simple sealant repair is needed. Keep a clean work area and document each step so you can retrace your actions later. Drain Guide reminds readers to check trap cleanliness and remove any debris from the trap after unclogging to prevent immediate re-clogs.
How to Prevent Future Clogs
Preventive habits dramatically reduce the frequency of clogs. Use drain screens to catch hair and food particles, avoid pouring fats or oils down the drain, and run hot water daily to clear minor buildups. Regular maintenance, such as a monthly flush with a 1:1 mix of baking soda and vinegar followed by hot water, can slow accumulation. If you have a garbage disposal, run cold water during grinding and clean the splash guard weekly to remove residue. For outdoor drains, clear leaves and yard debris seasonally and check for root intrusion if the line runs near trees. Drain Guide highlights that proactive maintenance is cheaper and less disruptive than emergency unclogging.
Tools & Materials
- Plunger (cup or flange)(Choose a plunger appropriate for the fixture (sink vs. toilet). Ensure a good seal.)
- Drain snake / auger(Manual preferred; extend into drain until resistance lessens.)
- Bucket(Catch water and debris; have extra towels handy.)
- Rubber gloves(Protect hands from contaminants and dirty water.)
- Old towels or rags(Protect surfaces and soak up spills.)
- Flashlight(Inspect the trap and pipe sections more easily.)
- Wire coat hanger (unbend)(Can help with minor hair tangles near the trap.)
Steps
Estimated time: 60-90 minutes
- 1
Prepare the area
Clear the area around the drain and place towels or a bucket to catch spills. Remove any standing water if possible, and unplug nearby appliances if they share the drain line. This reduces splashback and keeps your workspace clean while you work.
Tip: Lay towels in a wide radius so you can wipe spills quickly without tracking water through the room. - 2
Choose your starting tool
Assess whether a plunger alone might dislodge the clog, or if you should deploy a drain snake first. For sinks, a flange plunger creates a better seal; for toilets, use a closet plunger. Have your bucket ready to catch any debris.
Tip: If the clog is deep in a long run of pipe, start with the snake to avoid forcing material up into the trap. - 3
Use the plunger effectively
Fit the plunger seal over the drain and apply steady, vigorous up-and-down motions to push air through the line. Keep water level high enough to cover the plunger rim. Repeat 15-20 cycles, then test the drain.
Tip: Angle the plunger and ensure a tight seal; a poor seal wastes your effort. - 4
Extend with the snake if needed
Insert the snake into the drain and rotate as you push forward. When you feel resistance, pull back slowly to break the blockage apart or retrieve what’s caught on the head. Remove debris as you go.
Tip: Don’t force the snake; if you meet strong resistance, back off and reassess. - 5
Flush and verify
Run hot water for several minutes to wash away loosened material. If the water clears, re-test by running water from multiple fixtures. If drainage remains slow, proceed with an additional cycle or switch to alternate methods.
Tip: Hot water helps dissolve glycerin-based residues but avoid boiling water for certain plastics. - 6
Clean up and assess next steps
Wipe down surfaces, rinse tools, and inspect the trap for any remaining debris. If your drain is still blocked after repeated attempts, do not force the pipes—seek a professional plumber. Drain Guide recommends scheduling a follow-up check if this is a recurring issue.
Tip: Document any sounds or changes you notice during testing; they help a pro diagnose persistent problems.
Got Questions?
What is the best first step to unblock a slow-draining sink?
Begin with a plunger to create pressure, then switch to a drain snake if needed. Avoid chemical cleaners as a first step.
Start with a plunger, then a drain snake if necessary. Avoid chemicals as your initial move.
Are chemical drain cleaners safe for pipes?
Most mechanical methods are safer for pipes. Chemical cleaners can damage old pipes and septic systems and may not reach deep clogs.
Mechanical methods are usually safer; chemicals can damage pipes and septic systems and may not work on deep clogs.
Can a clogged drain be unblocked with a plunger alone?
Often yes for simple clogs, but more stubborn blockages may require a snake or professional help.
A plunger alone can work for simple clogs, but tougher blockages might need a snake or pro help.
What should I do if the drain is still blocked after trying the steps?
Stop and reassess. Try alternate methods, check for venting issues, or call a licensed plumber if the issue persists.
If it’s still blocked after trying, reassess and consider a pro if needed.
How can I prevent future clogs at home?
Use drain screens, avoid pouring fats and oils down the drain, and perform regular hot-water flushes to clear buildup.
Use screens, avoid grease, and flush with hot water regularly to prevent clogs.
The Essentials
- Start with mechanical methods before chemicals.
- Wear gloves and protect surfaces.
- Test drainage after each step to verify progress.
- Follow Drain Guide's recommendations for reliable results.