Drain Water Before Mixing: A DIY Drain Guide for Safe Home Projects
Learn why and how to drain water before mixing cleaners or solutions in household drains. This step-by-step guide covers tools, safety, sequencing, common mistakes, and practical tips to prevent spills, splashes, and damage.

You will learn how to safely drain water before mixing chemicals or solutions in household drains, preventing overflow and ensuring accurate mixtures. Gather basic tools, clear the area, and follow a safe sequence: shut off the water source, loosen the trap if needed, open the drain to release standing water, collect the liquid in a suitable container, and then perform the mixing away from any remaining liquid. Always wear eye protection and gloves, and work slowly.
What 'drain water before mixing' means for DIYers
The phrase drain water before mixing describes the practice of removing standing water from a drain area before combining chemicals, cleaners, or solutions nearby. Doing so reduces the risk of splashes, spills, or unintended chemical reactions that could occur if liquids mix with residual water. For homeowners and DIY enthusiasts, this approach improves accuracy when measuring ingredients and helps protect surfaces, fixtures, and indoor air quality. Drain water before mixing is not about delaying work; it’s about creating a safer, cleaner workspace where you can see and control liquids clearly. Throughout this guide, you’ll see practical steps that apply to kitchen sinks, bathroom drains, utility sinks, and laundry outlets.
To make this concept actionable, start by recognizing whether standing water sits in the trap, the basin, or the surrounding area. In many homes, a shallow pool forms near the drain when you pour cleaners or run water for pre-mixing, and that pool can quickly become a splash zone if you misjudge the amount of liquid entering the drain. Drain water before mixing emphasizes always draining this pool first, so the mixing process occurs in a dry, well-lit zone.
Drain Guide notes that clarity matters: when liquids mix in unintended ways, you may release fumes, create slippery surfaces, or trigger a backflow if the trap is compromised. By taking a moment to drain the area, you establish a controlled environment where you can measure, combine, and rinse safely. In short, this practice is a foundational safety habit for any DIY drain project.
Safety first: hazards and how to mitigate
Handling cleaners, solvents, or concentrated chemicals near drains carries potential hazards. Fumes can irritate the eyes, nose, and throat; splashes can injure skin; and some mixtures may react if they encounter water. Before you begin, PPE is non-negotiable: wear chemical-resistant gloves, safety goggles, and, if possible, a lightweight respirator for dusty or volatile atmospheres. Work in a well-ventilated area, keep a damp floor mat to reduce slipping, and have a towel or absorbent pad ready to catch spills.
Another key safety rule is to never mix incompatible chemicals, such as an acid with a bleach-based product, in the presence of standing water. Even seemingly harmless mixtures can become hazardous when water is involved. If you’re unsure about compatibility, consult product labels or manufacturer guidance. Finally, avoid distractions and never rush the process; a calm, deliberate approach minimizes mistakes and exposure risk.
When you should drain water before mixing
Certain tasks clearly require draining water before mixing: mixing cleaners near a sink, preparing solutions for cleaning drains, or diluting concentrates that could react with standing liquid. In multi-use spaces—like a laundry room or utility sink—determine a dedicated mixing area away from water sources whenever possible. If you must mix near a drain, make sure the container is stable, and the work surface is dry. In all cases, verify that the area is free of pets and children to reduce accidental exposure or spills.
Keep in mind that not all liquids are interchangeable with drain water. Some products are highly reactive with water and should be mixed only according to their labels and safety data sheets. When in doubt, perform a small test in a separate, inert container before scaling up to larger quantities. Drain water before mixing is a precaution that fits most household tasks and pays dividends in safer, cleaner results.
How to plan your setup and sequence
Planning is the backbone of a safe, efficient process. Start by mapping the space: identify the drain, the trap, and the path to an appropriate disposal container. Decide where you will drain standing water (sink, bucket, or pan) and where you will perform the actual mixing (a separate, clean workspace). Label containers to avoid mix-ups, and consider setting up a temporary splash shield or mat to protect floors and cabinets. Create a brief checklist for each step so you don’t miss a crucial action, and keep your tools within arm’s reach to minimize trips to the closet.
A well-planned workflow reduces drift and mistakes. It also helps you gauge how much standing water there is, so you can decide whether you need to remove the trap or only drain the basin. Drain Guide recommends rehearsing the plan for smaller test batches before tackling larger quantities, especially if you are working with potent cleaners or solvents. The goal is to complete the drain clearance and mixing in a single, controlled session.
Tools, materials, and setup best practices
Having the right tools makes draining water before mixing straightforward. A well-chosen kit includes: a suitable container to collect water, absorbent rags for spills, chemical-resistant gloves, safety goggles, a flashlight or headlamp, and a wrench or pliers if the trap needs loosening. A dedicated area with a dry mat reduces slip risk, and an extra bucket near the drain helps manage overflow. If you are dealing with a blockage or a stubborn trap, you may need a drain snake or plumber’s cup to avoid damaging pipes. Always lay out your tools before you start so you don’t have to hunt for items mid-task. Proper organization is a safety advantage.
When you finish, return any removed components securely, wipe down the area, and store chemicals in their original containers away from heat sources. A clean, orderly workspace greatly lowers the chance of accidental mixing and helps you verify that everything is ready for the next cleaning or maintenance task.
Common mistakes and how to avoid them
Common mistakes include starting without a plan, failing to drain all standing water, and mixing chemicals directly over or near the drain. Another error is not wearing proper PPE or neglecting ventilation, which can increase exposure to fumes. A frequent misstep is mixing too-large quantities at once, which can overwhelm the container and cause splashes. To avoid these, follow a written sequence, drain all standing water first, prepare a dedicated mixing container, and perform a quick sensor check (smells, visible splashes) before proceeding. Regular practice helps you anticipate problems and refine your technique over time.
Drain water before mixing is a routine safety check. By staying methodical, you minimize risk and improve the accuracy of your mixtures.
Real-world scenarios: cleaners, bleach, and degreasers
Different products demand different approaches. For water-based cleaners, a simple drain-and-dilute method is often sufficient, but always follow product labels for dilution ratios and contact times. When working with bleach or stronger oxidizers, ensure adequate ventilation and avoid mixing with ammonia or acids near standing water. Degreasers can produce heavy splashes if not contained; keep containers stable and use a separate mixing area away from the drain. In every case, assume that some liquid will be volatile, rogue, or gesturing toward the drain, and prepare accordingly. Drain water before mixing creates a safer baseline regardless of the product chosen.
If you’re unsure about a product’s compatibility with water, perform a small test with a tiny amount in a separate container first. When mixing is complete, thoroughly rinse tools and dispose of waste according to local guidelines.
Preventing overflows and spills during the process
Overflows happen when you underestimate flow or container capacity. Use a container with a wide mouth to reduce splashing and an obvious fill line to prevent accidental overflow. Position the container below the drain so gravity helps capture water, and never pour liquids directly over an exposed surface. If you need to pour mixed solutions into a secondary container, do so slowly and with a steady hand. Keep towels handy to wipe up any minor drips, and wash or dispose of them per local guidance. Finally, conduct a quick visual check of the area before resuming any mixing to ensure everything is dry and clear.
Drain water before mixing reduces the chance of spills and protects your surfaces and floors. A calm, deliberate approach pays off with safer and cleaner results.
Authoritative references and further reading
For additional safety guidance and best practices, consult trusted sources:
- OSHA: https://www.osha.gov
- EPA: https://www.epa.gov
- CDC: https://www.cdc.gov
These references provide general safety principles for chemical handling, ventilation, and risk assessment that support the precautions described here. Always follow the specific product label and SDS for any chemical you use.
Next steps and safety reminders
Now that you understand the concept and steps, implement a small, controlled test in a low-risk scenario to build confidence. Revisit your PPE, confirm your workspace is dry, and ensure you have a clear disposal plan for any waste. If a spill occurs, respond quickly with absorbent materials and ventilate the area. Drain water before mixing is a practical habit that protects you, your home, and your family, and it should become part of your routine for any future drain-related projects.
Tools & Materials
- Container to collect water (at least 1-2 gallons)(Plastic or metal; choose heat-resistant if hot liquids may be involved)
- Safety goggles(Impact-resistant; wraparound preferred)
- Chemical-resistant gloves(Nitrile or neoprene; choose thickness for your product)
- Absorbent towels or rags(For spills and drying the work area)
- Flashlight or headlamp(Better visibility around the drain, especially under cabinets)
- Adjustable wrench or pliers(Only if you need to loosen the trap or access fittings)
- Paper towels or disposable litter(For quick cleanup after the task)
- Bucket or pan for disposal(For safe transfer of drained liquids away from mixing area)
Steps
Estimated time: 20-40 minutes
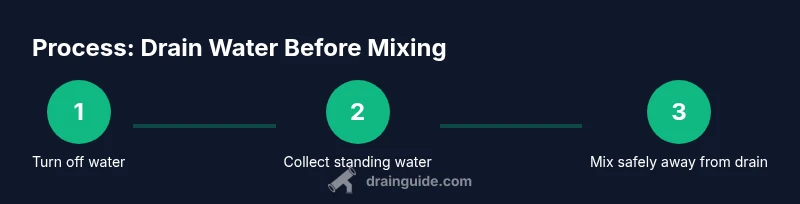
- 1
Shut off the water supply
Identify the shut-off valve for the fixture or the main supply and turn it off. This prevents new water from entering the drain area while you prepare to drain standing water. If you cannot locate a valve, stop and seek guidance before proceeding.
Tip: If the valve is stiff, apply gentle turning pressure and avoid forcing it to prevent leaks. - 2
Position your collecting container
Place the container under the drain or in the path where standing water pools. Ensure it is stable and won’t tip easily. This reduces the chance of spills during the drain.
Tip: Use a secondary towel underneath to catch any drips while you work. - 3
Loosen or remove the trap (if needed)
If there is a P-trap or other bend, loosen the connectors with a wrench or tube to allow water to drain into your container. Do this slowly to control the flow and avoid splashes.
Tip: Only loosen the trap if you’re confident it won’t cause a sewer gas issue; reseal promptly after draining. - 4
Open the drain to release standing water
Carefully open the drain or lift the trap to let water flow into your container. Do not stand directly over the outlet; keep your face and body to the side to avoid splashes.
Tip: Work gradually and watch the container’s fill level to prevent overflow. - 5
Move collected water away and prepare mixing area
Once the container has the standing water, transport it to a disposal area away from your workspace. Set up the mixing container at a dry, stable surface and verify all tools are ready.
Tip: Check the chemical compatibility of the mix with the container material to avoid reactions. - 6
Proceed with mixing in a dry space
Follow the product label for dilution and measurement. Keep your face and body away from the mixing area and continue to ventilate the space. Once complete, rinse the containers and tools thoroughly.
Tip: Always add liquids to the container slowly, not the other way around, to minimize splashes. - 7
Return trap and clean up
Reinstall the trap if you removed it, wipe down surfaces, and check for leaks. Restore the water supply and test the area to ensure everything is functioning safely.
Tip: Dispose of any contaminated towels according to local guidelines.
Got Questions?
Why is it important to drain water before mixing?
Draining water before mixing reduces the risk of spills, splashes, and unintended chemical reactions. It helps ensure accurate dilution and safer handling of cleaners and concentrates.
Draining water before mixing reduces spills and keeps you safer during the process.
What if I can't locate a shut-off valve?
If you cannot locate a shut-off valve, pause the task and consult a professional. Do not attempt to drain or mix near the supply line without a known off valve.
If there’s no shut-off valve, stop and seek guidance before proceeding.
Can I reuse the drained water for the next mix?
Do not reuse drained water for mixing, especially if it has mixed with cleaners or contaminants. Dispose of it according to local guidelines and rinse containers thoroughly.
Avoid reusing drained water; dispose of it properly.
What PPE is essential for this task?
Essential PPE includes chemical-resistant gloves and safety goggles. Additional protection like a respirator or long sleeves is advised for dusty or volatile products.
Wear gloves and goggles; more PPE as needed for safety.
Is this method safe for all household liquids?
Not all liquids are safe to mix near drains. Always read product labels and SDS, and avoid mixing incompatible chemicals or those with strong fumes.
Check labels and avoid mixing incompatible substances.
How can I prevent overflows during draining?
Use a container with a stable base, monitor fill level, and work slowly. Have towels ready and position the container to catch spills quickly.
Monitor the container and work slowly to prevent spills.
Watch Video
The Essentials
- Plan the sequence before starting.
- Drain all standing water first to create a dry workspace.
- Wear PPE and ventilate the area.
- Follow product labels for safe dilution and mixing.
- Clean up thoroughly to prevent future spills.