Drain with Tile Insert: Step-by-Step Home Guide
Learn how to install or replace a drain with tile insert, blending grout with tile for a seamless look while preventing leaks. Drain Guide provides a practical, step-by-step approach for homeowners and DIY enthusiasts.

This guide shows how to install or replace a drain with tile insert, delivering a clean, watertight surface in a bathroom or kitchen. You’ll choose a compatible insert, prep the drain opening, set the tile insert with appropriate sealant, and verify the connection with a leak test. Follow these steps for a durable, professional finish.
What is a drain with tile insert and when to use it
A drain with tile insert combines a drainage body with a tile-ready cover that sits flush with surrounding tile work. Instead of a plain metal grate, you install a tile insert that matches the pattern and thickness of your floor tile, creating a seamless surface. This approach is popular in showers, wet rooms, and occasionally bathrooms or kitchens where you want a cohesive look. According to Drain Guide, using a tile insert can simplify maintenance because debris are less likely to get trapped beneath a raised grate, and it enhances the room's aesthetic. The key is to ensure the insert is compatible with your tile thickness and the substrate beneath. Before you begin, confirm your drain size and whether your tile insert uses a clamping ring or mortar-set installation, as these choices affect tools, waterproofing, and curing times. Plan for a proper slope toward the drain to prevent standing water, and budget extra time for setting and grouting to keep the surface level. Drainage pathways should be clear and unobstructed to maintain reliable flow.
In practice, a drain with tile insert can be a great way to achieve a seamless look in modern bathroom tiling while preserving functional drainage. You should also consider routine maintenance, since a flush insert can be easier to clean but requires attention to gasket integrity and grout sealing. Drain Guide's findings emphasize compatibility with tile patterns and substrate support to prevent future issues. With careful planning, the result is a visually cohesive floor that remains easy to maintain over years of use.
Planning considerations include choosing a tile insert that is compatible with your existing tile pattern, ensuring you have the correct tool-kit, and understanding curing times for any mortar or adhesive used during installation.
Choosing the right tile insert
Tile inserts come in several configurations: the insert piece itself, the surrounding grate or frame, and the mounting method. The most important compatibility factors are tile thickness, substrate rigidity, and the drain's waste outlet size. Match the insert to your tile thickness and ensure the tile insert sits flush with surrounding tiles without creating a high spot that could trip a foot or trap soap scum. Consider materials—stainless steel or coated aluminum are durable, while ceramic tiles wrapped around the edge can improve durability in wet areas. Check for a watertight gasket and whether the insert expects a mortar-set or a clamped installation. If your tile is very large or heavy, use a support backer to prevent sagging during setting. Drain Guide analysis shows that planning the tile insert around your tile pattern reduces patchwork and makes maintenance easier over time.
Another practical factor is accessibility for cleaning. A tile insert should allow unobstructed access to the drain channel for routine maintenance and hair removal. Some inserts conceal the drain beneath a tile cover, while others provide a small opening that can be cleaned with a thin brush. Consider the location’s humidity and traffic level; high-traffic bathrooms benefit from a robust gasket and corrosion-resistant hardware. If you’re tiling over an existing surface, ensure the substrate is stable and free of loose material to avoid movement that could lead to cracks in the tile or grout. Drain Guide recommends checking the manufacturer’s compatibility chart for tile thickness, as mismatches are a common source of later repairs. Finally, confirm warranty terms and local code requirements for waterproofing membranes and slope to the drain.
When you’re ready to buy, bring precise measurements of your tile thickness and the drain outlet, plus a sample tile or two to verify color and glaze compatibility. A well-chosen tile insert reduces the need for patchwork and creates a durable, attractive finish that lasts years.
Prep and safety considerations
Start by shutting off water to the area and removing any fixtures nearby to prevent damage. Remove the old drain cover and carefully disconnect the flange, keeping track of screws and washers. Clean the opening and inspect the substrate for signs of damage or moisture; repair as needed before proceeding. Wear gloves and eye protection when cutting tile or working with adhesives. Install a temporary water barrier around the work zone to reduce splash. Ensure the work area is adequately ventilated, especially when using epoxy or solvent-based products. If you’re unsure about electrical or plumbing connections, consult a professional. Drain Guide Team emphasizes following local building codes and using the correct waterproofing membrane to prevent future leaks.
A common pitfall is rushing the prep stage. Skipping a thorough cleaning and inspection can hide problems that only appear after tile insert installation, such as substrate rot or hidden cracks. Taking time to test the substrate and address any weak spots pays off later with a tighter seal and longer tile life. Always verify that the chosen tile insert will align with existing tile lines before cutting. By adhering to safety precautions and proper prep, you set a solid foundation for a successful installation.
Installing a drain with tile insert: Common installation challenges and how to avoid them
This stage combines precision and patience. Aligning tile insert with existing tile lines requires careful measurement and sometimes dry-fitting before committing adhesive. Misalignment can create trip hazards or weak grout joints around the insert. Verify the drain outlet is centered with the tile pattern and that the insert sits level across the plane of the floor. Use spacers and temporary shims as needed to maintain alignment while the adhesive cures. Do not rush curing times; incomplete setting can cause movement and leaks later. Keep grout away from the tile insert’s inner gasket to avoid clogging the drain pathways. If you encounter a tight fit, trim the tile edge cleanly with a wet saw rather than forcing it, which can crack tile and damage the drain assembly. Drainage installations benefit from a clean, dry workspace so you can clearly see alignment marks and avoid accidental slip or slip of tools. The aim is a seamless, durable finish that remains flat over time. Drain Guide’s practical guidance underscores verifying fit and using the correct waterproofing approach to minimize future repairs.
Another tip is to pre-slope the tiling surface toward the drain corner if your room layout requires it. A slight slope helps water flow directly into the drain, reducing standing water that can degrade grout and create slippery surfaces. Finally, confirm you have the right type of grout for wet areas (epoxy or a polymer-modified grout) and plan for sealing around the tile insert after grout cures to maintain a water-tight joint.
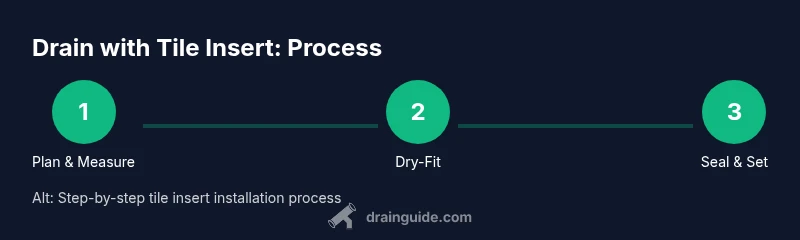
A professional checklist approach—measure, dry-fit, secure, seal, cure, test—helps ensure the tile insert system functions as intended and looks consistent with the surrounding tile.
Maintenance and troubleshooting
Once installed, inspect the seal around the tile insert at least weekly during the first month and after heavy use. Clean the surface with a non-abrasive cleaner to prevent soap scum buildup that can obscure the seal. If you notice slow draining or standing water, check the tile insert gasket and the mortar bed around the edge for cracks or gaps. Re-grout as needed and reseal with a neutral-cure silicone to keep moisture from creeping behind the tiles. If leaks persist, re-check the waterproofing layer and confirm the drain’s outlet is not clogged. The Drain Guide team recommends documenting your installation with photos and notes to reference if you ever need to replace the tile insert in the future.
Regular maintenance includes clearing debris from the tile insert cover and inspecting grout lines for hairline cracks. For homes with hard water, mineral deposits can build up on the gasket and cover; use a gentle descaling cleaner as recommended by the insert manufacturer. Always dry the surface after cleaning to prevent mold growth and keep the area visually appealing. If you ever notice a bubbling or gurgling sound, that can indicate air block or a clogged drain line, and you should inspect the drain path for obstructions. With proper care, a tile insert drain remains both functional and aesthetically pleasing for many years.
How to finalize the project and verify success
Before declaring success, perform a thorough leak test. Run water slowly around the drain area for several minutes and observe for any moisture behind the tile edge or beneath the grout line. If you see any seepage, re-check the gasket, reseal, and inspect the waterproofing membrane for gaps. Verify that water flows freely into the drain without pooling elsewhere on the surface. If everything checks out, allow the grout and sealant to cure fully according to the manufacturer’s instructions, then perform a final visual inspection to ensure the finish lines up perfectly with the surrounding tiles. The Drain Guide Team notes that keeping a small maintenance schedule will catch issues early and extend the life of your tile insert system.
Tools & Materials
- Tile insert drain kit (compatible with your drain size)(Choose a kit that matches your tile thickness and substrate type)
- Adjustable wrench(For flange nuts and securing hardware)
- Putty knife / scraper(For removing old gasket and scraping debris)
- Silicone sealant (neutral cure)(Use a color-matched sealant for visible joints)
- Waterproofing membrane(Ensure compatibility with your substrate and tile system)
- Backer board or substrate reinforcement(Optional based on substrate condition and tile thickness)
- Wet saw or tile cutter(Needed for precise edge cuts around the tile insert)
- Grout (polymer-modified or epoxy for wet areas)(Choose based on tile and environment)
Steps
Estimated time: 2-6 hours
- 1
Plan and measure the opening
Carefully measure the drain outlet, tile thickness, and available floor space. Confirm the tile insert will align with the surrounding pattern and that there is room for any required sealant. Mark cut lines on the tile or substrate before making any cuts to prevent mistakes.
Tip: Double-check your measurements twice and keep a small sample tile for color/finish matching. - 2
Shut off water and remove old drain components
Turn off the water supply to the area and remove the old drain cover, flange, and any debris. Take photos of the existing setup to reference during reassembly. Keep screws organized to reuse or replace as needed.
Tip: Have towels handy for potential spills and keep the workspace clean to prevent slips. - 3
Remove flange and clean the opening
Disconnect and remove the drain flange, then clean the opening thoroughly. Inspect the substrate for signs of moisture or damage and repair if needed before proceeding. This ensures a solid base for the new tile insert.
Tip: Wipe down with a mild cleaner and allow to dry fully before applying adhesive. - 4
Install waterproofing membrane and backer (if needed)
Apply the waterproofing membrane around the drain area according to the membrane manufacturer’s guidelines. If the substrate requires reinforcement, install backer board to maintain flatness and avoid movement under tile. This step protects against leaks behind the tile surface.
Tip: Overlap seams and seal penetration points around the drain with additional membrane. - 5
Dry-fit the tile insert to confirm fit
Place the tile insert in the opening without adhesive to verify alignment with pattern lines and surrounding tiles. Make any necessary tile edge cuts with a wet saw, ensuring straight, clean edges. Confirm that the insert sits level with adjacent tiles.
Tip: Mark cut lines on the tile surface before cutting to ensure precision. - 6
Apply adhesive and set the tile insert flush
Spread an even layer of appropriate adhesive on the substrate and press the tile insert into position. Use a level to verify that the insert is flush with the surrounding tile surface. Clean excess adhesive from around the insert before it cures.
Tip: Work in small sections to maintain consistent bonding and prevent movement. - 7
Seal joints and grout around the insert
Apply a sealant along the inner edge where the tile meets the insert to prevent moisture intrusion. Grout around the surrounding tiles once the adhesive has cured, taking care not to clog the insert’s internal channels. Allow curing time per product instructions before use.
Tip: Avoid applying grout directly into the drain gap; use silicone at the inside edge instead. - 8
Test for leaks and finalize
Run water around the tile insert area to observe for leaks and seal integrity. If any moisture appears behind the tile, re-check the gasket and waterproofing. Once satisfied, complete any final detailing and let all materials cure fully.
Tip: Document the process with photos for future maintenance or future tile insert replacements.
Got Questions?
What tile thickness is compatible with tile insert drains?
Most tile insert systems are designed for standard tile thickness; always check the insert’s spec sheet and the manufacturer’s guidelines to confirm compatibility with your tile. If unsure, consult a professional before cutting or setting.
Most tile insert drains work with standard tile thickness. Check the product specs and consult a professional if you’re unsure.
Can tile inserts be used in showers and kitchens?
Tile inserts are commonly used in showers and wet rooms due to their flush finish and easier cleaning. For kitchens, ensure the area is not subjected to heavy traffic or food spills that could affect sealants and grout; follow the manufacturer’s guidelines for use in kitchen areas.
Yes, they’re common in showers and wet rooms. For kitchens, follow the guidelines and ensure proper waterproofing.
How can I prevent leaks around the insert?
Use a waterproofing membrane under the tile, apply the correct adhesive, and seal joints with neutral-cure silicone at the inner edge. Ensure the grout lines do not block the drain channels and reseal as necessary after cleaning.
Seal around the inner edge with silicone and use a waterproof membrane under the tile to prevent leaks.
What tools are essential for tile insert installation?
A tile saw, putty knife, spacers, level, caulk gun, and a compatible membrane are essential. Always have a backup set of replacement parts for the drain kit in case of wear.
Tools you need include a wet saw, level, and silicone sealant. Have replacements on hand just in case.
How long does grout cure after tile insert installation?
Cure times vary by product, tile, and environment. Expect several hours to a day for initial hardening; complete curing may take longer, so avoid heavy use until fully cured per manufacturer guidance.
Grout cure times vary; follow the product guidance and wait until fully cured before heavy use.
Watch Video
The Essentials
- Plan tile-thickness compatibility before buying.
- Align insert with tile pattern for a seamless look.
- Use proper waterproofing and sealants to prevent leaks.
- Test for leaks after installation and before full use.