How to Drain an AC Unit: A Practical Guide
Learn how to safely drain an AC unit's condensate line with practical steps, tools, and maintenance tips from Drain Guide. Prevent leaks and protect your system with our thorough, DIY-friendly guide.

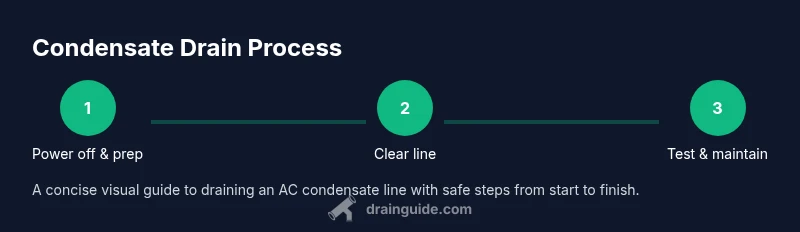
According to Drain Guide, safely draining an AC unit begins with shutting off power and locating the condensate drain line. Clear built‑up water with a wet/dry vacuum or by flushing with a vinegar-water solution. Check the drain pan, then test drainage by running the unit. Wear gloves and stay dry.
What happens when condensate drains from an AC unit?
Air conditioners remove heat by moving moisture, and the condensate that forms on the cooling coil must exit the unit through a dedicated drain line. In most homes, this line leads to a floor drain, a utility sink, or an exterior discharge. If the line becomes blocked or the pan overflows, water can pool around the indoor unit, triggering safety shutoffs, promoting mold growth, and potentially damaging nearby finishes. Understanding the flow helps you diagnose issues quickly and avoid costly water damage. Drain Guide explains practical steps to drain the condensate line safely, clear obstructions, and keep your system efficient. Remember parts like the drain pan, P-trap, and cleanout access; knowing their roles helps you locate problems fast. For central systems, check for an exterior discharge or a dedicated access point; window units drain differently, but the same principles apply. By the end, you’ll know the exact tools and steps to safely drain and test your condensate line with safety as a priority.
Safety and prep before you start
Safety has to be the first step because draining involves electricity and water. Turn off power to the unit at the main breaker, and if possible also switch off the outdoor condenser and thermostat. Use a non-contact tester to confirm de-energization before touching any components. Clear the area, place towels or a shallow tray to catch drips, and wear safety glasses plus waterproof gloves. Keep children and pets away during the procedure. Allow capacitors to discharge for a minute or two after power is cut. If you smell burning insulation or notice melted wiring, stop and call a professional. Plan for disposing of dirty condensate appropriately, and avoid pouring it into indoor drains that could back up. Following these precautions reduces the risk of shock, water damage, and mold while you work. Drain Guide emphasizes safety as the foundation of any DIY repair.
Diagnosing a clogged drain line
Before any cleanup, confirm the drain line is the source of the problem. Look for water pooling near the indoor air handler, a gurgling sound from the drain pan, an overflowing condensate pan, or musty odors indicating mold. Visually inspect accessible sections of the line for mineral buildup, algae, or debris. If you have a cleanout plug or removable panel, check for blockages there. Some systems have a secondary overflow switch; test it to ensure it shuts the unit off when the trap is blocked. Narrowing the cause to a clogged line helps you choose the right approach—vacuum pull, flushing, or gentle chemical cleaners (used with caution). Drain Guide reminds homeowners that many condensate issues stem from simple blockages that basic tools can clear.
Primary drainage methods and tools
Clearing a condensate line usually relies on mechanical suction and careful flushing. Start with a wet/dry vacuum to pull debris from the line via the cleanout or accessible end; seal connections with tape if needed. If access is limited, a flexible drain line brush or a small plumber’s snake can loosen buildup. After clearing, flush the line with a safe cleaning solution, typically a vinegar-water mix, to disinfect and dissolve mineral deposits without harsh chemicals. Always flush toward the exterior to avoid forcing water back into the indoor unit. For stubborn clogs or damaged lines, a professional may need to remove the trap or install a condensate pump. Treat damaged lines with care—avoid bending fittings or forcing components. Drain Guide notes that the right tool for the job reduces the risk of damage and ensures complete clearance.
Cleaning, flushing, and odor control
With the line clear, finish with a thorough rinse to prevent reformation of deposits. Flush from the exterior access point toward the indoor unit with a vinegar-water solution, then follow with a clear water flush to remove residual vinegar and debris. Clean the condensate pan with a non-abrasive cleaner and a soft cloth; remove mold or mineral residues. If odors linger, a small amount of baking soda in the pan can help absorb smells, or you can install a trap deodorizer designed for condensate lines. Do not use bleach or ammonia-based cleaners around HVAC components due to fumes and potential damage. Re-inspect for any new leaks or standing water. Regular flushing as part of seasonal maintenance is a practical habit recommended by Drain Guide.
Maintenance and when to call a pro
To keep condensate drainage reliable, perform a quick check at least seasonally and after heavy use. Clean the drain pan and accessible line, inspect for cracks, and ensure the exterior discharge remains unobstructed by leaves or debris. Address damaged parts promptly and avoid prolonged moisture that can promote mold. If water continues to back up after a thorough cleaning, or if mold growth persists, contact a licensed HVAC technician. A professional can inspect the condensate pump if installed, verify the floor drain is clear, and perform a deeper sanitization. Regular maintenance, paired with good air-filter habits, extends system life and reduces water-related risks. Drain Guide’s guidance treats drainage as a proactive task rather than a one-off repair.
Tools & Materials
- Safety gloves(Nitrile gloves; protect hands from water and mold)
- Safety glasses(ANSI Z87.1 safety rating)
- Flashlight(Bright LED for dark access points)
- Bucket or towels(To catch drips and spills)
- Wet/dry vacuum(Capable of 1-2 gallon capacity; use hose small end)
- Vinegar (white, 5-8%)(For safe line flushing; avoid bleach)
- Flexible drain line brush or plumber's snake(Loosen buildup from inside line)
Steps
Estimated time: 30-60 minutes
- 1
Power off the system at the breaker
Switch off the circuit breaker to cut power to the entire AC system. If your setup has a separate outdoor unit, also switch off its breaker or disconnect power at the thermostat. Wait a minute or two for capacitors to discharge before touching any components.
Tip: Label the breaker or take a quick photo so you can restore power safely after the task. - 2
Locate the condensate drain line and access point
Find the drain line that carries condensate away from the evaporator coil. Look for a PVC line or a copper pipe with a small drain pan beneath the indoor unit. Note any cleanout plug or panel you’ll need to access for clearing blockages.
Tip: Keep the exterior discharge point in view so you can observe water flow once you test drainage. - 3
Inspect for blockages and leaks
visually inspect the line and pan for visible blockages, cracks, or pinholes. A loose connection or mineral buildup can imitate a clog. If you see mold, the line needs cleaning and sanitizing before reuse.
Tip: Use a flashlight to check inside bends and traps; blockages often hide in the turns of the line. - 4
Clear the line with a wet/dry vacuum
Attach the vacuum hose to the drain line at the cleanout or accessible end and run the unit to pull out debris. If the line is hard to reach, use a flexible brush to loosen buildup first, then vacuum.
Tip: Seal joints with tape if needed to create a tighter seal; avoid forcing debris deeper into the system. - 5
Flush the line with vinegar-water
Prepare a mild vinegar-water solution and slowly pour or flush the line from the exterior access toward the indoor unit. Let the solution drain completely, then follow with a clean water flush to remove any residue.
Tip: Do not mix with bleach or ammonia; chemical reactions can release hazardous fumes. - 6
Inspect and clean the drain pan and trap
Wipe down the drain pan with a non-abrasive cleaner and remove visible mold or mineral deposits. If your system has a trap, ensure it’s seated properly and free of debris before reassembly.
Tip: A clean pan and trap reduce the chance of future backups and odors. - 7
Restore power and test drainage
Turn the breaker back on and run a short cooling cycle. Observe the condensate line as water begins to flow; ensure it exits properly outside and there is no reappearance of pooling or leaks.
Tip: If water backs up again, stop and call a pro—the line may be partially damaged or the system may require professional cleaning.
Got Questions?
Can I drain my AC unit myself, or should I hire a professional?
Many homeowners can clear a simple condensate line themselves using basic tools. If you encounter persistent clogs, mold, or electrical concerns, it’s safer to hire a licensed HVAC technician.
You can try clearing a simple clog yourself, but stop and call a pro if you see mold or if clogs keep returning.
What are the signs of a clogged condensate drain line?
Look for water pooling around the indoor unit, gurgling in the drain pan, an overflow, or musty odors indicating mold growth. These indicate a blocked line that needs attention.
Watch for pooling water, gurgling sounds, or bad odors near the unit; that usually means a clog.
Is vinegar safe for clearing lines?
Yes, white vinegar is a gentle disinfectant and safe for condensate lines when used in small amounts. Avoid bleach or ammonia and flush with clean water afterward.
Vinegar is safe for routine flushing, but never mix it with bleach and always rinse with water.
How often should I inspect the condensate drain line?
Inspect during seasonal maintenance or whenever you notice signs of poor drainage. Regular checks help prevent larger clogs and water damage.
Do a seasonal check and after heavy use you should inspect for clogs.
What tools do I need to drain an AC unit?
You’ll typically need safety gloves, safety glasses, a flashlight, a bucket or towels, a wet/dry vacuum, vinegar, and a flexible drain line brush or plumber’s snake.
Have gloves, glasses, a vacuum, and vinegar handy before you start.
What should I do if water backs up into the indoor unit after cleaning?
Stop the unit, re-check the line for new blockages, and consider calling a pro if the problem recurs. A persistent backup may indicate a damaged line or failing condensate pump.
If it backs up again, stop and call a professional—the line may need repair.
Watch Video
The Essentials
- Inspect the condensate line regularly to catch clogs early
- Use safe, non-harsh cleaners and proper tools
- Test drainage after each maintenance cycle
- Call a pro if clogs persist or you detect mold