How to Put a Drain in Basement
Learn how to install a basement drain with a clear, safety-focused plan. Drain Guide explains drain types, layout, permits, testing, and maintenance for a dry, durable basement.

Goal: Install a basement drain to move water away from the foundation and reduce flooding risk. This guide covers selecting the right drain type, planning the layout, ensuring proper slope and seals, and safely testing the system before backfilling. Gather the required tools, check local codes, and, if needed, hire a pro. This page from Drain Guide focuses on practical, code-compliant steps.
Why Basement Drain Installation Matters
Basements are prone to moisture when groundwater and surface water seek the path of least resistance. A well-planned drain system helps move excess water away from the foundation, reducing moisture, mold risk, and material deterioration. According to Drain Guide, deliberate drainage planning—paired with proper grading, sealing, and regular maintenance—substantially lowers the chance of water seeping through basement walls. A reliable drain also supports future renovations by creating a dry, stable space for storage, HVAC, or living areas. Start with a clear assessment of how water enters the basement during rainstorms or snowmelt, then map the flow path to a discharge point outside and away from utilities. This approach minimizes backflow and keeps your living space comfortable and healthy. Planning pays off in frequent storm events or highly saturated soils. Be aware that local codes may govern substrate preparation, materials, and inspection steps; plan for permits early to avoid delays.
Assessing Your Basement for Drainage Feasibility
Before you dig, inspect the space for cracks, high water marks, and existing drainage features. Look for signs of hydrostatic pressure on walls, suspicious mortar gaps, and damp air near windows or vents. The Drain Guide team recommends documenting water intrusion with photos and noting the most flood-prone zones (near doors, windows, or low-point corners). Check for nearby utilities, sump pits, and any existing floor drains. If water continues to appear after rainfall or if the basement hoists with damp air, the project may require professional assessment. A feasibility check helps you decide between a simple floor drain, a trench drain, or a sump-based system and informs your permit needs and budget.
Drain Types for Basements: Floor Drains, Trench Drains, and Sump Pumps
Choosing the right drain type depends on space, budget, and expected water volume. A floor drain with a connected trap primer is common for small basements and can be sealed to prevent sewer gases. A trench drain works well in larger basements or walkways that channel water toward a discharge point. A sump pump system is effective for basements with high water tables or frequent flooding, but it requires power and regular maintenance. Drain Guide notes that combining a primary drain with a sump or discharge line can offer robust protection. Evaluate how water will reach the drain, how it will exit, and how the system will be maintained over time.
Layout and Sizing: Where to Place a Drain
Place the drain in the lowest risk area where water tends to accumulate, such as the room’s bottom corner or near exterior doors. Avoid placing drains under large structural beams or where utilities run, and plan pathways that allow gravity-driven flow toward the discharge point. The distance between the drain and the discharge point should be minimized to prevent buildup while allowing space for trap components and elbows. Drain sizing should align with estimated water flow from roofs, gutters, and indoor sources, and it should accommodate seasonal shifts in water volume. Consult local codes and consider a professional review for complex layouts.
Planning Slope and Water Flow: How to Ensure Proper Drainage
A key factor is ensuring water moves toward the drain without pooling. Use a level and straightedge to verify the floor slope along the intended water path, adjusting subfloor or trench bed as needed. Local codes may dictate minimum slope requirements and acceptable materials. After installation, test with water flow to confirm there are no slow drains or air gaps, adjusting joints and seals as needed. Drain Guide emphasizes testing early to catch leaks or misalignments before backfilling. Keep future maintenance in mind when routing pipes and choosing fittings.
Code, Permits, and Professional Help
Many jurisdictions require permits for basement drainage work, especially when cutting concrete, modifying plumbing, or altering foundation drainage. Check with your local building department to understand permit scope, inspection requirements, and approved materials. If you are uncertain about structural risks, water pressure, or electrical proximity, hire a licensed plumber or contractor. Drain Guide recommends verifying insurance coverage and requesting a written scope of work with milestones and a cleanup plan. Proper permitting helps avoid fines and ensures long-term reliability.
Tools, Materials, and Safety Gear
Before you start, assemble the essential tools and safety gear. A sturdy chisel and hammer, masonry saw or grinder, level, measuring tape, and pipe cutter are necessary for cutting and fitting drainage components. Use PVC/ABS pipe, solvent cement, hydraulic cement for sealing, and a waterproof membrane where appropriate. Safety gear—gloves, goggles, dust mask, and sturdy boots—protects you during concrete work and trenching. If your plan includes a sump pump or trap primer, ensure electrical considerations are addressed and that the discharge point complies with local rules.
Common Mistakes and How to Avoid Them
Rushing the digging or neglecting permits leads to costly rework or code violations. Avoid installing drains in areas with poor access, weak concrete, or potential backflow zones. Misjudging slope or flow direction can cause standing water or sewer gas entry. Ensure joints are clean, dry, and fully sealed before backfilling. Finally, never neglect testing—water tests reveal leaks and misalignments that aren’t obvious with dry fittings.
Maintenance and Longevity Tips
After installation, schedule regular inspections and keep debris out of inlets and grates. Test the system after heavy rains to confirm performance, and inspect seals for cracking or gaps. If you installed a sump pump, check the float switch operation and battery backup periodically. Routine maintenance prolongs life, improves performance, and reduces the need for emergency repairs. Drain Guide recommends documenting service intervals and keeping spare parts on hand for quick fixes.
Authority Sources
- https://www.cdc.gov/mold/damp_homes.html — Centers for Disease Control and Prevention: mold and dampness in homes
- https://www.fema.gov — Federal Emergency Management Agency: floods, basements, and drainage planning
- https://www.nahb.org/ — National Association of Home Builders: practical guidance on drainage and basement finishing
Tools & Materials
- Shovel/trench spade(For digging the trench or channel)
- Chisel and hammer(To break and shape concrete floor)
- Masonry saw or grinder(Cut clean trenches in concrete)
- Level and measuring tape(Ensure proper slope and alignment)
- PVC/ABS drain pipe(Choose diameter per plan)
- Pipe fittings (elbows, tees, couplings)(Configures drainage path)
- PVC cement and primer(Seal joints securely)
- Hydraulic cement/sealant(Seal penetrations or cracks)
- Waterproof membrane or sealant(Optional moisture barrier)
- Drain trap primer (optional)(Prevents sewer gas odors)
- Sump pump (optional, depending on plan)(For high-water-table scenarios)
- Safety gear (gloves, goggles, dust mask)(Protect during concrete work)
- Wrench/pry bar(For adjustments and removal)
- Bucket, trowel, and mixing tools(General handling and cleanup)
Steps
Estimated time: 6-9 hours
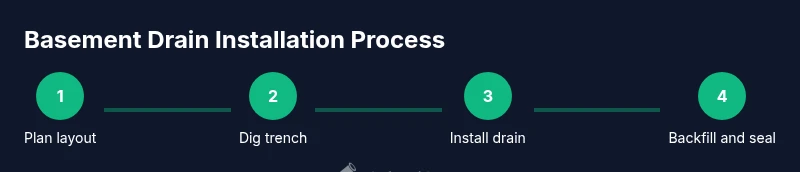
- 1
Assess space and plan layout
Survey the basement to identify the low point, structural features, and potential discharge paths. Mark where the drain will go and how piping will route to the exterior or sump. Confirm that the area can be excavated without compromising foundations or utilities.
Tip: Double-check utility locations with a locator before any digging to avoid hazards. - 2
Mark excavation area
Use chalk or spray paint to delineate the trench or trench bed outline on the floor. Include space for trench depth, pipe diameter, and fittings. Verify access for tools and future maintenance.
Tip: Keep a clear path for removing concrete dust and debris during cutting. - 3
Cut trench and prepare bed
Cut the trench along the marked line with a masonry saw or grinder. Remove broken concrete and smooth the bed to accept pipe. Dry-fit the drainage path to confirm alignment with the discharge point.
Tip: Work gradually; pause to vacuum dust and ensure clean surfaces for bonding. - 4
Install drain base and slope
Lay pipe segments and fittings, ensuring the line slopes toward the discharge end. Maintain joint alignment and clean surfaces before cementing. Secure pipes and supports to prevent movement during backfill.
Tip: Check for unobstructed exit path and verify that slope is continuous before sealing. - 5
Seal joints and add barriers
Apply solvent cement or appropriate glue to connect PVC/ABS joints. Use hydraulic cement for any penetrations in concrete and place a waterproof barrier if needed. Confirm joints are dry before proceeding.
Tip: Do not rush curing; allow recommended drying times for solvent cement. - 6
Test water flow and seal
Pour water into the trench or basin and observe flow toward the discharge point. Check all joints for leaks and reseal any gaps. Ensure there is no backflow and that the system drains smoothly.
Tip: Use a bucket test and inspect under pressure to mimic real rainfall flow. - 7
Backfill and finish
Backfill the trench in stages, compacting soil to minimize settlement. Refinish concrete surface or install a suitable grate. Restore surrounding area and label the drain for future maintenance.
Tip: Backfill gradually to avoid air pockets that can compromise drainage.
Got Questions?
Do I need a permit to install a basement drain?
Often yes, especially for cutting concrete or modifying plumbing. Check with your local building department to understand required permits and inspections. Failing to obtain proper permits can lead to fines and delays.
In most places, yes, you’ll need a permit for basement drainage work. Check with your local building department to confirm requirements and inspections.
What drain types are best for basements?
Floor drains, trench drains, and sump pumps each have different strengths. For small areas, a floor drain with a trap primer works well; for larger spaces, a trench drain or a sump-pump combination offers robust protection. Choose based on water volume, space, and maintenance needs.
Floor drains work for small spaces, trench drains for larger ones, and sump pumps help where water tables are high. Choose based on water volume and space.
Can I install a basement drain myself, or should I hire a pro?
Simple installations with clear access can be DIY, but complex layouts, structural concerns, or active water intrusion benefit from a licensed plumber or contractor. Professional help ensures code compliance and long-term reliability.
You can do simple installs yourself if you’re comfortable with concrete work, but for complex layouts, hire a pro to ensure safety and code compliance.
How long does installation typically take?
Most basement drain installations take several hours depending on space, concrete work, and system type. Plan for a full day when including permits, setup, and testing.
It usually takes several hours to a full day, depending on layout and whether permits are needed.
Will a basement drain connect to a sump pump?
Yes, many basement drainage plans route water to a sump pump for controlled removal, especially in high-water-table areas. Ensure the pump, power supply, and discharge line are properly installed and code-compliant.
A drain can feed a sump pump if needed; make sure wiring and discharge are correctly installed.
What maintenance is required after installation?
Regularly inspect joints for leaks, clean inlets, and test after heavy rain. If you have a sump, test the float switch and backup power periodically. Routine checks prevent surprises during storms.
Inspect for leaks, clean inlets, and test the system after rain; check sump backup power as needed.
Watch Video
The Essentials
- Plan layout before any digging and check codes.
- Choose drain type based on water volume and space.
- Verify slope and perform water tests before backfilling.
- Seal joints thoroughly and test for leaks.
- Schedule maintenance to protect longevity.