Repair Washing Machine Drain Hose: A Practical, Step-by-Step Guide
Learn how to diagnose and repair a leaking or clogged washing machine drain hose with practical steps, safety tips, and maintenance to prevent future issues.

You will diagnose and repair a washing machine drain hose that leaks or clogs by inspecting for cracks and kinks, verifying clamp security, and replacing the hose or fittings as needed. You’ll measure the correct hose length, route it to prevent backflow, and test with a rinse cycle to confirm a leak-free drain. This process emphasizes safety: unplug the machine, work on a dry surface, and use the right tools.
What a washing machine drain hose does and common failure modes
The washing machine drain hose is the conduit between your appliance and your home's drainage system. It carries used water from the washer's discharge outlet into a standpipe, laundry tub, or floor drain. When it operates correctly, you won't notice it—water flows smoothly during every cycle. When it fails, you may see water pooling behind the washer, damp floors, or a musty odor from trapped moisture. Common failures include cracks or holes in the hose wall, loose or corroded clamps, kinks or sharp bends that restrict flow, and improper routing that creates siphoning or backflow.
According to Drain Guide, a drain hose that is too long or looped in a tight U can cause standing water in the hose and backpressure on the washer. Defects can occur gradually from repeated travel behind the machine, or suddenly from a tug or spill while loading or unloading laundry. If you notice any of these symptoms, don't ignore them—the problem may escalate into a flood or mold growth. In most cases, repairing or replacing the hose is straightforward and safe when you follow the right steps and use the proper tools. The first step is to verify that the hose is the source of the problem and not a clogged standpipe or a blocked P-trap elsewhere in the drain system.
Before you begin, assemble the essential tools and materials. You will need a replacement drain hose of the correct inner diameter and length for your washer, high-quality hose clamps (stainless steel, worm-gear preferred), a screwdriver (Phillips and flathead), a utility knife or scissors, a bucket or towels for cleanup, and possibly a pair of pliers. Optional but helpful items include silicone lubricant for O-rings, a spare standpipe elbow, and a thread sealant for metal fittings. Safety is non-negotiable: unplug the washing machine from the wall outlet, turn off the water supply if you are near valves, and work on a dry, non-slip surface. If you are replacing the hose, measure the distance from the washer outlet to the standpipe to avoid a hose that is too tight or too slack, both of which can cause leaks or kinks. Choose a hose with reinforced walls and a secure clamp design to improve durability. Do not reuse cracked hoses or damaged clamps; replace them immediately.
Diagnosing problems with your drain hose
Start by visually inspecting the hose for signs of damage: cracks, bulges, discoloration, or soft spots along the length. Check both ends where the hose attaches to the washer and the standpipe; look for loose clamps and any water seepage around the connections. Gently squeeze the hose to confirm there are no hidden cracks, and try rotating or bending the hose to see if a kink is the source of resistance. If water backs up when the washer drains, the problem might be a clogged standpipe or a blocked trap rather than the hose itself, so verify the entire drain path. A quick test is to run a small load with the hose disconnected from the standpipe and directed into a bucket to observe flow. If you see leakage around the clamps after reattachment, re-seat them and replace any worn fittings. Document what you find with photos; this helps when you source a replacement part and explains the problem to a helper or a service tech. Finally, ensure the hose exit is above the floor level and below the standpipe rim to avoid backflow.
How to repair or replace the drain hose (overview)
Repairing a drain hose is often a matter of replacement, but you may also be able to repair minor cracks with sealant if the hose is short and the crack is not at the connection. The following sections outline the typical path: confirm the source, gather the parts, remove the old hose, install the new hose, secure clamps, and verify leaks. Always unplug the machine first and drain any residual water. Use the correct hose size to fit both the washer outlet and standpipe, avoiding excess slack that can coil and catch laundry. When routing, keep the hose above the trap and avoid sharp bends; a gentle 90-degree bend is usually acceptable. After installation, run a test wash with a sink or bucket beneath to check for leaks, and check connections after the cycle is complete. If there is any doubt about a joint or a valve, consult a professional plumber rather than risking a flood. Drain hose repair should be performed carefully but is generally straightforward for most front- or top-loading machines.
Preventive maintenance to extend hose life
To prevent future drain hose issues, incorporate simple habits into your routine. Inspect the hose every few months for signs of wear, replace aging hoses proactively every few years, and keep the hose away from sharp edges and hot surfaces. When relocating the washer for cleaning or repairs, reposition the hose to avoid kinks and chains or loops tucked behind the machine. Use a standpipe with a proper air gap or a drain vent to reduce backflow risk. Clean the standpipe and trap regularly to avoid lint buildup, and consider purchasing a higher-quality reinforced hose if you have a history of hose leaks. Finally, preserve the hose's interior by avoiding strong chemical cleaners that can degrade plastic, and replace clamps whenever you notice weakness or corrosion.
Authoritative sources
Consult these reputable sources for additional details to supplement your DIY process:
- U.S. Department of Energy – Energy.gov offers general appliance safety tips and energy-efficient practices.
- U.S. Environmental Protection Agency – EPA.gov provides guidance on safe home plumbing and water management.
- Cooperative Extension pages (e.g., extension.oregonstate.edu) offer practical, step-by-step home maintenance advice for laundry, plumbing, and drain tasks.
Tools & Materials
- Replacement drain hose (correct length/diameter)(Match washer outlet to standpipe; consider reinforcement for longevity)
- Stainless steel hose clamps(Two clamps; use worm-gear style for durability)
- Screwdriver set (Phillips and flathead)(Used to tighten clamps and panel screws)
- Utility knife or scissors(Trim excess hose if needed; avoid jagged edges)
- Bucket or towels(Catch residual water during hose removal)
- Measuring tape(Ensure the hose length is appropriate to prevent kinks)
- Pliers (optional)(Assist in loosening stubborn fittings)
- Silicone lubricant (optional)(Lubricate O-rings for easier seal)
Steps
Estimated time: 60-90 minutes
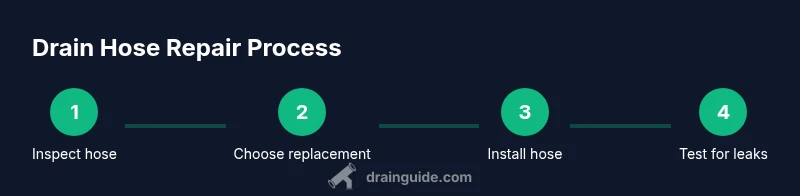
- 1
Power off and prepare safely
Unplug the washer from the wall outlet. If you anticipate near-valve work, temporarily shut off the home water supply. Place towels to catch drips and create a dry, non-slip workspace.
Tip: Use a dry surface and keep a clear path behind the machine to prevent tripping. - 2
Access the drain hose
Carefully pull the washer away from the wall to expose the back panel. If needed, remove the rear panel to access the hose connections. Have a bucket ready in case any water remains in the hose.
Tip: Take a quick photo of the original routing before removing anything so you can replicate it later. - 3
Loosen the clamps
Using a screwdriver, loosen the hose clamps at the washer outlet and at the standpipe or drain. Do not force the clamps; back them off just enough to slide the hose free.
Tip: If clamps are rusted, consider replacing them rather than forcing loose screws. - 4
Detach and inspect the hose
Gently pull the hose off the fittings. Inspect the hose for cracks, bulges, or soft spots. If you find damage, plan to replace rather than repair.
Tip: Keep the hose straight to avoid bending the fittings during removal. - 5
Choose the right replacement hose
Select a hose with the correct inner diameter and length. A reinforced hose offers better durability and reduces the chance of future leaks.
Tip: Buy from a reputable retailer and avoid the cheapest option if possible. - 6
Install the new hose and clamps
Slide the new hose onto the washer outlet and toward the standpipe. Tighten the clamps by hand first, then snug with a screwdriver until secure.
Tip: Position clamps roughly 1/4 inch from the end for a solid seal. - 7
Route the hose correctly
Run the hose to the standpipe with a gentle slope and no sharp bends. Avoid loop-backs behind the washer and ensure the exit is above the floor level to prevent backflow.
Tip: Keep a small air gap if local code requires it. - 8
Test for leaks and tidy up
Plug in the machine and run a short test cycle with a small load. Check both connections for dampness after the cycle ends and re-tighten if needed. Return the appliance to its original position and wipe up any remaining water.
Tip: Have towels ready and monitor for several minutes after the test.
Got Questions?
What are common signs that my drain hose needs repair?
Common signs include visible cracks or bulges, leaks at clamps, water pooling behind the washer, and frequent backups during drains. If you notice any of these, inspect the hose and connections first.
Look for cracks, leaks, or pooling water behind the washer, then inspect the hose and clamps.
Can I replace the drain hose myself?
Yes. Replacing a drain hose is a common DIY task when you have the right length and diameter hose, clamps, and basic hand tools. Always unplug the machine and follow the manufacturer’s installation steps.
Yes, you can replace it if you have the basic tools and follow the steps.
What size hose does a typical washer use?
Most washing machines use hoses with standard inner diameters of about 5/8 inch to 1 inch, but you should measure your outlet and standpipe to choose the correct size.
Most washers use a standard hose size; measure first to confirm.
Is it safe to run a washer with a damaged hose?
Running a washer with a damaged hose can lead to leaks or flooding. It’s best to replace the hose before continuing use.
No, don’t run it with a damaged hose.
How much does it cost to repair or replace a drain hose?
Costs vary by region and material, but a replacement hose and clamps are usually affordable. For a DIY repair, the cost is mainly the parts.
Cost varies, but parts are typically affordable and far less than service fees.
Watch Video
The Essentials
- Inspect hose for wear and damage regularly.
- Replace damaged hoses promptly to prevent floods.
- Route hose to avoid kinks and backflow.
- Test thoroughly after installation.