Water Jet Drain Cleaning: A Step-by-Step Guide
Learn how to safely use water jet drain cleaning to clear clogs and restore flow. This comprehensive guide covers tools, safety, step-by-step instructions, maintenance tips, and troubleshooting for homeowners.

Water jet drain cleaning aims to clear stubborn clogs by blasting the interior of pipes with a controlled jet of water. You’ll learn how to identify when it’s appropriate, choose the right nozzle and equipment, and follow a safe, step-by-step process. Essential safety gear and proper setup are required for effective results.
What water jet drain cleaning is and when to use it
Water jet drain cleaning uses a high-velocity stream of water to physically scour the interior walls of a drain line, dislodging hair, grease, soap scum, and mineral deposits. This method is an alternative to chemical cleaners that can corrode pipes or leave chemical residues. For many residential drains, water jetting restores flow with minimal mess and without introducing harsh chemicals. According to Drain Guide, this approach is particularly effective for grease-laden kitchen lines and bathroom stacks affected by hair and soap buildup. Note that water jetting is not a cure-all: stubborn clogs, collapsed pipes, or mains issues require professional evaluation.
The technique is most practical for routine maintenance and stubborn blockages in accessible lines. It’s less suitable for delicate piping materials or older, brittle systems where pressure can cause cracks if misapplied. Always start with a quick inspection and plan your approach before engaging any equipment.
Safety and setup prerequisites
High-pressure water can cause injuries and create splash hazards. Always wear protective equipment: splash goggles or a face shield, chemical-resistant gloves, and sturdy clothing. Keep a clear workspace, turn off power to nearby outlets if you’re working near an electrical appliance, and be mindful of backflow risks. If the drain leads to a sewage line, consider professional-grade containment and confirm venting is adequate. Drain Guide emphasizes preparation and PPE as the backbone of a safe jetting session. Before you begin, confirm you have a workable exit path for any backflow and a plan to manage runoff.
Tools, gear, and nozzle choices
Your nozzle choice determines how the water interacts with the pipe. For straight runs, a rotating or fan nozzle can scrub walls; for bends, a more flexible nozzle helps. You’ll also need a reliable water source with stable pressure and a length of hose long enough to reach the cleanout. Additionally have a drain snake or auger on hand in case larger debris remains after jetting. Always verify nozzle compatibility with your equipment and choose a nozzle designed for the pipe material you’re treating. This step reduces the risk of damage and improves cleaning effectiveness.
Preparing the work area and access points
Clear the area, remove protective floor mats, and set up containment for any splashes. Place a bucket under the trap to catch any water or debris, and remove the trap (if accessible) to inspect for solids. Inspect the surrounding pipes for signs of damage or corrosion before applying jet pressure. If you discover a compromised section, halt the procedure and plan a pipe repair rather than forcing water through a weakened area. Proper access points reduce the risk of injury and improve control during cleaning.
Entry point selection and nozzle alignment
Identify the best entry point (cleanout, trap access, or an exposed pipe section) to minimize pipe stress and maximize cleaning reach. Attach the nozzle to the hose, ensure all connections are tight, and prime the line with clean water. Slowly feed the nozzle into the drain while maintaining gentle tension on the hose to prevent kinking. Aligning the nozzle properly reduces the chance of scrapes, pipe damage, or dropped tools.
Jetting operation and flow monitoring
Power on the jetter and initiate short bursts to gauge reaction. Observe changes in water velocity and note any unusual sounds or resistance that could indicate a snag, a collapsed section, or a mineral bridge. If you encounter backflow, seepage, or foul odors, stop and reassess; these can signal a more serious problem. Maintain consistent angles and distance from the pipe walls to avoid gouging or chip damage. Document your observations for future maintenance.
Post-cleaning flush, inspection, and reassembly
Retract the nozzle slowly and flush the line with clean water to push debris toward the trap or cleanout. Reinstall the trap and run water through the line to verify uninterrupted flow. Check the trap seal for leaks and inspect the joints for moisture. If the water still drains slowly, repeat a shorter jet cycle focused on likely bottlenecks. Finish by cleaning the area and noting any pipe sections that may require future attention.
Troubleshooting and common mistakes
Common mistakes include using excessive pressure on fragile pipes, forcing the nozzle through sharp bends, and neglecting safety PPE. If you observe hairline cracks, leaking joints, or persistent backflow after jetting, do not push further—consult a professional. When in doubt, perform a lighter jet cycle or switch to a mechanical auger for stubborn blockages. Cleaning is most effective as part of a broader maintenance plan rather than a one-off fix.
When to call a pro and alternatives
If the drain remains sluggish after a couple of jetting attempts, or if you suspect tree roots, a collapsed pipe, or sewer line problems, contact a licensed plumber. Water jet cleaning can be a powerful DIY tool for routine maintenance and certain clogs, but it is not a substitute for professional diagnostics on major sewer issues. Alternatives include traditional snaking, hydro-jetting performed by pros, or trench repairs when needed.
Authority sources and safety considerations
For safety and best practices, consult established resources. See the following sources for guidance on safe drainage work and plumbing safety:
- https://www.osha.gov
- https://extension.illinois.edu
- https://www.epa.gov
drain work should always comply with local codes and manufacturer guidelines.
Tools & Materials
- Water jetting machine or high-pressure hose with compatible nozzle(Ensure nozzle type matches pipe size and material; use appropriate adapters if needed.)
- Personal protective equipment (PPE)(Goggles or face shield, gloves, long sleeves, and non-slip footwear.)
- Drain access tools(Drain snake or auger as backup or for final clearing.)
- Buckets, rags, and containment(Catch debris and protect surroundings.)
- Wrench or pliers(Tighten or loosen fittings as needed.)
- Test water source and hoses(Ensure stable water supply and leak-free connections.)
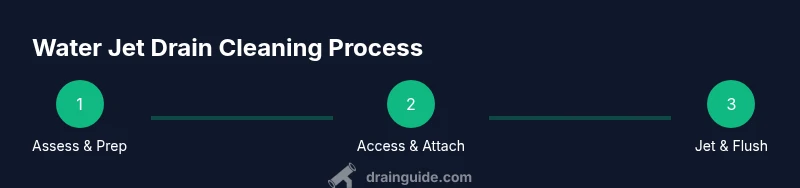
Steps
Estimated time: 60-90 minutes
- 1
Secure safety gear
Put on PPE and clear the workspace. Verify there are no electrical hazards nearby and set up containment to manage splash and runoff. This protects you and others from high-pressure water and debris.
Tip: Do a quick safety check of all connections before powering the unit. - 2
Access the drain and remove trap
Gain access to the drain by removing the trap or opening a cleanout. Clear any standing water and ensure you can observe the flow once you start jetting.
Tip: If the trap is stuck, avoid forcing it; use proper tools and assess for damage first. - 3
Attach nozzle and prime line
Connect the nozzle to the hose and tighten all fittings. Prime the line with clean water to remove air pockets before insertion.
Tip: Check for leaks at every connection; air pockets can cause inconsistent jet pressure. - 4
Feed nozzle into the drain
Gently insert the nozzle into the drain, keeping tension on the hose to prevent kinks. Move slowly past bends and avoid forcing the tool through restrictions.
Tip: Take your time at turns to prevent pipe damage. - 5
Jet and monitor
Activate the jetter with short bursts and observe flow and debris movement. Adjust angle and distance as needed to optimize cleaning.
Tip: If you encounter resistance, back off and re-align rather than pushing harder. - 6
Retract and flush the line
Withdraw the nozzle slowly and flush with clean water to push debris toward the trap or cleanout. Reinstall trap and perform a final test run.
Tip: Check for leaks around joints after reassembly. - 7
Evaluate outcome and plan next steps
Run multiple test flushes to confirm steady drainage. If flow remains slow, document the bottleneck and consider professional assessment if issues persist.
Tip: Keep a maintenance log for future reference.
Got Questions?
Is water jet drain cleaning safe for PVC pipes?
Yes, when used with appropriate nozzle selection and careful pressure management. Avoid aggressive jets on older PVC and check manufacturer guidelines.
Yes—PVC can be cleaned with water jets if you use the right nozzle and moderate pressure; always follow manufacturer guidelines.
Do I need professional training to operate a water jetting setup?
Basic familiarity with the equipment is recommended. If you’re new to high-pressure tools, practice on a dummy line or hire a pro for challenging blocks.
Basic familiarity helps. If you’re new to high-pressure tools, consider practicing on a dummy line or hiring a pro for tougher blocks.
What should I have on hand besides the jet nozzle?
A drain snake, compatible fittings, protective gear, a bucket, rags, and a good flashlight help you handle debris and inspect the pipe after jetting.
Have a snake, fittings, PPE, a bucket, and a flashlight to manage debris and inspect the pipe after jetting.
Can water jetting damage pipes or cause leaks?
Yes, if used improperly or on damaged sections. Always start with a low setting and inspect for signs of stress or leakage.
There is a risk if misused. Start with lower pressure and check for signs of damage as you work.
How long does it typically take to clean a drain with water jetting?
Most small to medium drains take about an hour or two, depending on access and blockage severity. Larger mains or rerouting may take longer.
Usually about an hour or two for typical residential drains, depending on the blockage and access.
What’s the difference between a water jetter and a manual snake?
A water jetter uses high-pressure water to scour the pipe walls, while a snake mechanically breaks up clogs. Jets cover more area with less manual effort but require more setup and care.
A jetter blasts with water to clean walls; a snake twists and breaks up clogs with manual effort.
Watch Video
The Essentials
- Understand when water jet drain cleaning is appropriate
- Use the correct nozzle for your pipe and plan entry points
- Monitor flow and back off if you detect damage or backflow
- Verify cleanout and trap integrity after cleaning
- Document results and plan follow-up maintenance