What To Do If a Drain Snake Doesn’t Work: A Troubleshooting Guide
Learn practical steps to diagnose and fix clogs when a drain snake fails. This guide covers causes, safe alternatives, and a step-by-step plan to avoid DIY hazards.

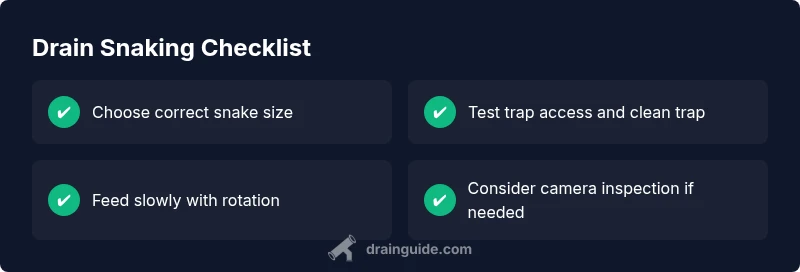
When a drain snake won't clear a clog, the issue is usually stubborn grease, a collapsed pipe, or a blockage beyond the trap. Start by re-checking the snake's size and technique: feed slowly, rotate steadily, and ensure you’re working at the trap arm. If it still fails, switch to a longer/stronger auger or seek professional inspection.
Why a drain snake might stop working
What if drain snake doesn't work? If you’ve tried a few passes and the clog remains, the problem is frequently not the tool’s basic function but where the blockage sits or how the pipe is built. According to Drain Guide, many DIY attempts stall because the clog lies beyond the trap arm or is a heavy, baked-in grease plug that resists mechanical pulling. Before blaming the auger, confirm you’re using the right diameter and length for your pipe and that you’ve fed the snake far enough to reach the actual obstacle. Watch for signs like a partially blocked trap that doesn’t drain, water backing up in other fixtures, or the snake snagging on screws or pipe joints instead of advancing. If these symptoms show up, expect a deeper blockage, a weakened or collapsed section of pipe, or a clog that’s spread into the main line. In short, the cause is tougher than a simple surface clog, and addressing it safely often requires a different strategy. This is why understanding the system as a whole matters—kitchens, bathrooms, and laundry drains each behave differently when a clog appears, and the approach must adapt accordingly.
Quick checks before pulling the snake again
Before you dump more coils into the drain, run through a quick checklist to avoid wasting effort. First, verify your tool is appropriate for the pipe size: too thin and it won’t reach, too thick and it won’t fit through the trap. Second, inspect the P-trap: remove it if you’re comfortable and clear out hair, food debris, and mineral build-up. Third, determine whether the water currently drains from the fixture when the trap is removed; if not, the issue is likely deeper in the pipe. Fourth, ensure you’re feeding the snake straight into the drain and keeping a steady wrist while rotating; avoid forcing it past a bend or joint. Fifth, keep the work area dry and use gloves and eye protection to prevent splashes or flying debris. If after these checks the clog remains, you’re likely dealing with a deeper blockage or an inaccessible spot, which means a larger auger, a camera inspection, or professional help may be necessary.
Common causes when the snake stalls
Several issues most commonly cause a snaking tool to stall. First, a thick layer of grease or soap scum can form a tight plug that resists pulling, especially in kitchen lines. Second, the clog may sit past the trap in the horizontal portion of the drain or even in the main line, where a standard household snake simply cannot reach. Third, the pipe itself could be damaged, misaligned, or collapsed, creating a snag that the tool cannot bypass. Fourth, improper access—such as trying to snake from a poor entry point—can make progress impossible. Fifth, the tool itself could be worn or damaged: a frayed cable head won’t grab the clog and will just slide along. Recognizing these specific causes helps you tailor your next move—whether it’s a deeper pass with a bigger auger, relocating to a different access point, or scheduling a pro camera inspection to identify the exact location of the blockage.
When to switch strategies: plunger, pressure, or chemical cleaners
If snaking fails, try safer alternatives before escalating. A plunger with a good seal can dislodge shallow clogs in sinks or tubs and is worth trying as a first backup. For stubborn but accessible blockages, a wet/dry vacuum (carefully used) can pull debris out of the drain; avoid attempting this on a sewer line or a toilet. Built-up grease may respond to hot water and a gentle degreasing routine with biodegradable cleaners, but avoid harsh chemical cleaners immediately after snaking—they can react with residual debris inside the pipe and damage seals or fittings. If the clog persists after these approaches, escalate to professional tools and procedures, such as a high-end auger, hydro-jetting, or a camera inspection to locate the exact blockage. In some cases, you may also benefit from a clean-out access at the main line, which makes future maintenance easier.
Step-by-step: using a drain snake correctly (home fix)
- Prepare the work area: lay towels, wear safety glasses, and have a bucket ready to catch any backflow. 2. If you’re working near an appliance like a garbage disposal, unplug or switch off power to avoid shocks. Remove the P-trap if you’re comfortable and clear it of debris; set aside the collected gunk for disposal. 3. Insert the snake into the drain, keeping the cable straight as you feed it toward the trap arm; maintain slow, even pressure and steady clockwise rotation. 4. When you feel resistance, pause, then apply gentle forward pressure while turning; if you don’t sense progress, back the tool out a little and reattempt a deeper pass. 5. Withdraw the cable slowly, clean the head, and reassemble the trap; run hot water to test for flow and inspect for any remaining resistance. 6. If the drain remains blocked after a full pass, try a deeper insertion with a longer auger or switch to a different access point; otherwise, book a camera inspection for a precise diagnosis. Tip: never force the cable through a hard bend or rough edge—redirect and retry.
Safety and professional limits
Drain work carries some safety risks. Water exposure, sharp edges, and moving parts can cause injuries if you’re not careful. Always wear eye protection and gloves, secure the area, and avoid leaning over a full bucket of dirty water. If you encounter sewage backup, foul odors, or persistent blockages after several attempts, stop and contact a licensed plumber. Don’t ignore slow drains that affect multiple fixtures, or signs of a possible main line problem; these situations often require specialized equipment and permits. If you’re unsure about the pipe layout or you’ve never removed a P-trap before, seek professional help rather than continuing to snake. Remember, a failed repair can lead to more expensive damage down the line, so know when to call for help early.
Prevention tips to avoid future clogs
- Use drain strainers on sinks and install a hair catcher in showers to stop debris from entering the pipes. - Avoid pouring grease or oil down the drain; store it in a container and recycle or dispose properly. - Flush drains with hot water regularly and consider a biodegradable enzymatic cleaner monthly to maintain a clear line. - Keep up with routine maintenance: inspect traps, clean debris, and schedule professional camera inspections for older homes. - If you’ve had repeated clogs, consider installing a clean-out valve for easier maintenance and future DIY access.
Steps
Estimated time: 30-45 minutes
- 1
Prepare the area and safety gear
Lay towels, put on eye protection and gloves, and have a bucket ready. Clear the area to avoid tripping over hoses or tools.
Tip: Safety first prevents messy accidents. - 2
Access the trap and inspect components
If you can, remove the P-trap and check for obvious debris. This helps confirm whether the clog is in the trap or deeper in the line.
Tip: Keep the trap’s washers and screws in a labeled container. - 3
Insert and feed the snake
Insert the cable into the drain, keep it straight, and feed toward the trap arm with slow, steady rotation.
Tip: Avoid forcing the cable past bends; redirect if you meet resistance. - 4
Rotate and retrieve
When you meet resistance, rotate and push gently; pull back to bring debris with you. Repeat as needed to deepen the pass.
Tip: Use a controlled rhythm rather than brute force. - 5
Test and reassemble
Withdraw the snake, clean the head, reassemble the trap, and run hot water to test flow.
Tip: Check for leaks around joints after reassembly. - 6
Decide next steps if unresolved
If the clog persists, consider a longer auger or a camera inspection, or call a plumber for a targeted diagnosis.
Tip: Document symptoms to share with the pro.
Diagnosis: Clogged drain that won't clear with a standard drain snake
Possible Causes
- highGrease buildup forming a tight plug ahead of the clog
- mediumPipe damage, misalignment, or collapse beyond the trap
- mediumBlockage located farther down the line or in the main sewer line
Fixes
- easyRe-check tool size/length, feed slowly, rotate steadily; try a deeper pass or a longer auger
- mediumUse a larger or more aggressive auger, or attempt hydro-jetting if accessible (with professional help)
- hardSchedule a camera inspection to locate the exact blockage and assess pipe integrity
Got Questions?
Why won’t my drain snake reach the blockage?
A clog located past the trap, too much grease, or a tool that’s too short can prevent reach. Reassess access points and consider a longer auger or professional inspection if necessary.
If the clog is beyond the trap or grease forms a tight plug, the snake may not reach it; try a longer auger or a camera inspection.
When should I stop trying with a drain snake?
If you feel persistent resistance with no progress after multiple passes, or you notice signs of main-line issues, stop and seek professional help to avoid pipe damage.
If you’re not making progress after several attempts, stop and call a plumber.
Are there safer alternatives to a drain snake for stubborn clogs?
Yes. A plunger for shallow clogs, and a wet/dry vacuum for certain debris can help. For deeper issues, a camera inspection is often safer and more effective than repeated snaking.
Try a plunger first, or call for a camera check if it's deeper than you can reach.
Can a clogged main line cause a snake to fail?
Yes. If the clog is in the main line, snaking downstream won’t clear it. A camera inspection or professional diagnostic is typically required.
If the main line is clogged, snaking won’t fix it; a pro check is needed.
Is it safe to use chemical drain cleaners after snaking?
Most professionals advise avoiding chemical cleaners after mechanical attempts; they can react with debris and damage seals. If you must use cleaners, do so only after thorough flushing and only with proper ventilation.
Avoid chemical cleaners after snaking; they can react with debris and damage seals.
Should I hire a professional for stubborn clogs?
For persistent or complex clogs, a licensed plumber with diagnostic tools is the safest route. They can perform a camera inspection and, if needed, hydro-jetting or pipe repair.
If it stays clogged after DIY attempts, a pro is the right move.
Watch Video
The Essentials
- Re-check tool size and technique before re-snaking.
- Switch strategies if the snake stalls at a bend or grease plug.
- Avoid chemical cleaners immediately after snaking.
- Schedule camera inspection for persistent clogs.
- Practice safe prevention to reduce future clogs.