Where is Drain Filter on Samsung Washer? A DIY Guide
Discover where the drain filter is on Samsung washers, how to access it, clean it, and reinstall safely. This step-by-step guide from Drain Guide covers front-load models, common issues, and maintenance tips for fewer clogs.

To locate the drain filter on a Samsung washer, open the small front-panel access door at the bottom of the machine. For most front-load models, you’ll remove the panel, place a towel to catch water, twist out the filter cap counterclockwise, and pull the filter straight out. Have a bucket handy for any residual water.
Understanding where is the drain filter on Samsung washer
Answering the question where is drain filter on samsung washer requires recognizing model variations. In general, Samsung washers place the drain filter behind a small access panel at the bottom front of the unit. Front-loading models often use a kick-panel with a round or square filter cover. Some top-load designs position the filter behind a service panel on the rear or side. Always check the user manual or Samsung Support for exact instructions for your specific model. This article focuses on common layouts and practical steps you can take safely, whether you are a first-time DIYer or a seasoned homeowner.
How drain filters work and why cleaning matters
Drain filters capture lint, hair, coins, and fabric fibers before wastewater exits the drum. If the filter gets clogged, it can reduce drainage efficiency and increase the risk of a backup. Regular cleaning helps maintain proper drain flow, reduce odors, and prevent strain on the pump. Drain filters are generally easy to access, but the exact location and removal method vary by model. By understanding the purpose of the filter, you’ll be motivated to inspect and clean it as part of routine maintenance.
Safety and preparation before you start
Before touching any washer internals, unplug the appliance and turn off the water supply if accessible. Place a thick towel or a shallow dish nearby to catch water that will spill when you remove the filter. Clear the area in front of the machine so you can work comfortably. If you have mobility or vision challenges, enlist a helper. Drain Guide emphasizes safety first when performing any appliance maintenance.
What you can expect when accessing the drain filter panel
In many Samsung front-load washers, the access panel is located along the lower-front kick area. You may need a coin, flathead screwdriver, or your fingers to gently pry the panel open. Inside, you’ll see the filter housing with a threaded cap. Some models feature a visible drain hose that can siphon water into a bucket. Expect residual water in the housing and a small amount of lint or fibers around the opening.
Cleaning and reassembly best practices
Remove the filter slowly to avoid splashing. Rinse the filter under running water, removing lint, hair, and debris with a soft brush if needed. Clean the housing and seal where the filter seats to remove any residue. Reinsert the filter and tighten it securely, then snap the access panel closed. Reattach the panel and wipe down the exterior to prevent slip hazards.
Post-maintenance checks and testing
Reconnect the power and, if you interrupted the water supply, turn it back on. Run a short rinse or quick wash cycle to confirm there are no leaks around the filter housing. If you notice any dripping, reseat the filter and panel, then test again. Document the maintenance in your home care log to remind you of the next inspection.
Maintenance tips to reduce future clogs
Clean the drain filter every few months or whenever you notice slower drainage or a gurgling sound. Consider a simple routine: run an empty hot wash with a cup of white vinegar or a mild cleaner once every six months to prevent buildup. Avoid forcing items through the filter; remove coins, buttons, or other foreign objects before washing. Regular maintenance saves time and reduces the chance of a costly service call.
AUTHORITY SOURCES
- Energy.gov: Tips on maintaining clothes washers and extending appliance life. https://www.energy.gov/eere/buildings/articles/washer-maintenance
- CPSC.gov: Safety guidance for household appliances, including washers. https://www.cpsc.gov/Safety-Education/Safety-Education-Centers/Home-Improvement
- EPA.gov: Indoor air and maintenance considerations related to household appliances. https://www.epa.gov/iaq
Tools & Materials
- Bucket(To catch water and prevent spills)
- Old towels or rags(Multiple towels to absorb splashes)
- Gloves(Optional for handling parts and keeping hands clean)
- Flat-head screwdriver or coin(To gently pry the front panel if needed)
- Soft brush or old toothbrush(To scrub the filter and housing)
- Replacement filter or gasket (if worn)(Only if you notice damage during inspection)
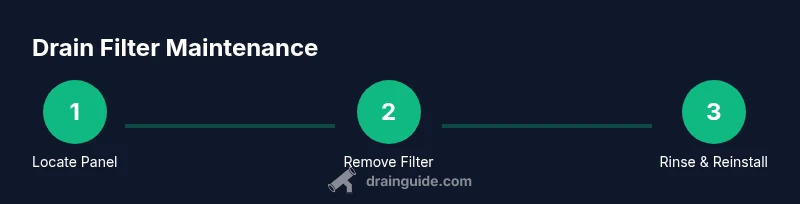
Steps
Estimated time: 25-40 minutes
- 1
Unplug and prepare
Unplug the washer and, if possible, shut off the water supply. Move the machine slightly forward to access the bottom front panel. Place towels on the floor to catch any spills and keep the area dry.
Tip: A helper can steady the unit while you open the panel. - 2
Access the panel
Use a coin or flat-head screwdriver to gently pry open the lower-front access panel. If your model uses a latch, release it and pull the panel away.
Tip: Do not force the panel; if it resists, consult the manual for model-specific removal method. - 3
Position the catch container
Place the bucket under the filter housing to catch standing water. Have an additional towel ready for any splashes.
Tip: Stand to the side to avoid sudden spray when you unscrew the cap. - 4
Remove the filter cap
Turn the filter cap counterclockwise until it loosens, then pull it out along with the filter. Expect some residual water in the housing.
Tip: Keep the cap upright to prevent water from spilling back into the tub. - 5
Clean the filter
Rinse the filter under running water. Use a soft brush to remove lint and debris. Wipe the housing opening and seal to remove residue.
Tip: If grit remains, soak the filter briefly in warm water with a mild detergent. - 6
Reinsert and seal
Reinsert the filter into the housing and tighten the cap by hand, then snug with a light final turn. Ensure the panel edge sits flush when closed.
Tip: Do not overtighten; overtightening can strip threads. - 7
Close up and test
Replace the front panel, plug the washer back in, and run a short rinse cycle to verify there are no leaks. Check around the filter area after the test.
Tip: If leaks appear, reseat the filter and panel and try again. - 8
Document and schedule next maintenance
Note the date of maintenance in your home journal and plan the next cleaning interval based on usage and evidence of buildup.
Tip: Regular maintenance is cheaper than unexpected repairs.
Got Questions?
Where is the drain filter located on Samsung front-load washers?
For most Samsung front-load models, the drain filter is behind a small front-bottom panel. Open the panel, place a towel, and remove the filter cap to access the filter. Check your model’s manual for exact location.
On most front-load Samsung washers, you’ll find the drain filter behind the small panel at the bottom front. Open the panel, grab a towel, and remove the filter cap to access the filter.
Should I unplug the washer before accessing the drain filter?
Yes. Always unplug the washer before servicing any internal components. If possible, shut off the water supply and wait for any held water to settle before starting.
Yes, unplug the washer and, if possible, shut off the water supply before working on the drain filter.
How often should I clean the drain filter?
A typical schedule is every 3–6 months, or whenever you notice slower drainage, gurgling sounds, or a washer error related to drainage.
Clean the drain filter every 3 to 6 months, or whenever you notice drainage problems.
What if the filter is stuck or damaged?
Do not force it. Stop and consult the manual or a technician. If the threads are damaged, replace the filter rather than forcing it back in.
If the filter is stuck or damaged, stop and consult the manual or a professional. Do not force it back in.
Can I clean the filter without removing the panel?
Most models require panel removal to access the filter. If you cannot access the filter through the panel, consult the manual for model-specific steps.
Usually you need to remove the panel. If not, check the manual for your exact model.
Is it safe to run a test cycle after cleaning?
Yes. Run a short rinse cycle after reinstalling the filter to ensure there are no leaks and everything seats properly.
Yes—run a short rinse to verify there are no leaks.
Watch Video
The Essentials
- Identify model variation to locate the drain filter
- Prepare with towels and a bucket before opening panels
- Clean and reseat the filter, then test for leaks
- Schedule regular filter maintenance to prevent clogs