Whirlpool Cabrio Drain Pump: Diagnosis and Replacement Guide
Learn how to diagnose and replace the Whirlpool Cabrio drain pump. Step-by-step methods, safety tips, and maintenance practices from Drain Guide to keep your washer draining properly.

This guide helps homeowners diagnose and replace a clogged or failed Whirlpool Cabrio drain pump. You’ll learn how to test the pump, access the rear or bottom panel, remove the old unit, and install a replacement with safe, step-by-step instructions. Following Drain Guide’s method ensures proper draining and helps protect your laundry from overflows and water damage.
What the Whirlpool Cabrio drain pump does
The drain pump in a Whirlpool Cabrio washer is responsible for moving used water from the tub to the drain hose during the drain cycle. It sits behind the lower access panel and is driven by the motor via a belt drive or direct-drive system depending on model. When the pump impeller is clogged with lint, hair, or debris, or when the motor fails, water will linger in the tub or fail to drain altogether. Drain Guide notes that a failing pump often presents as a buzzing or humming noise from the pump area, a blocked discharge hose, or error codes related to draining. Keeping the pump area clean helps prevent early failures, and regular maintenance can extend the life of the Cabrio. This component is a common point of failure in many load sizes, so understanding its role helps homeowners diagnose issues quickly.
Common symptoms of a failing drain pump
If the washer won’t drain or leaves standing water, the drain pump is a common suspect. You may hear a buzzing, hum, or stuttering when the drain cycle begins. The discharge hose might feel blocked, or water could leak from the pump area. In some cases, the motor will run but won’t move water, indicating an impeller jam or worn bearings. Drain Guide emphasizes that diagnosing the pump requires checking the pump housing, hoses, and electrical connections for signs of wear or obstruction. Recognizing these signs early helps you avoid water damage and potential overflow.
Tools and safety essentials before you begin
Before you touch the washer, unplug it from the wall and shut off the hot and cold water valves if you’ll be working with hoses. Place a towel or pan nearby to catch any residual water. Work in a well-lit area and wear gloves to protect your hands from sharp edges. Having the right tools ready—screwdrivers, pliers, a socket set, and a replacement pump—reduces repair time and improves safety. Drain Guide’s approach prioritizes clean work and safety above all. Take a few minutes to review the model’s service manual for any Cabrio-specific quirks before you start.
Step-by-step overview for accessing the pump area
To access the drain pump, you’ll typically need to remove the lower front panel or back panel depending on your Cabrio model. Once exposed, inspect the pump body for cracks, a loose mounting, or damaged hoses. If you see water near the pump housing, it's a sign of a possible leak or hose misfit. While the full, detailed steps are provided in the dedicated STEP-BY-STEP section, this overview helps you understand the sequence and why each action matters. Remember that different years of Cabrio washers may place panels in different locations, so consult your owner manual if you’re unsure.
Maintenance tips to prevent future drain problems
Keep the pump area clean by removing lint and hair from the filter and hoses. Run monthly flushes with a mild cleaner or white vinegar solution to dissolve mineral buildup in the hoses. Use a mesh filter on the drain hose where possible and avoid overloading the washer, which can stress the pump. Regular inspection of hoses for cracks or stiffness helps catch problems before they become failures. Drain Guide recommends scheduling a quick visual check every 3–6 months to catch wear early and extend the life of your pump and hoses.
Troubleshooting tips when you can't access the pump
If you cannot access the pump easily due to cabinet design, start by inspecting the drain hose and air gaps from the outside. Check for kinks and ensure the hose is routed correctly to the drain. Clean the lint screen and check for clogs in the standpipe or house plumbing that could mimic a pump failure. In many cases, fixing upstream clogs or hose kinks resolves the issue without pump replacement. If water still remains after these checks, you may need professional diagnostics to evaluate the motor, wiring, or control board.
Tools & Materials
- Flat-head screwdriver(for removing appliance panels)
- Phillips-head screwdriver(for screws on access panel)
- Nut driver or socket wrench(for pump mounting bolts)
- Pliers(to disconnect hose clamps)
- Pan or towel(to catch water)
- Replacement drain pump(compatible with Cabrio model)
- Work gloves(hand protection)
- Bucket(optional for extra spill control)
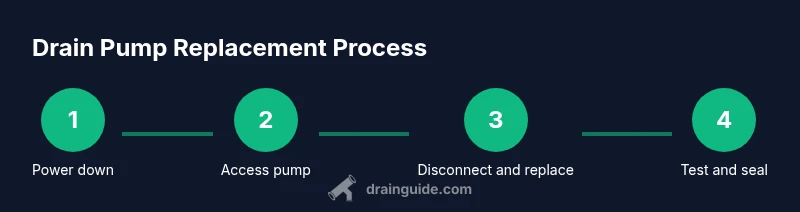
Steps
Estimated time: 60-90 minutes
- 1
Power down and prepare
Unplug the washer and shut off the water supply to prevent leaks. Move the unit to a accessible area and place towels to catch any residual water. Ensure you have good lighting before starting.
Tip: Always unplug the unit before handling electrical components. - 2
Access the pump area
Remove the lower front panel (or back panel on some models) to expose the pump. Keep track of screws and support panels so you don’t damage the cabinet. Confirm there is water in the tub that could spill when panels are removed.
Tip: Use a small tray to hold fasteners; panels can be sharp. - 3
Disconnect hoses and wiring
Carefully loosen hose clamps and detach the discharge and inlet hoses from the pump. Take a photo of the wire connector orientation before unplugging the pump harness. Avoid pulling on hoses forcefully to prevent cracking fittings.
Tip: Label hoses if needed to reassemble correctly. - 4
Remove the old pump
Unbolt the pump from its mounting brackets and slide it out gently. Check for cracks in the pump housing or damaged impeller. Remove any debris from the housing and hoses before installing the new unit.
Tip: Do not bend hoses excessively during removal. - 5
Install the new pump
Position the replacement pump and secure it with the mounting bolts. Reconnect the electrical harness and reattach the inlet and discharge hoses firmly. Ensure seals are seated to prevent leaks.
Tip: Hand-tighten clamps first, then snug with pliers. - 6
Test and cleanup
Plug in, run a quick drain cycle, and observe for leaks or unusual noises. If water drains correctly, run a full wash cycle to verify. Wipe up any residual water and reinstall the access panel.
Tip: Check again for leaks after the first full cycle.
Got Questions?
What are common symptoms of a failing Whirlpool Cabrio drain pump?
Common signs include the washer not draining, standing water in the tub, buzzing or humming noises near the pump, and occasional leaks. These symptoms point toward pump or hose issues and should be investigated promptly.
If your washer won’t drain, start by inspecting the pump and hoses for blockages or damage.
Can I fix the pump myself or should I hire a pro?
If you’re comfortable with basic appliance repair and have the right tools, replacing the pump is a doable DIY project. If you encounter burnt wiring or unusual smells, stop and contact a technician.
A DIY replacement is possible if you’re handy; otherwise, a professional is safer.
Is it safe for a DIY beginner to replace the drain pump?
Yes, with proper precautions: unplug, shut off water, wear gloves, and follow the manufacturer’s instructions. If you’re unsure, consult a detailed guide like Drain Guide’s.
You can do it safely if you follow steps and safety reminders.
What tools do I need for the replacement?
Common tools include screwdrivers, pliers, a nut driver or socket, a drain pan or towel, and a compatible replacement pump. Check your Cabrio model before purchase.
Gather the right tools and a compatible pump before you start.
How long does a drain pump replacement typically take?
Most homeowners complete the job in about 60-90 minutes, depending on access and experience. Plan extra time for troubleshooting.
Expect an hour or so, depending on setup.
Where can I find a compatible replacement pump?
Look for OEM-compatible pumps or reputable aftermarket options that list Cabrio compatibility. Verify model numbers and pressure ratings before purchasing.
Check the model number and verify compatibility before buying.
What if the pump isn’t the problem?
If you’ve ruled out clogs and hoses, the issue may be a motor or control board problem. Consider testing the washing machine’s electrical connections and consulting a professional.
If the pump checks out, the issue could be wiring or control boards.
Watch Video
The Essentials
- Identify pump as the drain source when water remains in tub
- Prepare safely with unplugging and water shut-off
- Follow the step-by-step replacement for best results
- Test thoroughly and inspect for leaks after installation