Drain Field Installation: A Complete How-To for Homeowners
Learn to plan, design, install, and troubleshoot a drain field for a septic system with practical steps, soil tests, permits, trenching, piping, testing, and maintenance tips.

Goal: Install a drain field for a septic system by following a clear, safety‑driven sequence. You’ll assess site conditions, design trench layout, select bedding and piping, and perform post‑installation testing. Before starting, verify local permits and soil percolation tests. This guide walks you through each step with practical checks to prevent failures and backups.
Understanding drain field installation
According to Drain Guide, a drain field installation is a critical component of a septic system that must be designed based on soil conditions and water usage. The field receives effluent from the septic tank and relies on soil for treatment and dispersal. A well-designed drain field distributes wastewater evenly, minimizes groundwater impact, and reduces the risk of backups. Key concepts include soil percolation rate, drain tiles or pipes, gravel bedding, and proper trench depth. Local regulations may dictate setback distances from wells, property lines, and water features. Before you start, ensure you have a certified design, or consult a licensed professional if soil tests indicate challenging conditions. The success of the installation hinges on accurate site assessment, correct trench placement, and strict adherence to bedding and backfill procedures. Drain Field installation is not a DIY one-size-fits-all task; it requires careful planning to match soil type, groundwater depth, and household water use. By understanding these fundamentals, homeowners can prevent long-term failures and protect their drinking water supply.
Planning and site assessment
Planning a drain field installation starts long before trenches appear. A thorough site assessment considers soil type, infiltration rate, groundwater depth, slope, and proximity to wells or streams. Drain Guide analysis shows that soil texture and percolation rates dramatically affect field performance, so testing is essential. Begin with a soil percolation test (perc test) and a shallow groundwater check, then map required setbacks and buffers. Confirm local permits and health department requirements; failure to obtain approvals can halt work or lead to fines. With a clear site map, identify the best location that promotes even distribution and minimizes uphill drainage toward structures or driveways. In some climates, seasonal water table changes alter suitability, so plan for seasonal variability and potential future home additions. Documentation of site conditions, including measured depths to seasonal groundwater and bedrock, helps lenders, inspectors, and future owners. Drain Guide's practical approach emphasizes record-keeping, soil‑friendly trenching, and consistent backfill to avoid compaction that can impede drainage.
Designing the layout and trenches
A well‑designed drain field uses evenly spaced trenches to maximize aerobic treatment and dispersion. Start with a layout plan that shows trench lines, lengths, and the distribution box location. The design should specify trench width (commonly around 1–2 feet wide), depth (to accommodate bedding and a perforated pipe), and a gentle slope for gravity flow. Consider elevational changes across the site to prevent water pooling in low spots. Use durable, corrosion‑resistant perforated pipe and a central distribution header that feeds lateral lines uniformly. Layer the trench bed with gravel to promote filtration, then add a geotextile fabric to separate gravel from soil. The final backfill should be clean soil that preserves porosity. Drain Guide notes that grading and soil restoration after installation are critical; poor backfill density can reduce infiltrative capacity and lead to early failure. This phase sets the stage for effective wastewater treatment and long‑term system resilience.
Materials, soil considerations, and permits
Before you buy components, understand the soil profile and regulatory requirements. Dry, sandy soils drain rapidly but may need wider or deeper trenches, while clay soils require careful backfill management to avoid compaction. Gather essential materials: bedding gravel, perforated pipe, distribution box, geotextile fabric, soil backfill, and sand for the trench ceiling. You’ll also need a means to excavate safely and measure accurately, such as a trenching shovel, level, and measuring tape. Permitting and inspections are often mandatory; failing to obtain approvals can delay or invalidate the project. Retain a soil test report if available and coordinate with the local health department for on‑site evaluation. Drain Guide emphasizes documenting soil conditions and equipment use to demonstrate compliance during inspections. Remember to create an emergency plan in case groundwater is encountered during trenching and to stage equipment to minimize soil disturbance.
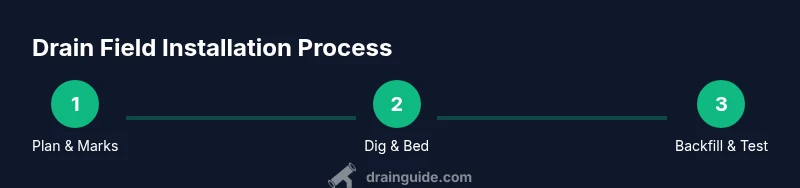
Step-by-step overview and workflow
This section provides a concise workflow you can implement on the ground, in conjunction with the detailed Step-by-Step block. Start by marking the setback areas and trench routes with stakes and string, then verify depths with a level. Excavate trenches to the planned depth, ensuring a uniform bottom grade. Install a bedding layer of gravel, lay the perforated pipe with a consistent downward slope, and cover with another gravel layer before adding geotextile fabric and backfilling. Install a distribution box at the trench junction and connect lateral lines, ensuring invisible joints are sealed. Test the system using a pressure/flow check before final backfill and cover with landscape soil to allow settlement. Keep records of measurements, materials, and inspector signs. Drain Guide recommends inspecting the trench joints for leaks and maintaining a clean worksite to avoid contamination.
Maintenance, troubleshooting, and long-term care
After installation, close monitoring is essential for several weeks. Look for signs of surface dampness, gurgling sounds, or slow drainage in connected fixtures. Regular inspections help catch failures early, reducing the risk of sewage backups. Drain Field systems require periodic soil moisture checks, effluent monitoring, and occasional pump replacements if you have an adjacent septic tank. User education is critical; teach household members to conserve water while the system establishes. If you notice abnormal odors, soft ground, or wet areas in the drain field, consult a licensed professional. Drain Guide advocates a proactive maintenance plan: schedule annual inspections, perform soil tests when changes occur, and keep detailed records of maintenance activity. By staying ahead of issues, homeowners protect property value and environmental health.
Tools & Materials
- Measuring tape(Long enough to measure trench lengths and setbacks)
- Stakes and string line(For marking trench routes and setbacks)
- Shovel and trenching shovel(Essential for manual digging)
- Backhoe or trenching machine (optional)(Use if soil is hard or trench depth is deep)
- Gravel or crushed stone (3/4”–1”)(Bed and bedding fill to promote drainage)
- Perforated PVC/HDPE pipe(Corrugated pipe can be used in some cases)
- Geotextile fabric(Prevents soil from clogging gravel)
- Sand for trench ceiling(Soft layer helps protect pipes)
- Distribution box(Joins trenches and feeds lateral lines)
- Backfill soil(Clean, uncompacted soil for final cover)
- Safety gear (gloves, eye protection, hard hat)(Worksite safety)
- Utility locator service (811) and permits(Identify buried cables and get approvals)
Steps
Estimated time: 4-8 hours
- 1
Assess site and plan layout
Survey the site, identify setbacks, and draft a trench layout with stakes. Verify local regulations and ensure you have the necessary permits before any digging. Create a simple map showing trench lengths, direction, and the intended distribution box location.
Tip: Take precise measurements; small errors multiply across long trenches. - 2
Obtain permits and test soil
Submit plans to the local health department if required and arrange a soil percolation test. Use perc test results to determine trench depth and gravel thickness. Keep a copy of all approvals for inspectors.
Tip: A failing perc test may require design adjustments; plan for contingencies. - 3
Mark trench lines and depths
Place wooden or metal stakes along the planned trench route and run string lines to create straight lines. Mark the target depth using a level and measuring tape; confirm there is clearance from utilities.
Tip: Double-check depths at multiple points, especially on sloped ground. - 4
Excavate trenches to spec
Dig trenches to the set depth and uniform bottom grade. Avoid over‑digging into compacted soil; create a smooth base for bedding gravel.
Tip: Keep trench walls stable; avoid cave-ins by working in sections. - 5
Install bedding and pipe
Spread a bedding layer of gravel, lay the perforated pipe with a consistent downward slope, and cover with another gravel layer. Place geotextile fabric over the gravel before backfilling.
Tip: Ensure pipes are clean and joints are secure before backfilling. - 6
Set up distribution and backfill
Install the distribution box at the trench junction and connect lateral lines. Backfill with clean soil in lifts to avoid sudden settling and test the system for leaks or blockages.
Tip: Backfill gradually and compact gently to prevent pipe movement. - 7
Test, finalize, and document
Conduct a flow test and inspect every joint for leaks. Restore the site surface, reseed or re‑grass as needed, and record installation details for future maintenance.
Tip: Keep the inspector's sign-off and maintenance plan readily accessible.
Got Questions?
What is a drain field and why is it important?
A drain field is the network of trenches and perforated pipes that receive effluent from the septic tank for soil treatment. It’s essential for dispersing wastewater safely and protecting groundwater. Proper design ensures reliable operation and reduces the risk of backups.
A drain field is a network of trenches that treats and disperses septic effluent; proper design protects your water and home.
Do I need a permit for drain field installation?
Most jurisdictions require a permit and inspection for drain field work. Check with your local health department or building authority before excavating. Permits help ensure system design meets soil and environmental standards.
Yes, check with local authorities for permits and inspections before you start.
How long does installation typically take?
Time varies with site conditions and equipment. A typical residential drain field project can take several hours to a day or more, including permitting, excavation, and final backfilling. Plan for weather-related delays.
It usually takes several hours to a day, depending on soil and access.
What soil conditions are favorable for drain field performance?
Sandy or loamy soils with good infiltration promote efficient treatment. Clay soils require careful backfill management to avoid compaction. Perc tests guide the design and expected performance.
Better infiltration soils like sandy loam perform best; clay soils need careful handling.
Can I install a drain field myself?
DIY installation is possible in some cases but often requires permits, soil tests, and professional oversight. Evaluate local codes, soil conditions, and your comfort with excavation and safety.
DIY is possible in simple cases, but many jurisdictions require professionals.
Watch Video
The Essentials
- Plan thoroughly before digging to avoid redesigns.
- Soil testing guides trench depth and pipe layout.
- Use bedding gravel, fabric, and clean backfill for durability.
- Obtain permits and inspect at key milestones.
- Test thoroughly and document every step for maintenance.