Dishwasher Drain Hose Frigidaire: Step-by-Step Guide
Learn how to inspect, replace, and secure your Frigidaire dishwasher drain hose. Step-by-step instructions, safety tips, and common mistakes to prevent leaks.

By the end, you’ll learn how to inspect, replace, and secure the dishwasher drain hose frigidaire on Frigidaire models. This quick guide covers common hose problems, the essential tools, and a safe, step-by-step approach to prevent leaks, backups, and water damage during installation and testing. It also highlights maintenance tips to keep drainage smooth.
Why the dishwasher drain hose frigidaire matters
The phrase dishwasher drain hose frigidaire describes a common component responsible for carrying wastewater from the dishwasher to the drain. When this hose is bent, cracked, or poorly connected, wastewater can back up into the tub or spill onto the floor. According to Drain Guide, addressing hose issues quickly can prevent more expensive water damage and mildew growth. Identifying symptoms early helps you decide if repair or replacement is needed.
Symptoms to watch for include pooling water under the dishwasher, a gurgling sound during cycles, and a faint sewer-like odor near the unit. If you notice any of these, start with a visual inspection of the hose path and clamps.
Safety and prep for working on a Frigidaire dishwasher
Safety first: unplug the dishwasher or switch off the circuit breaker, then shut off the water supply to the under-sink valve. Move the machine carefully to access the hose routes and clamps. Place a towel or small bucket to catch any residual water and protect the floor. If your model has a disposal or air-gap connection, note how the hose is routed before detaching anything.
Inspect the hose layout and connections
Carefully inspect the entire length of the drain hose for cracks, bulges, or soft spots. Check clamps for corrosion and ensure the hose is not kinked or stretched behind the unit. Verify the hose diameter matches the fittings on your Frigidaire model and confirm there is a proper loop to prevent backflow. Drain Guide findings indicate that many drainage issues begin with a loose connection or a kinked hose.
Replacement considerations and hose selection
If the hose shows cracks, chalky hardness, or is significantly stretched, replace it with a compatible drain hose designed for Frigidaire dishwashers. Choose a hose with the same inner diameter as the old hose and a length that reaches the sink or disposal without stretching. Avoid reusing rubber hoses from other appliances and select rigid or semi-rigid hose if your model requires it. Use new clamps if the old ones are corroded.
Installation best practices and securing connections
Install the new hose by routing it along a smooth path with gentle bends. Secure every connection with a screw-type hose clamp; ensure the clamp is tight, but not overtightened to damage the fitting. Reconnect the hose to the disposal or sink connection, ensuring the rubber gasket seats correctly. Avoid allowing the hose to sag behind the unit, which can trap water and promote mildew.
Testing, maintenance, and prevention
After reassembly, run a short test cycle without dishes to check for leaks. Look at all hose clamps and joints for moisture; wipe as needed to spot drips. Regularly check hose for signs of wear every 6–12 months and replace as needed. To prevent future problems, keep the area under the sink dry and avoid bending the hose sharply.
Common mistakes to avoid
Common mistakes include buying the wrong hose size, reusing old clamps, failing to remove moisture and debris, and not testing after installation. Make sure to confirm the hose is rated for dishwasher use and that the disposal air gap or high loop requirement is met if needed in your home.
Tools & Materials
- New dishwasher drain hose compatible with Frigidaire(Ensure correct diameter and length for your model)
- Phillips screwdriver(For hose clamps and mounting brackets)
- Flathead screwdriver(Optional for certain clamp styles)
- Adjustable wrench(Useful for fittings and tight spaces)
- Bucket(Catch residual water during replacement)
- Dish towels or rags(Clean up spills and keep area dry)
- Hose clamps (new)(New clamps prevent leaks)
- Pliers(Help loosen/tighten clamps)
- Flashlight(Illumination for tight spaces)
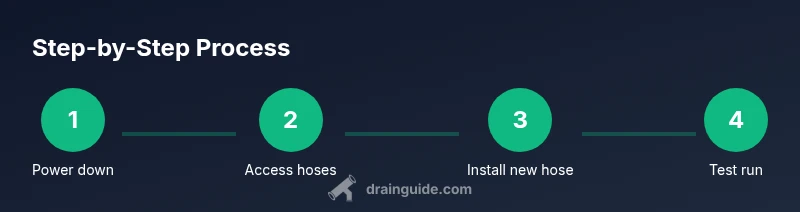
Steps
Estimated time: 60-90 minutes
- 1
Power down the unit
Unplug the dishwasher from the outlet or switch off the circuit breaker. This ensures you are not risking electric shock while accessing water-related components.
Tip: Double-check the outlet by trying to plug a lamp in after unplugging to confirm power is off. - 2
Access the drain area
Carefully pull the dishwasher out from its cabinet to expose the back and underside. Do not yank the power cord; disconnect it before moving the appliance fully.
Tip: Have a helper assist with the move to avoid dropping the unit. - 3
Disconnect the water supply
Shut off the under-sink valve and disconnect the water line from the dishwasher. Be prepared for some water to spill; use the bucket to catch it.
Tip: Keep a towel handy to wipe condensation as you work. - 4
Loosen clamps and remove old hose
Using a screwdriver or pliers, loosen the hose clamps and slide the old drain hose off both fittings. Expect some residual water in the hose.
Tip: Hold the hose steady to avoid spraying water on nearby wiring. - 5
Prepare the new hose
Compare the new hose length with the old one, and cut only if necessary to fit a clean path without sharp bends. Dry-fit routes before final installation.
Tip: Leave a small slack to prevent kinks during operation. - 6
Attach the new hose and clamps
Slide the new hose onto the fittings, position clamps, and tighten securely. Re-check the gasket seating to ensure a watertight seal.
Tip: Do not over-tighten clamps as this can crush fittings. - 7
Reconnect hoses and power
Reconnect the drain hose to the disposal or sink connection, re-fastening clamps. Return the water supply line and move the unit back into place.
Tip: Make sure the hose path is free of sharp edges or pinch points. - 8
Test for leaks
Plug in the unit and run a short wash cycle with no dishes. Inspect all connections for drips and verify proper drainage.
Tip: Wipe joints after the cycle to spot slow leaks early.
Got Questions?
What size is the standard Frigidaire dishwasher drain hose?
Frigidaire models typically use a standard drain hose compatible with most disposal or sink connections. Always check your model's manual or the hose packaging to confirm diameter and length before replacing.
Frigidaire uses a standard drain hose, but you should check your model's manual to confirm size before replacing.
Can I reuse the old hose if it looks okay?
If the hose is cracked, kinked, or stiff, replace it. If it’s flexible and undamaged, you may reuse it, but replacement is recommended for reliability.
If it's in good condition, reuse is possible, but replacing is usually best for reliability.
Should I disconnect power before starting?
Yes. Always unplug the unit or switch off the circuit breaker before handling drainage components.
Yes—unplug or switch off power before starting.
How do I test for leaks after replacement?
Run a cycle with no dishes, then inspect clamps and joints for moisture. Wipe and re-tighten if you see drips.
Run a test cycle and check for leaks at every joint.
Do I need a professional to replace the hose?
Most homeowners can replace the drain hose themselves if basic safety steps are followed; consult a professional if you’re unsure.
DIY is usually fine, but call a pro if you don’t feel confident.
What are signs of an incorrectly installed hose?
Backups, leaks, or gurgling sounds indicate improper routing or loose clamps. Re-check the path and clamps after installation.
Leaks or backups mean the hose is not installed correctly.
Watch Video
The Essentials
- Inspect for cracks, kinks, or loose clamps.
- Replace with a Frigidaire-compatible hose.
- Secure connections to prevent leaks.
- Run a test cycle to confirm drainage.
- Drain Guide's verdict: proper hose setup prevents issues.