Drain Filter Samsung Washing Machine: Step-by-Step Guide
Learn how to locate, remove, and clean the drain filter on a Samsung washing machine to prevent drainage issues. This Drain Guide tutorial covers safety, model variations, step-by-step actions, and prevention tips for long-term performance.

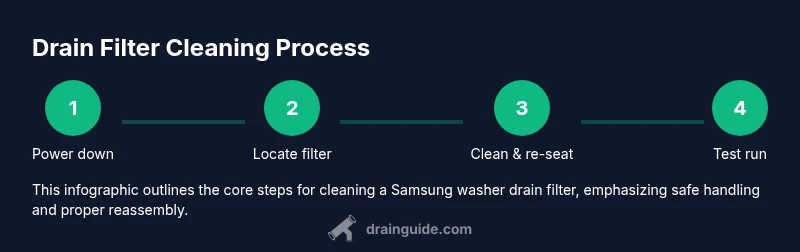
Start by unplugging the machine and turning off the water supply. This Drain Guide tutorial on drain filter samsung washing machine emphasizes safety and model variations, but the basic method stays the same: access the filter, remove debris, rinse, and reinstall. Afterward, run a test cycle to confirm proper drainage.
Understanding the drain filter in Samsung washers
The drain filter is a small screen and housing that captures lint, coins, hair, and fabric fibers before wastewater exits the drum. In a typical drain filter samsung washing machine setup, the filter sits behind a front-panel access door near the bottom of the machine. The purpose is twofold: it protects the pump from debris and helps the machine drain more efficiently. Over time, the filter can become clogged, reducing drainage speed and triggering error codes on many Samsung models. Regular cleaning keeps water flowing freely, reduces a risk of pump damage, and minimizes the chance of mold developing inside the filter housing. In practice, you should consider this a routine maintenance task, not a once-in-a-career repair. The Drain Guide approach emphasizes safety and consistency: unplug the unit, prepare towels, and clean the filter with plain water and a soft brush. If you have a high-efficiency model, remember that even tiny debris can slow drainage, so inspect the hose clamps and the hose connection for signs of wear. By staying proactive, you can prevent more serious issues and avoid expensive service calls.
Locating the drain filter on common Samsung models
Most Samsung front-loading washers place the drain filter behind a small access panel at the bottom front of the unit. Some models use a removable cover, while others require you to open a door or pull away a small tray. Before you begin, unplug the machine and place a shallow tray or towels in front of the panel to catch any water that escapes. If your model has a recessed filter, you may need a screwdriver to release a tiny retaining screw. Always consult the user manual for model-specific directions, but the general idea remains consistent: you’re seeking a circular or square cap that meets the drain hose and pump housing. Once located, remove the panel or cover to reveal the filter housing and gasket. Take a quick photo before removal so you can reassemble precisely as it came apart. A clean, dry workspace helps you see debris more clearly and prevents accidental drops into the pump chamber.
What signals a clogged drain and what to check first
If drainage slows or stops, a clogged drain filter is a frequent culprit. Look for signs like standing water in the drum after a cycle, longer cycle times, or intermittent gurgling sounds from the drain area. Common debris—lint, coins, hair, buttons, and fabric fibers—accumulates in the filter mesh and can extend to the housing if not cleaned regularly. In addition to the filter, inspect the drain hose for kinks or obstructions and check the pump for jammed objects. If you see visible lint or debris on the filter, clean it promptly and run a short rinse cycle to confirm flow improves. Regular inspection reduces the risk of pump burnout and helps your Samsung washer maintain efficient drainage.
Safety, prep, and essential tools for the job
Cleaning the drain filter is a straightforward maintenance task, but it involves potential water exposure and sharp edges. Always unplug the washer and, if available, shut off the hot and cold water supply to reduce risk. Prepare a bucket or shallow tray to catch water, towels to protect the floor, and gloves for hand protection. Having a flashlight or phone light helps you see into the housing, especially if the filter sits low behind a panel. A soft brush or old toothbrush is ideal for dislodging lint from the mesh, while a damp cloth makes quick wipe-downs easier. If your model has a small retaining screw, keep a Phillips head screwdriver handy. Finally, be mindful of any gasket or O-ring around the filter—if it looks worn, consider replacing it to maintain a tight seal.
Step-by-step overview before you start the hands-on part
Understanding the flow of actions helps you stay organized. You’ll need a clean workspace, a filled or empty bucket depending on water level, and a plan to re-seat the filter correctly to avoid leaks. The goal is to remove debris, rinse the filter under running water, inspect the housing for damage, and confirm a snug seal when you reinsert the filter. While this section outlines the approach, you’ll find the detailed, step-by-step instructions in the dedicated STEP-BY-STEP block for precise actions, timing, and safety notes.
Common mistakes and best practices when cleaning the drain filter
Avoid forcing the filter if it doesn’t turn freely; take a moment to check for any retaining screws or clips. Don’t use harsh chemicals or abrasive tools that could wear down the filter mesh or housing. Always dry the filter and surrounding area before reassembly to prevent mold growth. If you notice cracking, cracking seals, or persistent leaks after reinstallation, stop and consult a professional. Finally, maintain a regular cleaning schedule to reduce future clogs and keep the pump in good condition.
Maintenance plan and long-term prevention tips
A proactive maintenance plan yields long-term results: set a reminder to inspect the drain filter every few cycles or monthly if you run heavy loads. Keep a small stash of rags and towels near the washer to quickly manage any spills. Consider a gentle rinse to flush out lint after large loads and avoid stretching the filter mesh by forcing oversized items through the drum. Regularly check hoses for wear and ensure the drain path remains unobstructed. A clean drain filter samsung washing machine is less prone to draining issues and less likely to trigger error codes that derail family laundry days.
Tools & Materials
- Bucket or shallow tray(To catch water and lint under the filter.)
- Old towels or rags(Place to wipe spills and protect floor.)
- Gloves(Protect hands from sharp edges and debris.)
- Flashlight or phone light(Better visibility inside the filter housing.)
- Screwdriver (Phillips head)(Only if your model uses a small screw-on cover.)
- Water-safe container or sponge(For cleaning residual water and wiping the housing.)
- Replacement gasket or O-ring (optional)(If seal looks worn or damaged.)
- Soft brush or old toothbrush(For dislodging lint from mesh and corners.)
Steps
Estimated time: 15-25 minutes
- 1
Power down and prep the area
Unplug the washing machine and turn off the water supply. Move a towel and bucket to catch any residual water. This prepares you for a safe, mess-free filter access.
Tip: Have your phone handy to take a quick photo of the original setup in case you need to reassemble precisely. - 2
Locate the drain filter housing
Inspect the front-bottom panel for a circular or square access cover. Use a flashlight to spot any screws or clips and remove the cover gently to reveal the filter.
Tip: If you don’t see a panel, check the user manual for your exact model; location can vary slightly. - 3
Loosen and remove the filter
Turn the filter counterclockwise until it releases from the housing. Have the bucket ready to catch water that flows out as the filter is removed.
Tip: Support the housing with one hand while turning the filter to avoid dropping it into the pump area. - 4
Clean the filter mesh and housing
Rinse the filter under running tap water, using a brush to dislodge lint and debris. Wipe the housing, gasket, and surrounding area until all residue is removed.
Tip: If you see stubborn buildup, soak the filter briefly in warm water with a touch of dish soap. - 5
Inspect the gasket and seals
Check the rubber gasket around the opening for tears or wear. If the seal looks compromised, replace it before reinstalling the filter.
Tip: A damaged gasket can cause leaks post-reinstallation; replacing it is a small preventive step. - 6
Reinsert the filter and seal
Place the filter back into the housing and turn clockwise to engage. If your model uses a screw or clip, secure it firmly without over-tightening.
Tip: Run your finger around the edge to confirm a snug fit before closing the panel. - 7
Test for leaks and proper drainage
Plug the unit back in, reattach water supply, and run a short rinse cycle to ensure the filter seating is leak-free and drainage is smooth.
Tip: Watch for water around the panel; if you see any, recheck the seal.
Got Questions?
Where is the drain filter located on most Samsung washing machines?
Most Samsung washers place the drain filter behind a bottom-front access panel. Some models require removing a small cover or door to reach the filter.
Most Samsung washers have the drain filter behind a bottom-front panel; some models need a small cover removed.
Can I run the washer with the drain filter removed?
No. The filter helps protect the pump and maintain proper drainage. Reinstall the filter before operating the washer.
No, reinstall the filter before use to protect the pump and drainage.
What should I do if water remains after cleaning?
Check the drain hose for kinks, ensure the pump is not jammed, and run a short rinse cycle to verify drainage improves.
If water remains, check the hose and pump for blockages and try a short rinse.
How often should I clean the drain filter?
Inspect the drain filter during routine maintenance and after heavy loads. Frequency depends on usage and load type; more debris means more frequent cleaning.
Clean it during regular maintenance and after heavy loads.
What items most commonly cause clogs in Samsung washer drains?
Lint, coins, hair, buttons, and fabric fibers are frequent culprits that accumulate in the filter and housing.
Lint, coins, hair, buttons, and fabric fibers—lint is the biggest culprit.
If the filter housing shows cracks, should I call a professional?
Yes. A cracked housing or gasket can lead to leaks; a professional should assess and replace compromised parts.
Yes—cracks or leaks require a professional repair.
Watch Video
The Essentials
- Unplug and prep before opening the access panel.
- Clean the filter mesh and inspect seals for damage.
- Reinstall securely and run a test cycle.
- Regular maintenance reduces clogs and pump strain.