Drain or: DIY Drain Troubleshooting Guide
Learn to diagnose and fix common drain issues at home with practical, step-by-step guidance from Drain Guide. Tools, safety, and when to call a pro.

In this guide, you’ll learn to diagnose and fix common drain problems yourself, including when to drain or call a professional. Drain Guide recommends a safety-first approach, gathering basic tools, and testing progressively before resorting to chemicals. By following a step-by-step process, you’ll know when DIY fixes are enough and when to seek expert help today, in your home.
What 'drain or' means for homeowners
For homeowners, the phrase drain or describes the ongoing decision: should you attempt a DIY fix now or defer to a professional? Drain or decisions hinge on the symptoms, the location of the clog, and your comfort with basic plumbing tasks. In many homes, slow drains across a single fixture may be addressed with simple steps, while a mainline backup demands professional intervention. The Drain Guide team emphasizes evaluating safety concerns first: electrical lines near wet areas, hidden pipes, and the potential for sewage exposure. A measured approach reduces mess, prevents damage, and often saves time and money. By understanding the problem scope, you can decide whether to drain the system yourself or escalate. Drain Guide's guidance centers on clear planning, correct tools, and staged testing. The goal is to resolve the issue with minimal disruption while preserving pipe integrity. Remember: not every clog is equal, and a cautious, informed plan typically yields the best outcome for most households. Drain Guide’s insights are designed to empower homeowners with practical, non-destructive methods.
Safety first: when to DIY and when to call a pro
Your safety comes first. If a clog involves a main sewer line, sewage odors, or you’re unsure about the pipe layout, stop and call a licensed plumber. For simple, isolated clogs, basic tools and precautions make DIY fixes reasonable. Always wear gloves and eye protection, and shut off water when testing drains to prevent accidental overflows. Drain Guide urges caution with electrical outlets and wet areas; never mix cleaning chemicals, and never push a tool beyond the trap where you can’t visually assess what you’re doing. If you notice persistent backups after a DIY attempt, it’s wise to consult a professional to avoid future damage or costly repairs. This measured approach aligns with safe home maintenance practices and minimizes risk to you and your family.
Tools and materials you’ll need (overview)
Having the right tools on hand dramatically improves outcomes. A basic starter kit includes gloves, a bucket, rags, a plunger, a drain snake (augur), adjustable wrench, and a flashlight for dark pipes. For stubborn clogs, a K- or closet auger can reach deeper into pipes. Consider enzyme-based cleaners as a safer alternative to harsh chemical cleaners, which can damage gaskets and pipes over time. Drain Guide recommends keeping a simple log of tools and steps used so you can track what works best in your home. Proper disposal of debris is essential—dispose of waste according to local guidelines. By preparing your toolkit, you set yourself up for a smoother, cleaner DIY experience.
Common causes of slow drains and clogs
Slow drains rarely happen by accident. Hair, soap scum, food particles, and grease build up over time, especially in kitchen sinks and bathroom traps. Foreign objects or garden debris can slip into outdoor drains, causing blockages that propagate back through the system. In older homes, mineral build-up and corroded pipes also contribute to reduced flow. Identifying the likely culprit helps you choose the most effective method—whether it’s snaking, trap cleaning, or a targeted use of safe cleaners. Drain Guide notes that a misdiagnosed clog wastes time and can lead to bigger problems if left unchecked. Start with a visual inspection, then test drain speed after each step to confirm progress.
Step-by-step diagnosis and basic fixes (overview)
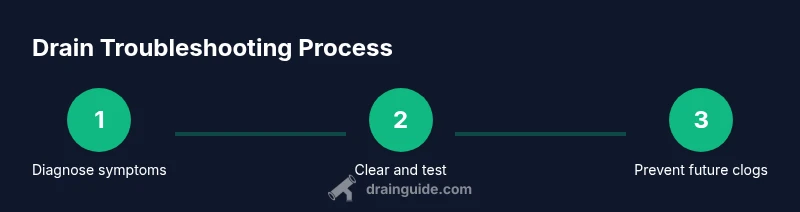
Diagnosing a drain issue involves a systematic approach: observe symptoms, isolate the affected fixture, inspect traps, and apply safe, incremental fixes. Begin by removing the trap if accessible and cleaning out any debris. Use a drain snake to break through the blockage, then flush with hot water to verify flow. If the clog remains, evaluate alternative methods such as enzyme-based cleaners, always avoiding mixing with other chemicals. Finally, reassess after a test run and plan routine maintenance to prevent recurrence. This section provides a roadmap, while the dedicated STEP-BY-STEP block below gives concrete actions.
Chemical cleaners: when to use and when to avoid
Chemical drain cleaners can be tempting, but they pose risks. Harsh formulas can damage PVC and metal pipes, corrode seals, and release strong fumes in confined spaces. They often fail to reach deep or stubborn clogs and can create a dangerous reaction if mixed with other products. Safer alternatives include mechanical methods (plunging, snaking) and enzyme-based cleaners that work gradually without harsh chemistry. If you do use a cleaner, follow the manufacturer’s directions exactly, ventilate the area, and never mix different products. Drain Guide recommends prioritizing non-chemical methods first and reserving cleaners only for specific, well-ventilated situations.
Maintenance tips to prevent future clogs
Prevention beats cure when it comes to drains. Regularly clean traps, avoid pouring grease down the sink, and use a mesh screen to catch hair and debris. Periodic use of enzyme-based cleaners can help maintain clear pipes without harsh effects; never rely on cleaners as a sole solution for recurring problems. Schedule quarterly checks for slow drains, inspect seals and traps for wear, and keep a simple maintenance log. By adopting these habits, you reduce the chance of major clogs and extend the life of your plumbing system. Drain Guide’s practical approach emphasizes consistent, small steps that yield noticeable results over time.
Tools & Materials
- Drain wrench or needle-nose pliers(Helpful for removing small blockages at the trap or fittings)
- Drain snake / auger (12-25 ft)(Length depends on pipe access; longer is better for deeper clogs)
- Bucket, towels, and rags(Catch water; protect floors; clean up debris)
- Adjustable wrench(Loosen fittings if traps are hard to remove)
- Gloves and eye protection(Protect hands and eyes from debris and splashes)
- Flashlight/headlamp(Inspect dark pipes and traps beneath sinks)
- Biodegradable enzyme cleaner or baking soda + vinegar(Safer, non-corrosive options for maintenance)
Steps
Estimated time: 45-60 minutes
- 1
Assess the symptoms
Observe whether the clog affects a single fixture or multiple fixtures. Note slow draining, gurgling, or foul odors. This helps determine whether the problem is local or systemic and informs your next action.
Tip: Document symptoms with photos or notes to share if you need professional help. - 2
Shut off water and prep the area
Turn off the water supply to the affected fixture to prevent overflow. Place a bucket beneath the trap and lay towels to catch drips. This reduces mess and protects your floors while you inspect.
Tip: Confirm you’re at the correct shutoff valve; some sinks have separate valves for hot and cold lines. - 3
Remove and clean the trap
Place a bucket under the U-shaped trap, loosen the slip nuts, and remove the trap. Clean out all debris, rinse with water, and reassemble tightly. A clean trap often resolves minor clogs without tools.
Tip: Keep the trap aligned and snug to avoid leaks after reassembly. - 4
Use a drain snake to break through the clog
Insert the auger into the pipe and rotate the handle while applying steady pressure. Work the snake past bends until you feel the clog give way, then pull back slowly to remove debris.
Tip: Crank slowly to avoid pushing the clog deeper or tearing pipes. - 5
Flush the drain and test
Run hot water for several seconds to flush remaining debris. Refill the trap area and run all affected fixtures to ensure proper flow and check for leaks around joints.
Tip: If the flow is weak, repeat the snake process for a deeper pass. - 6
Consider safe alternatives if needed
If the clog persists, try enzyme-based cleaners following package directions. Avoid mixing cleaners and never rely on chemical-heavy products as a first option.
Tip: Enzyme cleaners work slowly but are gentler on pipes over time. - 7
Final checks and disposal
Reset all fittings, wipe down the area, and dispose of debris according to local guidelines. Keep a simple log of what you did and the results for future reference.
Tip: Schedule regular maintenance checks to prevent future clogs.
Got Questions?
What does drain or mean in home plumbing?
Drain or describes the decision to attempt DIY fixes or hire a professional. It emphasizes evaluating safety, scope, and feasibility before proceeding.
Drain or means deciding whether you DIY or call a pro after assessing the problem.
Are chemical drain cleaners safe for pipes?
Most harsh cleaners can damage pipes and seals. Use safer methods first and avoid mixing chemicals.
Harsh cleaners can harm pipes; safer methods work better and are less risky.
When should I call a professional?
If you cannot locate the clog, multiple fixtures are affected, or you suspect a main sewer line issue, contact a licensed plumber.
If you’re unsure or the problem affects multiple fixtures, call a professional.
What tools are essential for DIY drain troubleshooting?
Gloves, bucket, pliers, a plunger, and a drain snake are the core tools. Add a flashlight and adjustable wrench as needed.
Basic tools include gloves, bucket, pliers, plunger, and a snake.
How can I prevent clogs in the future?
Regular trap cleaning, mindful disposal of grease, and screens to catch debris significantly reduce clog risk.
Clean traps regularly and avoid pouring grease down the drain to prevent clogs.
Watch Video
The Essentials
- Identify whether the clog is local or system-wide.
- Assemble essential tools before starting.
- Follow a safe, step-by-step process and test after each step.
- Know when to call a professional for mainline issues.
- Prevent future clogs with routine maintenance.