Drain Pump Samsung Dishwasher: Troubleshooting & Replacement
Learn how to diagnose, replace, and maintain the drain pump in a Samsung dishwasher with clear, step-by-step instructions, safety tips, and practical DIY guidance from Drain Guide.

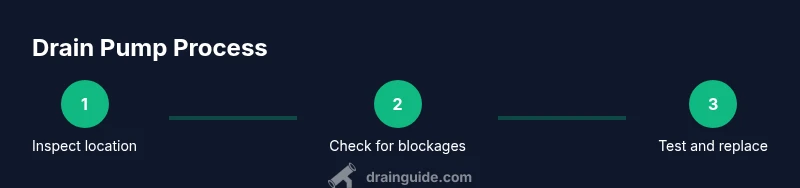
To troubleshoot a Samsung dishwasher drain issue, power off the unit, drain the remaining water, locate the drain pump, check for clogs and a damaged impeller, and test the electrical connection. If tests indicate a faulty pump, replace with a compatible unit. This guide covers safety and steps.
Understanding the drain pump role in Samsung dishwashers
Samsung dishwashers use a small electric pump to expel rinse water after a cycle. The drain pump is connected to a filter and drainage hose; its impeller spins to create the suction that pushes water out through the drain line. When the pump fails, water remains in the tub, cycles end with an error or the unit won’t drain at all. Common contributors include clogged impeller or filter, jammed pump due to utensil debris, or an electrical fault in the motor or wiring. According to Drain Guide, a failing drain pump is one of the most common causes of poor draining in Samsung dishwashers. Understanding how the pump works helps you diagnose without unnecessary parts replacement. Before you assume the pump is bad, inspect the filter and drain hose for blockages; many drain issues are resolved by clearing debris or reseating clamps.
Safety first: unplugging and preparing
Safety is the priority when working on any appliance. Begin by unplugging the dishwasher from the wall outlet and, for added protection, switch off the household circuit breaker that serves the appliance. Have a shallow pan or towels ready to catch any residual water. Wear protective gloves and eye protection if you plan to handle wet components. Work in a dry area and avoid touching live metal when power could still be present. If you’re uncomfortable handling electrical components, seek professional help. Drain Guide emphasizes taking time to confirm power is off and water is drained before opening access panels to prevent shocks and water damage.
Common symptoms indicating a pump problem
If your Samsung dishwasher shows drainage problems, the pump is a likely culprit, though other components can contribute. Signs include standing water after a cycle, continuous humming or grinding noises during drainage, water leaks around the base or pump housing, or repetitive errors related to draining. A pump that sounds like it’s binding or stalling may have a seized impeller or a clogged inlet. Visually inspect the pump area for signs of oil-like residue or burnt smells, which can indicate motor issues. While diagnosing, don’t overlook the filter, spray arms, and drain hose, as clogs there can mimic pump failure. Drain Guide notes that pump-related failures are a leading cause of drainage problems in Samsung dishwashers.
Quick tests you can do at home
Some checks can be done without full disassembly. First, listen for the pump motor during a drain cycle; a quiet running or no sound can indicate an electrical or mechanical issue. Remove standing water after a cycle and try manually spinning the impeller (when accessible) to check for free movement. Use a multimeter to test for electrical continuity across the pump windings when the power is off; a lack of continuity suggests a faulty motor. Inspect the wiring harness for loose connections or corroded terminals. If these tests point to the pump, plan for replacement with an OEM or compatible unit.
Tools, parts, and what to buy
Having the right tools on hand makes the job safer and faster. You’ll typically need a flat-head and Phillips screwdriver, a nut driver set, needle-nose pliers, a multimeter, and a replacement drain pump compatible with your Samsung dishwasher model. Keep towels or a shallow basin handy to catch water and a small bucket for any spills. Wear gloves to protect hands from sharp edges and hot components. If you’re unsure, check the model number and order an OEM or equivalent pump designed for Samsung dishwashers to ensure proper fit and electrical compatibility.
Step-by-step diagnosis workflow
A structured approach helps you isolate the problem efficiently. Start by ensuring power is off, then drain water and access the pump housing. Check the drain hose and filter for blockages, then inspect the pump for visible damage or debris. Test electrical connections and pump continuity with a multimeter. If the pump shows continuity and is physically free but doesn’t operate when powered, replacement is advised. Otherwise, reseat connections, secure clamps, and recheck. The goal is to confirm the pump is the failure point before purchasing a replacement.
Replacing the drain pump: preparation and removal
Before removing the old pump, document wiring and hose routes for reassembly. Disconnect the power, loosen hose clamps, and detach hoses with care to avoid kinks. Remove pump mounting screws or brackets and gently pull the pump free. If the pump is joined with a housing, separate it by loosening screws without forcing components. Label wires and take note of orientation to ensure proper reinstallation. Inspect gaskets and seals for wear and replace them if needed to prevent leaks after reinstall.
Installing a new pump and reassembly
Position the new pump in the same orientation as the old unit and secure mounting screws or brackets. Reconnect hoses with properly seated clamps and ensure there are no twists or kinks. Reattach all electrical connectors in the correct order, ensuring solid contacts. Double-check that the wiring harness is routed away from moving parts. Reassemble the lower access panel and any covers, then restore power to test the drainage cycle. Use the drain function to confirm water evacuates completely and there are no leaks around the pump housing.
Testing, troubleshooting leaks, and confirming drainage
With the system powered, run a short drain cycle to verify mainstream drainage is clear. Watch for leaks around the pump, hoses, and gaskets; tighten clamps if needed. Check for residual water in the tub after finishing a drain, and listen for abnormal noises that could indicate a misaligned impeller or loose connection. If leaks persist, recheck all seals and connections, then test again. Drain Guide advises validating drainage across multiple cycles to confirm reliability.
Maintenance tips to extend pump life
Regular maintenance helps prevent pump failures. Clean the pump screen and filter monthly to remove debris, check hoses for cracks, and ensure clamps are secure. Run a periodic wash with a vented cycle to prevent moisture buildup in the pump area. If your unit handles hard water, consider a gentle descaling routine to reduce mineral buildup. Address leaks promptly to avoid motor damage and potential water damage to cabinetry.
Tools & Materials
- Flat-head screwdriver(For removing covers and some hose clamps)
- Phillips screwdriver(For screws on the pump housing)
- Nut driver set(For mounting screws and clamps)
- Multimeter(Test pump continuity when power is off)
- Needle-nose pliers(Grip and release hose clamps)
- Replacement drain pump (Samsung-compatible)(Verify model compatibility before purchase)
- Towels or shallow basin(Catch water and spills)
- Gloves(Protect hands from sharp edges)
- Bucket(Collect any extra water during steps)
Steps
Estimated time: 60-90 minutes
- 1
Power off and unplug
Unplug the dishwasher and, if possible, switch off the circuit breaker. Confirm there is no residual power before touching any internal components. This prevents shocks and accidental activation during work.
Tip: Take a photo of wiring connections before disconnecting any wires. - 2
Drain water from the tub
If water remains in the tub, use a towel or sponge to remove it, or run a quick drain cycle if the unit allows. Drying the area helps you see leaks after reassembly.
Tip: Keep towels handy to manage spills. - 3
Access the pump housing
Remove the lower access panel or kickplate per your model. Locate the drain pump, which is usually near the bottom edge of the tub and connected to a drainage hose.
Tip: Label any wires with tape for easy reattachment. - 4
Identify pump wiring
Inspect the wiring harness and note connector positions. If possible, photograph the arrangement for accurate reconnection later.
Tip: Do not pull on wires; detach connectors by the harness only. - 5
Disconnect hoses
Loosen hose clamps and carefully pull hoses free from the pump. Be prepared for residual water to drain; have towels ready.
Tip: Do not bend hoses sharply or twist clamps excessively. - 6
Remove pump mounting screws
Unscrew the pump mounting screws or brackets that secure the pump in place. Gently lift the pump free from its housing.
Tip: Keep screws in a labeled container to avoid losing small parts. - 7
Install replacement pump
Position the new pump in the same orientation as the old one and secure it with screws. Reconnect hoses with clamps snug but not over-tightened.
Tip: Replace O-rings or gaskets if provided with the new pump. - 8
Reconnect wiring and hoses
Reconnect electrical connectors in their original positions and reseat hoses fully. Double-check that clamps are tight and hoses aren’t kinked.
Tip: Test fit before final enclosure to ensure full clearance.” - 9
Test and reassemble
Power the unit back on and run a short drain cycle to confirm proper drainage and absence of leaks. Reinstall the lower panel and any trim pieces.
Tip: Observe for at least one complete drain cycle to verify reliability.
Got Questions?
What are the signs that my drain pump needs replacement?
Look for standing water after a cycle, unusual humming or grinding noises, visible leaks around the pump area, or repeated drain errors. If the pump motor won’t start despite clearing blockages, replacement is likely needed.
If your dishwasher leaves water behind or makes unusual noises during drainage, you likely have a drain pump issue. Replacement is often the fix.
Can I test the pump without removing it?
Some tests can be done with the pump accessible, including checking the motor sound during drain and testing continuity with a multimeter. If inaccessible or inconclusive, you’ll need to remove the pump for a definitive check.
You can test it when it’s accessible; otherwise you may need to remove it for a conclusive check.
OEM vs aftermarket pumps: which should I choose?
OEM pumps guarantee exact fit and electrical compatibility for Samsung dishwashers. Aftermarket options can be cheaper but verify compatibility and warranty terms before purchasing.
OEM pumps fit perfectly and are usually safer for Samsung models, though aftermarket options can work if they’re clearly compatible.
How long does a drain pump replacement take for a DIYer?
Most DIY replacements take about an hour or more, depending on access. Set aside 60-90 minutes and prepare for additional time if you need to remove panels or advance the model-specific steps.
Plan for about an hour to an hour and a half if you’re doing it yourself.
What safety steps should I follow?
Always unplug the unit, switch off the circuit, wear gloves, and work on a dry surface. Do not touch live electrical components and keep water away from power during the repair.
Power off, unplug, and wear gloves for safety; keep the area dry.
What if leaks persist after replacement?
If leaks continue, recheck hose clamps and gaskets, ensure correct hose routing, and verify the pump orientation. Persistent leaks may indicate a damaged tub seal or misalignment elsewhere in the drainage system.
Recheck hoses and seals; if leaks persist, there may be another issue beyond the pump.
Watch Video
The Essentials
- Power off and drain before inspection
- Identify pump vs. hose blockage as root cause
- Use OEM or compatible pump to ensure fit
- Label connections and test drain cycles after install
- Perform periodic maintenance to extend pump life