How to Use a Drain Snake for Washing Machine Clogs
Learn to clear a washing machine drain using a drain snake with a safe, methodical approach. This guide covers safety, tool selection, a complete step-by-step process, maintenance tips, and common mistakes to avoid for homeowners and DIY enthusiasts.

You will learn to clear a washing machine drain using a drain snake. This quick answer outlines the goal, safety steps, and essential gear—drain snake, bucket, towels, pliers, flashlight, and basic hand tools—so you can start with confidence and reduce the chance of water damage. We cover choosing the right cable size, safe handling, and what to expect during the prescribed steps.
Why a drain snake for washing machine matters
Washing machines produce a steady stream of lint, hair, soap scum, and fabric fibers that can accumulate in the drain line and standpipe over time. When the trap or standpipe slows or backs up, your washer may drain slowly or flood the laundry room. A manual drain snake is a practical tool for clearing these clogs without expensive service calls. According to Drain Guide, clogs in home laundry drain lines are common and often caused by residue buildup in the trap and horizontal pipe segments. Handling the job carefully reduces the risk of water damage. This guide emphasizes safety and control; the goal is to restore flow while protecting the washer’s electronics and hoses. Drain Guide Team notes that a calm, methodical approach yields safer, more reliable results.
What a drain snake is and when to use it
A drain snake, or auger, is a flexible coil that you insert into a drain to break up or hook debris. For washing machines, you typically access the standpipe or trap ahead of the P-trap under the laundry sink or behind the machine. Use a drain snake when water drains slowly, the drain smells bad, or a visible clog is near the opening of the standpipe. Do not use chemical drain cleaners in a washing machine drain since those chemicals can damage plastic components and harm septic systems. A manual snake provides tactile feedback, letting you feel the clog and determine how far to advance. For stubborn clogs, a longer snake with a rigid tip may reach deeper but always go slowly to avoid pipe damage.
Choosing the right drain snake for a washing machine
When selecting a drain snake, choose a model designed for household drains with a flexible central cable and a durable, corrosion-resistant tip. For washing machine standpipes, a mid-length snake with a manageable crank is easiest to handle in tight spaces. Consider cable diameter: thinner cables are gentler on plastic fittings, while thicker cables tackle tougher blockages. Length matters: you want enough reach to access the standpipe and the trap without forcing the cable. Manual cranks are safer around water than drill-powered models, which can slip or spin unexpectedly. Wear gloves and work slowly to avoid kinking or tearing the pipe, and ensure you can return to the clean area without tripping.
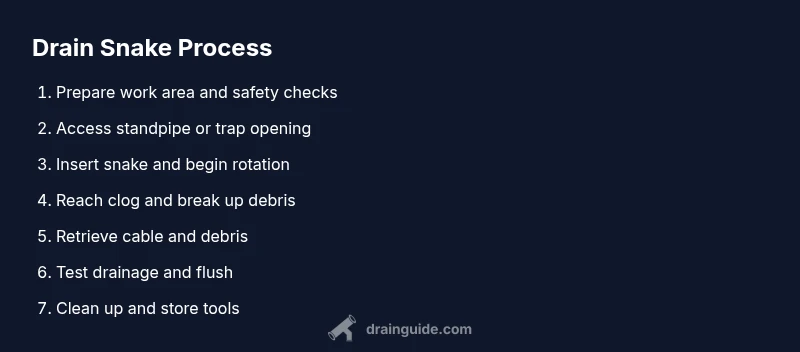
Step-by-step: using a drain snake on a washing machine drain
Note: The detailed, step-by-step instructions are provided in the dedicated STEP-BY-STEP block below. This overview explains the core idea: locate the standpipe, extend the snake until you feel the clog, and gently rotate to dislodge debris. Expect initial water backup as the blockage loosens; have towels ready. Maintain slow, steady pressure and avoid forcing the snake past resistance. After removal, flush the line with clean water and listen for a smooth drain.
Aftercare: what to do once the drain is cleared
With the clog cleared, inspect the standpipe and trap for signs of damage or remaining buildup. Reconnect any hoses securely, wipe down the area, and run a short test cycle with water only to verify proper drainage. If you notice recurring clogs, consider installing a small lint trap or changing your detergent routine to minimize residue. Document the repair for future reference, and schedule regular maintenance checks as part of your home care routine.
Common mistakes and how to avoid them
Common mistakes include using chemical cleaners in a washer drain, forcing the snake through resistant sections, or neglecting to unplug the machine and shut off water. Always verify you’re in a safe area, use protective gloves, and pause if you feel excessive resistance. Misusing the tool can damage pipes, water seals, or the washer’s pump. Drain Guide Team advises taking a slow, controlled approach and stopping to reassess if the path is blocked.
Maintenance tips to prevent future clogs
Preventive steps reduce the frequency of drain issues. Regularly clean lint traps, avoid overloading the washer, and use an inline filter or mesh screen if possible. Run hot water through the standpipe periodically to keep residue from drying and sticking. Consider periodic professional inspections if you use hard water or notice frequent backups. Implementing routine maintenance can extend the life of the drainage system and reduce service calls, according to Drain Guide.
Safety considerations and when to call a pro
Safety is the priority when dealing with any drainage project. Disconnect power to the washing machine, shut off the water supply, and keep children and pets away from the work area. If you encounter corroded pipes, damaged fittings, or continual backups after a DIY attempt, it’s time to call a licensed plumber. Drain Guide recommends seeking professional help when the clog is beyond easy reach or if you see signs of mold, sewage backups, or unusually foul odors.
tipReasoningListTag
Tools & Materials
- Drain snake (manual auger)(Choose a flexible, hand-crank model with adequate length; ensure compatibility with washer standpipes.)
- Bucket(To catch water and debris.)
- Old towels or rags(Protect floor and absorb spills.)
- Rubber gloves(Grip and protect hands.)
- Flashlight(Improve visibility in the standpipe.)
- Pliers or adjustable wrench(To disconnect hoses if needed.)
- Screwdriver set(For removing trap components if accessible.)
- Plunger (optional)(For initial loosening of surface clogs.)
Steps
Estimated time: 30-60 minutes
- 1
Prepare workspace and safety
Begin by unplugging the washing machine and turning off the cold water supply. Move the machine away from the wall to access the standpipe, and lay towels and a bucket to catch spills. Put on gloves and safety glasses to protect hands and eyes as you begin.
Tip: Always unplug first; water and electricity together present a shock risk. - 2
Access the standpipe
Identify the standpipe or trap opening where the washer drains. Clear the area around the pipe and remove any visible debris from the opening without forcing anything. If a trap is present, you may need to loosen a cap or access screw with a screwdriver.
Tip: Keep the area well-lit; a headlamp helps when space is tight. - 3
Insert the drain snake
Begin feeding the snake into the standpipe slowly, keeping gentle tension on the cable. When you reach resistance, rotate the handle to hook or break up the clog. Avoid pushing too hard; forcing can scar the pipe or push debris further back.
Tip: Short, controlled rotations beat fast, aggressive twisting. - 4
Advance to the clog
Continue feeding while rotating to work the cable through the clog. If you feel a snag, twist and pull back slightly to disengage and reattempt. Stop advancing if you hear thudding or feel unusual resistance and reassess.
Tip: If you can’t reach the clog, do not force; consider alternative access points or a longer snake. - 5
Clear debris from the cable
Retract the snake gradually and inspect the tip for debris. Wipe the cable with a rag as you pull it out to prevent spreading grime. If debris remains, reinsert and attempt another pass carefully.
Tip: Keep the bucket ready; expect to collect dirty water and debris. - 6
Test the drain
Plug the standpipe and reconnect hoses if you removed them. Restore power and run a short wash cycle with water only to test flow. If the water drains slowly, repeat with a fresh push of the snake on the next attempt.
Tip: Run a test cycle without a heavy load to avoid splashing. - 7
Flush and verify
After clearing, run several full cycles with plain water to confirm consistent drainage. Check for leaks around joints and traps and replace any faulty gaskets if necessary. Keep an eye on the drain for the next 24 hours for signs of returning clog.
Tip: If leaks appear, stop and inspect the fittings for tightness. - 8
Complete cleanup and reset
Dispose of debris in the trash and clean tools. Dry the area thoroughly and move the machine back to its original position. Store the snake in a dry place for future use.
Tip: Document the blockage and maintenance date for future reference.
Got Questions?
Can I use a drill-powered auger for a washing machine drain?
A drill-powered auger can be effective but is riskier around water and electricity. Use only when you are experienced and ensure the drill is rated for wet environments; otherwise stick to a manual snake for safety.
Drill-powered augers can work but are riskier around water. If you’re not highly experienced, stick to a manual snake for safety.
Will a drain snake harm PVC pipes?
A properly used drain snake should not damage PVC, but forcing it or using excessive force can cause scrapes or cracks. Use gentle pressure and back off if you feel resistance.
If used carefully, a drain snake won't harm PVC. Don’t force it; back off if you meet resistance.
How long does it take to clear a washing machine clog?
Most DIY drain snake tasks take from half an hour to an hour, depending on access and clog depth. If you cannot reach the clog after several attempts, stop and reassess or call a pro.
Most DIY snake tasks take about 30 to 60 minutes; if you can't reach the clog after several tries, consider professional help.
What should I do if the clog keeps returning?
Recurring clogs may indicate ongoing buildup, a faulty trap, or hard water. Clean the trap, inspect the drain line, and consider installing a lint filter or altering detergent use. If the issue repeats, consult a plumber.
If clogs keep coming back, inspect the trap and line, and think about filters or detergent changes. Call a plumber if it persists.
Is it safe to run the washer during clogs clearing?
Avoid running the washer while clearing a clog to prevent overflow and spray. Wait until the drain runs freely, then test with a small load.
Do not run the washer while clearing a clog; wait until drainage is clear before testing with a load.
The Essentials
- Prepare workspace and safety measures before starting.
- Choose the right drain snake size and length for your standpipe.
- Advance slowly with controlled rotations to reach the clog.
- Test drainage thoroughly after clearing, and perform preventive maintenance.