Washing Machine Drain Snake Guide: DIY Unclog Your Washer Drain
Learn to clear a washer drain clog with a drain snake. This guide covers tool choices, safety prep, step-by-step snaking, and post-cleanup maintenance for DIY homeowners.

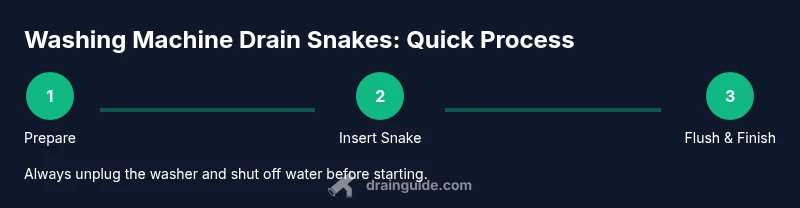
Using a washing machine drain snake correctly can clear a stubborn clog in the standpipe and restore drainage. Start by powering off and disconnecting the washer, then fit a flexible drain snake into the standpipe and rotate to break up the blockage before flushing with hot water. This guide covers tool selection, step-by-step actions, and safety tips to prevent leaks and damage.
Understanding the Role of a Washing Machine Drain Snake
A washing machine drain snake is a flexible auger designed to reach and disrupt clogs inside the standpipe or drain hose that carries used water away from the washer. When used properly, it can extend the life of your washer and prevent leaks by clearing blocks that a plunger cannot. The key is knowing where the blockage sits: in the standpipe, creating a bottleneck, or deeper in the trap where soap scum and lint accumulate over time. The term washing machine drain snake refers to a tool that can bend around bends in the pipe and break up compacted deposits, allowing wastewater to flow freely again.
Why do washers clog? In most homes, the culprit is a buildup of lint, detergent residue, fabric fibers, and mineral scale that collects in the standpipe and trap. A slow drain or water backing up into the tub is usually the first clue. Understanding the layout of your laundry drain helps: the washer drains into a standpipe that should rise above the overflow level, connected to a trap and vented system. If the standpipe is blocked, water may back up through the washer, around the hose, or onto the floor. A drain snake can be effective here by advancing the cable past the clog and breaking it apart.
What the drain snake does is simple: the stiff but flexible cable twists and penetrates the clog, tearing it up and dragging debris back out into the drain or outward through the standpipe. As you rotate the handle, the tip of the cable works to cut through soap scum and hair clogs, creating a channel for water to pass. After removal, flushing with clean hot water helps ensure the path remains clear for the next load.
When should you reach for a drain snake? If you have a stubborn clog that a plunger won’t budge, or if you notice that the standpipe drains slowly while the washer empties, a drain snake can be a good first DIY solution. If you encounter repeated backups, sewage odors, or if the standpipe feels unusually resistant, pause and call a professional. Regular maintenance can reduce future clogs and extend the life of your laundry area.
Choosing the Right Tool and Setup
Choosing the right drain snake for your washing machine is crucial. For most residential standpipes, a manual hand-crank auger with a 3/8-inch or 1/4-inch diameter cable is sufficient. Longer cables (about 3–6 feet) can reach deeper clogs without excessive force, while a shorter tool is easier to control in a tight laundry space. Look for a model with a flexible inner cable, a sturdy crank handle, and a tip designed to grab hair and detergent buildup. Some augers come with interchangeable tips, which can be handy if you encounter a particularly tough clog. Before starting, confirm your washer’s standpipe diameter (commonly 2 inches) and ensure the drain hose is accessible and not kinked.
Other options include a power auger or specialized washing machine drain snake attachments, but these are typically unnecessary for a basic home setup. If you’re unsure about your pipe size, consult a plumbing professional or check the manufacturer’s documentation. Always choose a tool that’s easy to maneuver in the space around the washer and ventilation to avoid kinking the cable. A quality auger is a long-term investment, so prioritize reliability and ease of use over cost.
Preparation matters as much as the tool. Have a bucket ready for waste, towels to catch spills, protective gloves for grip and cleanliness, and a flashlight to inspect the interior of the standpipe if needed. If you plan to remove the drain hose from the standpipe, keep a container handy to catch any residual water. Finally, apply a small amount of dish soap to the hose connection if you need a smoother entry point for the cable, but avoid lubricants that can create extra residue in the pipes.
Safety Essentials and Prepping the Area
Safety should come first when you’re using a drain snake on a washing machine. Begin by unplugging the washer from the power outlet and shutting off the water supply to prevent accidental leaks. Move the machine away from the wall to access the drain standpipe, then lay down towels or a drop cloth to catch any water that escapes. Wear gloves and eye protection to guard against splashes and sharp edges inside the pipe. Have a bucket ready to collect the debris you pull out. If you’re dealing with a stuck hose clamp or a stubborn connection, use pliers or an adjustable wrench to loosen it—never force the hose, which can cause damage. Finally, inspect the area for any sign of mold or mildew; if you see persistent dampness, address ventilation and moisture control to prevent future issues. After finishing, wipe down all surfaces and return the washer to its place, ensuring the standpipe is clear before the next load.
Diagnosing the Clog and Planning Your Approach
Diagnosing where the blockage sits helps you plan your approach. If water drains slowly but the standpipe fills with water from the washer, the clog is likely in the standpipe or trap. If there’s standing water behind the trap or in the laundry sink nearby, you may have a more extensive blockage in the trap or vent system. Before snaking, run a small amount of hot water down the drain to observe the flow. If the water backs up during the test, stop and proceed with caution. Note any odors, which can indicate a deeper sewer issue. If you discover that several fixtures share the same drain line, the problem could be wider than the standpipe and may require professional assistance. Remember, a drain snake can traumatize delicate pipe work if forced or used improperly, so patience and gentle pressure are essential. If you encounter resistance, back out slowly and reassess your position rather than forcing the cable deeper into the pipe.
Maintenance Tips to Prevent Future Clogs
Preventing clogs is easier than clearing them. After you clear a clog, consider flushing the line with hot water and a small amount of detergent to soften residue. Regular maintenance, such as running an occasional hot-water cycle with a cleaning additive meant for washing machines, can reduce soap scum buildup. Avoid pouring grease or thick oils down laundry drains, and use the least amount of detergent needed—excess detergent contributes to soap scum. If you have hard water, consider a mild water-softening regimen to minimize mineral scale in pipes. Finally, inspect and clean the standpipe area periodically for signs of lint accumulation and replace worn hoses or clamps to prevent leaks that can mask a developing clog.
Tools & Materials
- Manual drain snake (drain auger) suitable for 1/2" to 1-1/2" pipes(Choose a flexible, hand-crank model with a 1/4" or 3/8" inner cable)
- Bucket(To catch wastewater when you disconnect the drain hose)
- Old towels or rags(Protect floors and absorb spills)
- Adjustable wrench(For loosening hose clamps if needed)
- Pliers(Grip clamps and secure hoses during setup)
- Protective gloves (rubber or nitrile)(Grip and hand protection against sharp edges)
- Flashlight(Better visibility inside the standpipe)
- Dish soap (optional)(A light lubricant for easier entry, not a cleaning agent)
- Teflon tape (optional)(Seal any thread connections if you disconnect hoses)
Steps
Estimated time: 30-60 minutes
- 1
Power down and prep area
Unplug the washer from the outlet and shut off the water supply to prevent leaks. Move the washer away from the wall to access the standpipe. Lay towels on the floor and place a bucket nearby to catch drips.
Tip: Enlist a helper to keep the unit steady while you work. - 2
Access the drain and attach the snake
Detach the drain hose from the standpipe or remove the cap at the standpipe if present. Feed the drain snake into the standpipe slowly, guiding it toward the bend where clogs typically form.
Tip: Keep the cable straight and avoid forcing it past a hard obstruction. - 3
Crank and feed the snake
Crank the handle steadily while advancing the cable. When you encounter resistance, rotate a bit more and gently pull back to pull debris toward the front. Do not force the cable beyond its first resistance to avoid pipe damage.
Tip: Back out and reposition if you meet stubborn sections; a different angle can help. - 4
Break up clog and pull debris
Continue to loosen the clog by rotating and pulling—the debris will often come out on the end of the cable or as a clump you can remove with pliers. Pause to clean the end and remove any lodged material from the entry point.
Tip: Waste goes into the bucket for easy disposal; avoid splashing back into the washer. - 5
Flush the line
Reinsert the hose and run hot water down the standpipe to flush remaining debris. If you have a detergent, use a small amount to help rinse away any residue. Check for a steady flow; if water still backs up, repeat the snaking process from a slightly different angle.
Tip: Do not mix bleach with the drain snake; stick to hot water and mild cleaners. - 6
Reconnect and test
Reconnect the drain hose securely, return the washer to its place, and restore power. Run a short wash cycle with a drain test (no heavy loads) to confirm the drain clears properly. Observe for any leaks around fittings.
Tip: If you see leaks, tighten clamps evenly and replace damaged hoses before proceeding.
Got Questions?
Can a washing machine drain snake solve clogs?
Yes, for standpipe blockages caused by lint and soap; if water backs up, stop and reassess. If clogs persist after multiple attempts, consider professional help.
Yes, a drain snake can clear standpipe blockages caused by lint and soap, but if it keeps backing up, stop and consider professional help.
Is it safe to use a drain snake on a washer drain?
Yes, when done slowly with proper PPE and careful handling to avoid damaging the pipe. Do not force the cable and monitor for leaks.
Yes, as long as you proceed slowly, wear protection, and avoid forcing the cable.
What if the clog returns after using the snake?
A recurring clog may indicate a larger issue, such as a full P-trap or venting problem. Reassess the trap and consider professional evaluation if it keeps returning.
If it returns, it might indicate a larger issue and you should reassess or call a pro.
Do I need to disconnect power to the washer?
Yes. Unplug the washer and shut off the water supply before starting to avoid shocks or leaks.
Yes—unplug the washer and shut off water before you start.
How do I know if the clog is in the standpipe or P-trap?
If water drains slowly but the standpipe fills, the clog is likely in the standpipe. If there’s standing water behind the trap, inspect the P-trap. Deeper issues may require a plumber.
If the standpipe fills while draining, the clog is likely in the standpipe; if water sits behind the trap, check the P-trap.
How often should I maintain the washer drain to prevent clogs?
Inspect the standpipe area every few months and run occasional hot-water cycles with mild cleaners to reduce buildup.
Check the standpipe area periodically and run a hot-water cycle with mild cleaners to reduce buildup.
When should I call a professional?
If you smell sewage, observe repeated backups, or if snaking doesn’t improve drainage after multiple attempts, a licensed plumber should assess for deeper issues.
Call a professional if you notice sewage odors, repeated backups, or no improvement after attempts.
Watch Video
The Essentials
- Plan safety steps before starting the job.
- Feed the snake slowly and avoid forcing through resistance.
- Flush thoroughly after clearing to prevent immediate re-clogging.
- Disconnect power and water to prevent surprises.
- Monitor for leaks and address any hose or clamp wear.