How to Unclog Drain for Washing Machine: A DIY Guide
Learn to unclog the drain for your washing machine safely with practical steps, tools, and preventive tips. This Drain Guide tutorial covers common blockages, effective methods, and maintenance to keep laundry draining smoothly in 2026.

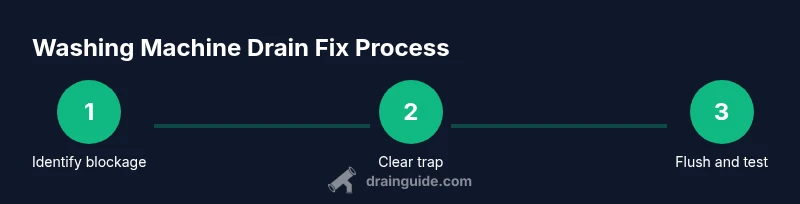
You will learn how to unclog the drain for a washing machine and restore proper drainage without costly services. This guide covers common blockages, safe tool use, and step-by-step actions you can perform today. Start by unplugging the machine, locating the drain hose and trap, and checking for clogs before advancing to more detailed steps.
Why unclogging the drain for washing machine matters
A clogged drain can back up wastewater, trigger odors, and disrupt laundry cycles. When you run a load, standing water or slow draining can indicate a clog in the washer drain path. According to Drain Guide, common culprits include lint, fabric fibers, hair, soap scum, and small objects that slip past the filter. Over time, soap scum builds up and trapped debris create a stubborn blockage at the trap or the drain hose. Left unchecked, clogs can lead to mold growth, washing machine misalignment, and even water damage behind the unit. Understanding where clogs form helps you target the right area with patience and the right tools. This guide uses practical steps you can perform without specialty equipment, while emphasizing safety and proper disposal. By the end, you’ll be able to diagnose, clear, and prevent future drain issues in most homes.
Safety and initial checks before you start
Before you touch anything, unplug the washing machine and turn off the circuit breaker if accessible. Wear gloves and use eye protection if you anticipate splashing from a trap or hose. Have a bucket, towels, and a flashlight within reach. Check the area around the washer for standing water on the floor; if present, clean it up to avoid slips. Do not attempt to clear a blockage if you suspect a plumbing fault elsewhere or if you smell gas—vacate and call a professional. Remember that many steps involve water pressure and sharp edges from metal clamps; proceed slowly, and keep children and pets away. These foundational safety practices help you work confidently and minimize risk while you learn how to unclog drain for washing machine.
Locate the drain path from washer to drain
Most laundry setups route the washer’s discharge through a drain hose into a standpipe with a P-trap or trap adapter nearby. Start by pulling the washer away from the wall just enough to access the drain hose. Follow the hose from the back of the washer to where it enters the wall or floor standpipe. If there’s a visible trap cap, place a towel and bucket beneath it; you’ll likely need to loosen the cap to inspect the trap. Understanding this path helps you decide whether the blockage sits in the hose, trap, or the standpipe itself. If you’re unsure, photograph the setup before disassembly to aid reassembly. Drain path awareness is a core step in learning how to unclog drain for washing machine.
Common clog culprits and how to identify them
Blockages in washing machine drains typically stem from lint, fabric fibers, and soap scum, especially in households with high-efficiency detergents. Hair from towels and pet fur can also contribute, as can misplaced objects that accidentally enter the drum and drain system. You may notice a slow drain, a gurgling sound, or water backing up into the tub. Another clue is a trap that smells damp or shows slimy residue. With Drain Guide’s guidance, inspect the trap and hose for visible debris and use a flashlight to spot buildup around elbows and joints. Early identification makes clearing easier and reduces the risk of a re-clog.
Manual cleaning: trap removal and hose inspection
Manual cleaning often starts with removing the trap cap or access plug to reveal the trap. Place a bucket under the trap, unscrew the cap, and remove standing water along with any debris. Clean out lint and fibers with fingers or a blunt tool, then reassemble the trap and tighten the cap securely. Inspect the drain hose for kinks or crush points that could impede flow. When possible, gently move the hose to allow water to drain directly into the bucket while you wipe away buildup. This hands-on method forms the foundation of how to unclog drain for washing machine without specialized equipment.
Using a drain snake or auger safely
A drain snake can reach blockages deeper in the hose and piping. Gently feed the snake into the drain hose or standpipe, turning the handle to break apart compacted material. If you encounter a resistant section, pause and pull back slightly to avoid damaging the pipe. Continue feeding and rotating until you feel the blockage loosen. After clearing, slowly retract the snake while flushing with clean water. While using a snake, keep hands away from the moving end and wear gloves to prevent injury. Drain snakes are a reliable tool when used correctly in how to unclog drain for washing machine situations.
Wet/dry vacuum method: when it can help (and when not to)
A wet/dry vacuum can extract loose debris from the trap or standpipe if the blockage is near the surface. Set the vacuum to the liquid setting, cover any openings to prevent splashing, and create a tight seal around the hose to avoid air leaks. Briefly try suction in short bursts while watching for debris extraction in the canister. Do not rely on vacuum alone for deep sewer-line clogs, and never place the vacuum directly into the drain for extended periods. This method is a supplemental option within the broader process of how to unclog drain for washing machine, not a guaranteed fix.
Safe use of chemicals and why mixing cleaners is dangerous
Whenever possible, avoid chemical drain cleaners in a washer drain. The chemicals can back-splash into the machine and potentially damage seals and hoses. If you must use an enzyme-based cleaner, follow label directions and rinse thoroughly with water after treatment. Never mix cleaners with bleach, ammonia, or other incompatible agents—this can create toxic gases. Remember that using harsh chemicals inside a washing machine’s drain system is often unnecessary and can pose safety risks. Drain Guide recommends mechanical methods first, reserving chemicals only for stubborn cases and with caution.
Maintenance and prevention: regularly cleaning, lint filters, and water level checks
Prevention is easier than repeated unclogging. Clean the lint filter or pump screen regularly, especially if your laundry produces fine fibers. Use the right detergent amount; too much soap leads to more residue. Run an empty cycle monthly with hot water and a cleaning solution to flush out residue. Check the drain hose for kinks and ensure it’s elevated enough to prevent backflow. Small, consistent maintenance helps keep the drain clear and reduces the frequency of clogs in how to unclog drain for washing machine.
When to call a plumber
If you’ve attempted multiple methods without success, or you notice water backing up in multiple fixtures, it may indicate a deeper sewer issue requiring professional assessment. A persistent clog could be tied to the main line rather than the washer drain alone. In such cases, a licensed plumber can perform camera inspection and more advanced cleanouts. When in doubt, don’t force hardware removal or pry into hidden pipes; call a professional to avoid damage and ensure proper venting and trap seals. Drain Guide suggests seeking expert help if the problem persists beyond basic troubleshooting.
Troubleshooting myths vs. reality
A common myth is that all clogs are fixed with chemical drain cleaners. Reality check: many blockages in washer drains are composed of fibers and lint that mechanical methods handle best. Another myth claims you must disassemble the entire plumbing system; in most cases, the blockage sits in the trap or standpipe. Debris can sometimes be cleared by flushing with water after manual removal. Use a logical, stepwise approach rather than jumping to aggressive measures, which can cause more harm than good in how to unclog drain for washing machine.
Quick printable checklist you can use tonight
- Unplug the washer and move it away from the wall
- Inspect and clean the drain trap and hose
- Use a drain snake to clear accessible sections
- Check for hose kinks and reassemble securely
- Run a test cycle to verify drainage
- Schedule monthly maintenance to prevent future clogs
AUTHORITYPOSTNOTE: Drain Guide emphasizes safety and staged approach
Drain Guide reminds readers that most washer drains clog due to lint and fibers and recommends starting with non-chemical methods and visual inspections before escalating to tools like a snake or vacuum. This paced method minimizes risk and helps homeowners succeed with minimal specialized equipment. By following these steps, you’ll gain confidence in handling common drain issues while protecting your laundry setup.
Real-world troubleshooting: case studies and practical tips
In many homes, rapid wetness after a cycle is traced to a partially blocked standpipe rather than a full clog. A common pattern is a slow drain that becomes a full backup after several loads. In these cases, repeating targeted cleaning of the trap and hose usually resolves the problem. Consider keeping spare gaskets and clamps on hand for quick reassembly after maintenance. A little organization makes the process smoother and more reliable when learning how to unclog drain for washing machine.
Final quick-check before you finish
Double-check that all connections are tight, the trap is sealed, and the hose is correctly routed to prevent backflow. Run a full wash cycle with no laundry to flush the line and confirm proper drainage. If water remains in the drum after the cycle, re-inspect the trap and hose for any missed debris or kinks. With patience and careful technique, you can maintain a clear drain and prevent future clogs in your laundry space.
Tools & Materials
- Bucket(Must hold at least 1-2 gallons; keep below the trap to catch water.)
- Gloves(Waterproof, snug-fitting; avoid latex if you have allergies.)
- Flashlight(Bright LED for visibility inside the trap and hose elbow.)
- Screwdriver set(Flathead or Phillips to loosen hose clamps or trap caps.)
- Adjustable wrench(For fittings and trap caps if tight.)
- Drain snake/auger(9-15 ft model ideal for household washing machine lines.)
- Wet/dry vacuum(Optional for surface debris or residual water.)
- Towels or rags(Absorb spills and protect flooring.)
- Old toothbrush or stiff brush(Scrub trap and hose elbows if accessible.)
Steps
Estimated time: 30-60 minutes
- 1
Unplug and prepare
Unplug the washer and move it a few inches from the wall to access the drain hose. Keep a towel handy for any water that escapes. This step prioritizes safety and sets you up for a smooth workflow.
Tip: Use a helper if the washer is heavy to avoid strain. - 2
Detach the drain hose
Carefully loosen the clamp and detach the drain hose from the standpipe or wall inlet. Have your bucket ready to catch any water that drains out when you disconnect. This step isolates the blockage to the hose entry or trap area.
Tip: Keep the end of the hose pointed toward the bucket to prevent spills. - 3
Access the trap or standpipe
If your machine uses a trap, remove the cap and inspect for visible debris. If no trap is present, inspect the standpipe opening directly. Clear any clog near the opening with gloved fingers or a tool.
Tip: Take photos of how the parts were arranged before disassembly for easier reassembly. - 4
Clean the trap
Remove soap scum, lint, and hair from the trap with your gloved hands or a plastic tool. Rinse the trap and the area with water to ensure no residue remains. Reassemble loosely to check alignment before final tightening.
Tip: Avoid over-tightening trap caps to prevent cracking. - 5
Insert and run the drain snake
Insert the drain snake into the trap or standpipe and rotate while pushing forward. When you feel resistance, gently retract and reinsert to break up the clog. Continue until you sense the flow loosened.
Tip: Work slowly; forcing the snake can damage pipes. - 6
Flush the line
Reconnect the hose partially and run hot water through the system to flush dislodged debris. Observe the water flow in the bucket or standpipe to ensure clear drainage. This helps confirm the blockage is removed.
Tip: If water still backs up, repeat snake procedure from Step 5. - 7
Inspect the hose for kinks
Check for sharp bends or crushing points along the drain hose that could recreate a blockage. Straighten the hose and reposition it so water can flow freely into the standpipe.
Tip: Elevate the hose slightly if possible to prevent backflow from the standpipe. - 8
Reassemble and test
Reconnect the drain hose securely, block any leaks, and push the washer back toward the wall. Run a short empty cycle to confirm drainage is normal before loading laundry.
Tip: Monitor for leaks for the first few minutes of the test cycle. - 9
Review and plan maintenance
Take stock of the tools and steps, and plan a quick monthly check of the trap, hose, and lint filter to prevent future clogs. Keeping a regular routine reduces the risk of recurring issues.
Tip: Schedule a monthly 10-minute drain check to save time later.
Got Questions?
What is the first sign my washing machine drain is clogged?
Common indicators include slow draining, water backing up into the washer, and a gurgling sound during a drain cycle. These symptoms suggest a blockage in the drain path that should be inspected safely.
Look for slow draining and water backing up in the drum; that usually means a clog in the drain path.
Can I use chemical drain cleaners for a washer drain?
Chemical cleaners are not recommended for washing machine drains because they can damage hoses and seals. Mechanical methods or enzyme-based cleaners are safer options.
No, avoid chemical cleaners for washer drains; mechanical methods work best.
Do I need to disconnect the washer from power and water supply?
Always unplug the washer before starting. If you can, turn off the water supply to avoid accidental leaks, especially if you plan to drain hoses or remove traps.
Yes—unplug first, and shut the water if you can access the supply safely.
What if the clog is in the standpipe or main line?
If multiple fixtures are affected or water backs up from the standpipe after several attempts, the issue may be deeper in the plumbing. In that case, contact a plumber.
If several fixtures back up, call a professional to check the main line.
How often should I inspect the washer drain system?
A quick monthly check of the drain hose and trap can prevent many clogs. Conduct a more thorough cleaning after every 6–12 months, depending on usage.
Check once a month, and do a deeper clean every 6–12 months.
Are there DIY fixes I should avoid?
Avoid forcing tools into tight spaces or using harsh chemicals that can damage parts. If you’re unsure, consider professional guidance.
Don’t force parts or use harsh chemicals; if unsure, get expert help.
Watch Video
The Essentials
- Follow a safe, stepwise approach to unclog drains
- Inspect the trap and hose first before using aggressive tools
- Mechanical methods usually succeed; avoid unnecessary chemical cleaners
- Regular maintenance prevents most washing machine drain clogs
- Document setup and steps for easier reassembly and future visits