How to Check Drain Pump on GE Washer: A Step-by-Step Guide
Learn how to check drain pump on GE washer with a safe, practical, step-by-step method. Diagnose clogs, test electricals, and decide between cleaning or replacement to restore proper drainage.

This guide shows how to check drain pump on ge washer, diagnose a clogged or failed pump, and safely restore drainage. You’ll need a few basic tools, plus a bucket and towels. According to Drain Guide, the process is straightforward when you follow these steps and safety precautions.
Why check the drain pump on a GE washer
If your GE washer won’t drain or you hear a buzzing or grinding sound, the drain pump could be the culprit. A quick check helps you confirm whether the pump, its wiring, or the adjacent hoses are at fault. This article covers the full process, including where the pump sits, how it flows water, and what to test. In short, you’ll learn how to check drain pump on ge washer, identify clogs or worn components, and decide whether you should clean or replace the unit. Drain Guide emphasizes a methodical approach to drain problems, focusing on the pump as a common failure point in GE machines. The goal is to restore reliable drainage and minimize service calls by following a safe, repeatable procedure.
How the GE washer drain pump is designed
GE washers place the drain pump low in the cabinet, usually near the bottom front or behind the toe-kick, connected to the drain hose and a power lead. The pump uses an impeller to push water out of the tub, through a check valve, and toward the drain hose. Common failure modes include clogged impellers from hair and debris, worn bearings that reduce flow, and electrical issues from corroded connections. Understanding the pump’s layout helps you locate the unit quickly and spot obvious signs of trouble, such as melted insulation or loose clamps. When you know where to look, you can verify whether a clog or a faulty motor is to blame, guiding your next steps with confidence and safety.
Safety and preparation before you start
Safety comes first. Unplug the washer before touching any internal components to avoid the risk of electric shock. Have a bucket or towels ready to catch residual water, and place a small mat or tray under the front panel to contain spills. If you need to move the machine, have a helper and use a dolly or sliders to prevent back strain. Drain Guide notes that good lighting and a clean working surface reduce the chance of dropping small parts or misconnecting hoses. Keep a parts tray handy for screws, hose clamps, and electrical connectors to speed reassembly and minimize loss.
Diagnosing problems from symptoms
Begin by observing the symptom pattern. If the tub fills but water won’t drain, the pump or the outlet hose may be clogged. If you hear a buzzing or hum but no water movement, the impeller or motor could be jammed or the pump may be seized. A water leak around the pump often points to a damaged seal or loose connection. Drain Guide analysis shows that clog-related failures are a frequent cause of drainage problems, but wiring faults are also common—so don’t assume a single cause until you test both path and power. Document what you observe to guide testing and any future maintenance.
Inspecting the pump and hoses
With the machine unplugged, remove the toe-kick or access panel to reach the drain pump. Inspect the hoses for kinks, cracks, or loose clamps, and disconnect them one at a time to look for debris in the lines. Check the pump housing for signs of debris or a blocked impeller. Manually turn the impeller if possible to see whether it spins freely; any binding means the impeller or motor bearings may be worn. Clean out visible lint or hair from the pump inlet, breather vent, and hose ends. Reattach hoses snugly, ensuring clamps are secure to avoid leaks once you power the unit back on.
Testing the pump with power and flow
Reassemble enough to power the unit briefly for a test. If you have a multimeter, test for continuity on the pump’s wiring and check for voltage when the washer attempts to drain. If there’s no continuity or voltage, the pump circuit or wiring is faulty and needs repair or replacement. If continuity and voltage appear, manually deflect the impeller to assess resistance to rotation; a seized pump indicates internal damage. If you suspect a dud motor, replacing the pump is typically the most reliable option. Record the readings and symptoms to compare with model-specific guidance.
Cleaning tips and maintenance after service
After addressing the pump, finish with a thorough cleaning of the drain path to prevent future clogs. Run a diagnostic or empty-cycle rinse to flush out debris, then inspect the hoses again for residual lint. Consider installing a small mesh filter in the pump input if your model supports it, and schedule periodic checks of the impeller and seals. Regular maintenance helps sustain drainage performance and reduces the likelihood of recurrent failures. The Drain Guide team recommends keeping a simple maintenance routine to extend the life of GE washers and protect your drainage system from recurring issues.
Tools & Materials
- Flathead screwdriver(for access panel screws)
- Phillips screwdriver(to remove screws from front panel)
- Nut driver or pliers(to detach hose clamps)
- Pliers(for hose clamps and clamps on the pump)
- Bucket or towels(to catch water when hoses are disconnected)
- Shop rag(for cleaning debris and spills)
- Multimeter(to test continuity and voltage)
- Drain pan or tray(optional for extra spills)
- Replacement drain pump (if needed)(model-specific fit and compatibility)
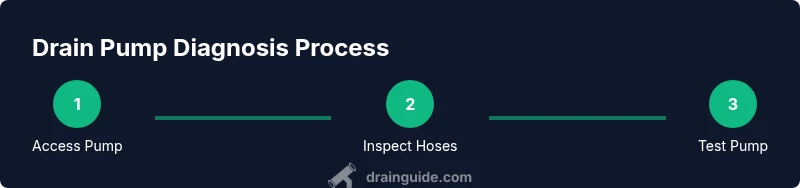
Steps
Estimated time: Total time: 40-60 minutes
- 1
Power down and unplug the washer
Ensure the machine is completely disconnected from power. This prevents accidental shocks while you access the drain pump. If you must move the unit, do so with a helper and keep the cord away from moisture.
Tip: Always disconnect power before any diagnostic work. - 2
Access the drain pump
Remove the toe-kick panel or bottom front panel to expose the drain pump area. Locate the pump, wiring harness, and drain hose connections. Take note of how everything is arranged to ease reassembly.
Tip: Take a quick photo of the wiring before disconnecting anything. - 3
Inspect hoses and connections
Check the inlet and outlet hoses for kinks, cracks, or loose clamps. Detach each hose one at a time and inspect for debris that could impede water flow. Re-seat and tighten all clamps after inspection.
Tip: Clean the hose ends with a rag to remove any residual lint. - 4
Check the pump housing and impeller
Visually inspect the pump housing for cracks and test if the impeller spins freely. If the impeller is blocked by lint or hair, remove the obstruction and spin it by hand. Any stiffness or binding suggests a worn pump.
Tip: Only apply gentle pressure to the impeller to avoid damaging the motor. - 5
Test electrical continuity and voltage
With the power off, reconnect the harness and use a multimeter to check continuity across the pump terminals. When the washer attempts to drain, verify that voltage reaches the pump. No continuity or absence of voltage points to an electrical fault.
Tip: If you’re unsure about readings, consult the model’s wiring diagram or a professional. - 6
Reassemble and run a drain test
Reconnect hoses securely, reattach the toe-kick, and plug the washer back in. Run a drain cycle or an empty cycle to confirm the pump evacuates water properly. Listen for a smooth hum or cadence rather than grinding noises.
Tip: Watch for leaks during the test; tighten clamps if you detect moisture. - 7
Decide on replacement or professional help
If the pump shows no continuity, broken impeller, or persistent leaks after testing, replacement is usually the best option. For complex wiring faults, consider arranging repair with a qualified technician.
Tip: Keep original parts for reference and order a precise replacement using your model number.
Got Questions?
What are common signs the drain pump is failing on a GE washer?
Common signs include the washer not draining, standing water in the tub, and unusual buzzing or humming noises when draining. Visual checks for cracks or leaks around the pump are also important. Drain Guide highlights that many pump failures stem from clogs or electrical issues.
Common signs include poor drainage, buzzing noises, and water in the tub, often caused by clogs or electrical issues.
Do I need to remove the entire back panel to reach the pump?
Most GE models allow access from the toe-kick or bottom front panel. Removing the full back panel is rarely required. Refer to your model’s manual for the exact access point.
Usually you access the pump from the toe-kick or front panel, not the full back.
Can I repair a failed pump or should I replace it?
Repairs are uncommon for drain pumps; replacement is typically more reliable if the impeller is damaged or the windings have failed. Cleanings can fix clogs but won’t fix motor failure.
Most times you’ll replace the pump if it’s failing.
Is it safe to run a drain test without clothes in the washer?
Yes, but ensure all connections are secure and there are no leaks. Run an empty cycle to observe proper drainage before loading laundry.
Yes, run an empty test to verify drainage.
Where can I buy a replacement GE drain pump?
Purchase from GE parts or reputable retailers that specify compatibility with your GE washer model. Verify model number and pump compatibility before buying.
Buy from GE parts or trusted retailers matching your model.
What if I’m unsure about electrical tests?
If you’re not confident testing voltage or continuity, stop and consult a professional. Incorrect testing can cause damage or injury.
If unsure, seek a professional for electrical testing.
Watch Video
The Essentials
- Identify the drain pump as the likely culprit for drainage issues
- Prepare safely with unplugging, towels, and good lighting
- Inspect both hoses and the pump impeller for debris
- Use a multimeter to check continuity and voltage
- Decide between cleaning or replacing the pump based on tests