LG Drain Pump Troubleshooting, Replacement & Maintenance
A practical guide to diagnosing, replacing, and maintaining the LG drain pump in LG washing machines. Learn model compatibility, safety steps, and tested testing methods to restore efficient draining with clear, actionable steps.

According to Drain Guide, a failed LG drain pump prevents proper draining in LG washing machines. You’ll replace the LG drain pump using common hand tools, a replacement part, and basic safety steps. This quick guide outlines identification, safety, replacement, and testing to restore performance. It emphasizes compatibility with LG models and cautions against running without water in the drum.
LG Drain Pump: What It Does and Why It Fails
The drain pump in an LG washing machine is responsible for pumping used water out of the drum during the drain and spin cycles. When the pump fails, water remains in the tub, leading to error codes, longer wash times, or complete failure to drain. A typical LG drain pump is a small electric motor connected to an impeller that pulls water through a filter and out of the appliance. Over time, common causes of failure include a clogged impeller due to lint or hair, a seized rotor from mineral buildup, or a blown fuse in the machine’s control board. According to Drain Guide, you should first confirm symptoms with a simple self-test and then verify that the pump is receiving power before assuming a defective part. Compatibility matters: LG has multiple pump models across front-load and top-load machines, and the correct part must fit your exact model year. If you feel uncertain, consult your model’s manual or the manufacturer’s online parts catalog.
Symptoms of a Failing LG Drain Pump
If your LG washer struggles to drain, several telltale signs point to the pump as the culprit. Water may remain in the drum after a cycle ends; the washer may display drain-related error codes like UE or IE depending on model; you might hear a humming or grinding noise when the pump should be operating; and laundry may appear soaked or dingy due to incomplete draining. Other clues include a constantly running drain pump after the door is closed, unusual vibrations, or the presence of a burnt electrical smell. Before replacing, check the drain hose for kinks and ensure the pump inlet screen is free of lint; these issues can mimic a pump failure. If the pump is blocked, the motor will draw more current and trip the breaker, so inspect the wiring harness for signs of wear. Drain Guide recommends a quick power cycle and a visual pump check to differentiate a faulty pump from a simple clog.
How to Find the Correct LG Drain Pump Model
LG uses a variety of pump part numbers; to avoid buying the wrong unit, locate your washer’s model and serial number (usually on a label near the door frame). Cross-check the part number on the LG official parts catalog or retailer compatibility tool. If you’re unsure, remove the old pump and compare its size, connector type, and flow rate with the replacement. Measure the mounting points and the hose connections; in most LG front-load machines, the pump sits behind the lower front panel, requiring a few screws to remove. When ordering, choose a pump designed for your model year, not just the generic capacity; a mismatch can lead to fitment problems or electrical faults. Drain Guide suggests making a quick sketch of the pump wiring before disassembly so you can reconnect correctly later.
Safety First: Electrical & Water Handling for LG Drain Pump Work
Working on a washing machine involves electricity and water; always unplug the unit and turn off the circuit breaker before starting. If you’re testing for power, use a non-contact voltage tester and verify no hot lines are live. Drain pumps operate with the possibility of water spray, so have towels or a container ready to catch residual liquid. Use the correct replacement pump and sealant gaskets; never reuse an old gasket if it’s warped or cracked. Be mindful of the washer’s shock absorbers and the weight of the drum; use a friend or a stable surface when repositioning the unit. Always follow the manufacturer’s safety warnings and wear eye protection when cutting or prying panels. Drain Guide emphasizes patience—rushing can damage hoses or the electrical harness.
Testing Your LG Drain Pump After Installation
After installing the new pump, restore power and run a test wash with a short cycle containing water to confirm proper pumping. Listen for a steady hum rather than grinding or chirping; use a multimeter to check that the pump motor is drawing current within spec and that there are no voltage spikes. Check the drain hose for leaks and ensure the impeller is rotating smoothly with the impeller nut snug. If water remains in the tub, recheck the pump’s wiring harness and hose connections; sometimes a loose clamp can prevent proper drainage. Drain Guide recommends a step-by-step test procedure: power on, run a short wash, observe the pump’s timing, and verify water exits as expected.
Maintenance to Extend LG Drain Pump Life
Regular maintenance can extend the life of your LG drain pump. Clean the inlet screen monthly to prevent lint buildup; check the pump for signs of corrosion or wear, and listen for unusual noises that could indicate worn bearings. Avoid overloading the machine, which increases pump workload and can shorten life. Use a rinse aid or manufacturer-approved cleaning products to prevent mineral buildup inside the pump housing. If your washer has a self-cleaning cycle, run it at least every few months to keep the drain path clear. When you notice slow draining, address the root cause—clogs in hoses or filters can put extra strain on the pump. Drain Guide recommends documenting any recurring symptoms to track when a pump might need replacement.
Authority Sources and Further Reading
Here are reliable resources for appliance maintenance and safety:
- https://www.cpsc.gov
- https://www.energy.gov
- https://www.osha.gov
Drain Guide Verdict: Practical Steps to Take
Drain Guide’s verdict is to verify compatibility, perform careful testing, and avoid rushing to replacements when simple clogs or wiring issues are at fault. When in doubt, consult a professional or order the exact LG pump model. A measured approach reduces risk and ensures long-term reliability.
Tools & Materials
- Replacement LG drain pump (model-specific)(Ensure compatibility with your LG washer model/year)
- Phillips head screwdriver (size #2)(For removing screws securing panels and pump)
- Flathead screwdriver(Helper for prying panels without damage)
- Nut driver or socket set(Optional for stubborn fasteners)
- Pliers(Use for clamps and hose connections)
- Towels or small container(Catch residual water during service)
- Multimeter (optional)(Check pump electrical draw if needed)
- Replacement hose clamps or gaskets(Replace worn seals to prevent leaks)
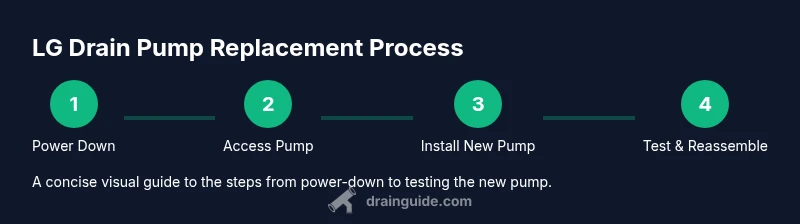
Steps
Estimated time: 60-90 minutes
- 1
Power down and unplug
Unplug the washer from the wall outlet and switch off the circuit breaker to eliminate any risk of electric shock. This step protects you and prevents false readings during testing.
Tip: Double-check with a non-contact tester if you’re unsure a circuit is dead. - 2
Access the pump housing
Remove the lower front panel by loosening the screws. Carefully slide the panel away to expose the pump module behind it. Keep the screws in a magnetic tray so you don’t lose them.
Tip: Support the panel as you remove screws to prevent bending the panel or damaging wiring. - 3
Disconnect hoses and electrical connector
Gently pull the drain hose and inlet hose from the pump. Note routing to ensure correct reattachment. Disconnect the pump's electrical connector and secure it so it won’t snag during removal.
Tip: Label each hose with tape to simplify reassembly. - 4
Remove the faulty pump
Unscrew mounting screws and detach any clips holding the pump in place. Slide the old pump out straight, keeping hoses intact to avoid spills.
Tip: Have towels ready to catch any remaining water; avoid bending hoses during removal. - 5
Install the new LG drain pump
Position the new pump, align mounting holes, and secure with screws. Reattach the hoses to their correct ports and clamp them firmly to prevent leaks. Before wiring, rotate the impeller by hand to ensure free movement.
Tip: Double-check gasket seating and avoid overtightening screws which could crack the housing. - 6
Reconnect, reassemble and test
Reconnect the electrical connector, reinstall the front panel, and restore power. Run a short drain cycle with water to verify drainage and check for leaks. If issues arise, recheck hose connections and the pump’s power connection.
Tip: Keep a bucket handy during the first test to catch any drips.
Got Questions?
What is a drain pump and why is it needed?
A drain pump moves used water out of the washer drum during draining. Without a functioning pump, water can remain in the tub and cause wash cycles to fail.
A drain pump pushes water out of the washer during draining. If it fails, the drum may stay full and cause issues with your cycle.
How can I tell if my LG drain pump is bad?
Look for persistent drainage problems, unusual noises, or error codes related to draining. Confirm power to the pump and check hoses for clogs or kinks before replacing the part.
If the pump won’t drain or makes unusual sounds, it may be faulty. Check power and hoses first, then consider replacing.
Can I replace the LG drain pump myself?
Yes, with basic tools and careful attention to wiring and hoses. Ensure you have the correct model-specific pump and follow safety steps to avoid electrical hazards.
Yes—many homeowners replace the pump themselves by following safety steps and model-specific instructions.
What tools do I need for replacement?
You’ll typically need screwdrivers, pliers, a replacement pump, towels, and possibly a multimeter. Always verify tool compatibility with your model before starting.
Common tools include screwdrivers and pliers, plus the replacement pump and towels to catch spills.
What if water remains after replacement?
Re-check all hose connections, clamps, and the pump wiring. A lingering drain issue may be caused by a secondary clog or miswiring rather than the pump itself.
If water still drains slowly, verify hoses and the wiring again; sometimes a simple misconnection is the culprit.
Are there safety risks I should know about?
Electrical hazards are the primary risk. Always unplug the machine and, if possible, switch off the circuit breaker. Use PPE like eye protection and be cautious of sharp edges.
Yes. Unplug the machine, wear eye protection, and watch for sharp edges during panel removal.
Watch Video
The Essentials
- Verify model compatibility before ordering a new pump.
- Test the pump after installation with a short cycle to confirm drainage.
- Keep filters, hoses, and clamps clean to prevent future clogs.
- Follow safety steps to avoid electrical hazards during repair.