Replace Drain Field: Step-by-Step Guide for Septic Systems
Learn how to replace a drain field safely and legally. This Drain Guide how-to covers planning, permits, materials, installation steps, and maintenance for lasting performance.

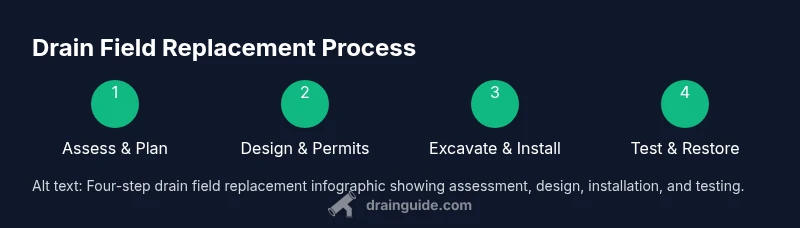
Replacing a drain field is a major septic upgrade that proceeds through careful planning, permits, excavation, and installation of a new field. You’ll verify soil conditions, coordinate with health authorities, and ensure post-installation testing and maintenance. This guide emphasizes safety, code compliance, and professional oversight when required.
Understanding the signs of a failing drain field
A drain field that is failing will often give clear, observable signals long before a total system collapse. Wet, lush patches in the yard that stay damp after rain, a persistent sewage odor, gurgling sounds in plumbing, toilets that back up or drain slowly, and unusually high water usage in the house can all point to a field problem. According to Drain Guide, many homeowners misinterpret these symptoms as isolated septic tank issues, but the field is the ultimate disposal path for effluent. It’s crucial to distinguish between a tank problem and a failing absorption area. Early recognition matters because it guides whether you pursue a repair, a field replacement, or a system redesign. If you notice any combination of these signs, schedule an inspection with a licensed professional and begin documenting any wet zones or odors with photos. Early action can prevent groundwater contamination and more costly repairs down the line. Drain Guide Team emphasizes documenting symptoms and seeking professional assessment when in doubt to avoid unintended health risks.
Planning, permits, and site assessments
Replacement of a drain field sits at the intersection of plumbing, environmental health, and property development. Before you break ground, you’ll need to plan with an understanding of local codes and site constraints. Most jurisdictions require an official assessment, soil tests or percolation tests, and a permit application. The Drain Guide team recommends engaging a licensed septic installer or engineer early to confirm site suitability and to help with permit applications. A thorough site assessment considers soil type, drainage patterns, groundwater table, setbacks from wells or buildings, and tree root zones. Collecting existing system data (tank size, baffles, and lid locations) helps the design stage. Be prepared for scheduling delays due to permitting, inspections, and weather. Clear communication with the health department and your contractor reduces the risk of project hold-ups and ensures compliance with environmental protections.
Soil conditions and design considerations
Soil is the living engine of a drain field. It must be capable of absorbing and treating effluent safely after it leaves the septic tank. If the soil is too clayey, too waterlogged, or has restricted depth to groundwater, a conventional drain field may fail. In those cases, designers may opt for mound systems, sand filters, or other advanced treatment approaches. Drain Field size is tied to estimated wastewater load, soil percolation rate, and local regulations. A well-designed system uses trenches with perforated pipes surrounded by gravel and a layer of geotextile fabric to prevent silt intrusion. When soil tests indicate marginal conditions, engineers may specify alternative layouts or additional treatment components. The Drain Guide Team notes that soil data is non-negotiable in this step; it guides trench spacing, bed dimensions, and the overall feasibility of a replacement project. Soil mapping and simulation tools help predict how the new field will perform under seasonal variations.
Replacement options and installation approaches
There are multiple pathways to replacing a drain field, each with implications for cost, longevity, and maintenance. A conventional trench field is the most common approach, while mound systems can overcome shallow ground or poor soil permeability. In some cases, a partial replacement with an alternative treatment unit may be viable if the site cannot support a full field. The installation sequence typically includes stripping topsoil, excavating trenches, laying graded gravel, installing perforated pipe, adding geotextile fabric, backfilling with soil, and restoring the surface. Proper venting and distribution are essential to even effluent disposal. The Drain Guide Team emphasizes conservative design with a safety margin to prevent future failures, and to re-evaluate once the new field is established. During installation, avoid compacting the trench base and ensure the pipe slope is uniform to promote gravity-driven distribution. After installation, water testing and a formal inspection confirm system integrity.
Maintenance, monitoring, and long-term performance
A newly replaced drain field benefits from a clear maintenance plan. Routine inspections should focus on seepage signs, damp patches, and odors around the installation area. Avoid flushing non-degradable items, fats, or chemicals that can harm microbial activity or clog the system. Scheduling periodic pumping of the septic tank while ensuring proper disposal of pumped contents is essential to prevent overload on the new field. Drainage performance should be validated with a follow-up inspection and, if necessary, soil moisture monitoring after rainfall. With a well-planned maintenance routine, homeowners can maximize the life of the replacement field and minimize the risk of further failures. Drain Guide Team recommends documenting maintenance steps and confirming compliance with local regulations as part of a long-term plan.
What to expect during the process and how to communicate with professionals
Replacing a drain field is complex and site-specific. Expect a staged process: soil evaluation, design, permitting, excavation, installation, testing, and final approvals. This sequence makes collaboration with a licensed contractor, engineer, and local health department essential. Clear documentation of every step, site sketches, and material lists can streamline inspections and avoid back-and-forth delays. If soil conditions are marginal, prepare for longer timelines and potential design modifications. Drain Guide’s approach emphasizes safety, environmental responsibility, and adherence to codes throughout the project.
Tools & Materials
- Backhoe or mini excavator(Essential for trench excavation and material handling)
- Shovels and digging bars(For precise handwork and finishing touches)
- PVC perforated pipe (4 inch)(Primary drainage conduit in trenches)
- Gravel/crushed stone(Backfill around pipes to promote filtration)
- Geotextile fabric(Prevents silt intrusion into trenches)
- Topsoil and grading equipment(Restore surface and prevent erosion)
- Tamping tool or mechanical compactor(Lightly compact backfill to avoid settlement)
- Soil testing kit or access to a certified lab(Validate percolation rates and site suitability)
- Personal protective equipment (PPE)(Gloves, goggles, boots, hard hat, high-visibility vest)
- Utility locating tool and marker spray(Identify buried lines before digging)
- Concrete or cinder block forms (optional)(Used for stable risers or access points if needed)
Steps
Estimated time: several days to a few weeks, depending on permits and site conditions
- 1
Assess site and confirm scope
Review the existing system data, obtain a recent soil report, and define the replacement scope with your contractor. Confirm regulatory requirements and permit needs before any ground disturbance.
Tip: Document all findings with photos and notes to support permit applications. - 2
Pump out and inspect the septic tank
Pump the tank to remove sludge and scum, then inspect baffles and condition. Ensure there is no structural damage that would complicate replacement.
Tip: Keep a service record of tank status for future maintenance. - 3
Locate and map the drain field area
Use utility locating tools to mark existing lines and leach field boundaries. Create a new field layout plan based on soil data and regulatory setbacks.
Tip: Avoid areas with tree roots or known drainage obstructions. - 4
Design replacement layout with soil data
Work with an engineer or licensed installer to determine the trench spacing, bed dimensions, and pipe slope suited to your site’s percolation rates.
Tip: Choose an approach that allows future expansion if required. - 5
Excavate and prepare trenches
Dig trenches to the planned width and depth, careful to avoid hitting utilities. Remove old materials and prepare the trench beds for gravel.
Tip: Keep spoil material away from clean soil to prevent contamination. - 6
Install pipes, fabric, and gravel
Lay geotextile fabric, install perforated pipe with the correct slope, and backfill around it with gravel before final fabric and topsoil.
Tip: Check for uniform grade along each trench. - 7
Backfill and restore site grade
Backfill trenches with soil and shape the surface to promote runoff away from the installation. Restore lawns or landscaping as needed.
Tip: Avoid heavy compaction over the trench base to preserve void spaces. - 8
Test, inspect, and document
Conduct a water or dye test if required by local codes and obtain final approvals. Record the layout, materials, and inspection results for future reference.
Tip: Do not finalize until you have written approvals from the health department.
Got Questions?
What is a drain field and why does it fail?
The drain field is the part of a septic system where liquid effluent is dispersed into the soil for treatment. Failures typically occur when the soil cannot absorb the effluent due to saturation, compaction, roots, or improper loading.
The drain field disperses wastewater into the soil; failures happen when the soil can’t absorb it or becomes clogged.
Do I need a permit to replace a drain field?
Yes. Replacements usually require permits from the local health department or environmental agency to ensure environmental safety and code compliance.
Yes, a permit is typically required to ensure safety and codes are met.
Can I replace the drain field myself?
This is a complex, potentially dangerous task that often requires licensed professionals and equipment. Local rules may restrict DIY replacement.
This job is best left to licensed professionals due to safety and regulatory concerns.
What if the soil is unsuitable for a conventional drain field?
Alternative systems such as mound fields or advanced treatment units may be required. Site-specific design determines feasibility.
If soil isn’t suitable, an alternative system may be needed based on site tests.
How long does replacement typically take?
Timeline varies with permits, weather, and site conditions. Expect a multi-step process that can take weeks.
Timelines depend on permits and site conditions and can take several weeks.
What maintenance follows a drain-field replacement?
Implement a maintenance plan with regular inspections, controlled wastewater loads, and periodic pumping as recommended.
Keep up with inspections and pump-outs as part of ongoing maintenance.
Watch Video
The Essentials
- Plan with local codes and permits in mind.
- Conduct thorough soil testing before replacement.
- Engage licensed professionals when required.
- Follow proper installation steps and avoid soil compaction.
- Schedule post-installation testing and routine maintenance.