Where Is Drain Hose on Washing Machine: A Practical DIY Guide
Learn exactly where the drain hose sits on common washing machines, how to inspect it for wear, clear clogs, and safely reconnect. This Drain Guide tutorial walks you through locating, testing, and maintaining the drain hose to prevent leaks and floods.

If you’re wondering where is drain hose on washing machine, start at the back or bottom of the unit. The hose typically exits the rear panel and leads to a standpipe or household drain. This quick guide covers where to look, how to inspect for wear, and safe steps to reconnect without leaks.
Understanding the drain hose and why it matters
The drain hose is the conduit that carries wastewater from your washing machine to the home drain. For the question where is drain hose on washing machine, the answer depends on model, but you’ll usually find it at the back or on the bottom where it exits the chassis. In many setups, the hose ends in a standpipe or a laundry tub. Knowing its location helps you inspect for leaks, blockages, and proper drainage without flooding your laundry area. According to Drain Guide, correctly routing and securing the drain hose reduces leaks and clogs, extending the life of your machine. Stay mindful of the hose’s arc and avoid sharp bends, which can trap debris and hinder drainage.
Common locations by washer type
Front-loading machines often have a back-mounted drain hose that exits near the upper rear panel, while top-loading machines may route the hose along the rear or side to a standpipe. In compact or apartment machines, you may see a short hose that terminates directly into a drain opening. The drain hose must be free of kinks and held securely by the clamps provided by the manufacturer. For the typical homeowner asking where is drain hose on washing machine, focus on the back of the unit and the drain outlet at the bottom front if present. Drain Guide notes that the core principles—secure connection, proper height, and no kinks—apply across models.
How to inspect the hose for wear, cracks, and clogs
Begin with a visual check: inspect the entire length of the hose for cracks, bulges, or soft spots. A damaged hose is a common source of leaks and must be replaced. Check the hose end connections for rusted or loose clamps. If you notice mold or foul odors near the hose sheath, it’s a signal that buildup has occurred and might require cleaning or replacement. If a partial clog is suspected, you can feel for pinch points and remove obstructions from the end closest to the washer. Drain Guide recommends removing the hose only when the washer is unplugged and the water supply is shut off.
Safe steps to remove and clear clogs without creating a flood
- Unplug the washer and shut off the hot and cold water valves, then pull the washer away from the wall to access the hoses. 2) Place a bucket under the drain hose and disconnect it from the standpipe or drain, being prepared for a small spill. 3) Inspect the interior with a flashlight, then use a flexible drain snake or long brush to dislodge any debris. 4) Rinse the hose end with clean water and reattach securely, ensuring the clamps or connectors are tight. 5) Run a test cycle with no clothes to verify there are no leaks. Drain Guide stresses caution to prevent backflow and to avoid forcing water into unintended areas.
Replacing, relocating, or upgrading the drain hose
If the hose shows wear, replace it with a standard-duty rubber hose of compatible diameter and secure clamps from the washer to the standpipe. When relocating, follow the manufacturer’s routing path and avoid placing the hose where it can rub against sharp metal edges. If your setup lacks a standpipe, install one or use an approved adapter to connect to the drain. After replacement, inspect all clamps and ensure the hose has a gentle slope that promotes gravity-driven drainage. Drain Guide reminds homeowners to choose hoses with durable fittings and to check the entire drainage path for leaks.
Maintenance tips to prevent future drain hose issues
Schedule periodic checks of the hose for cracks and leaks, especially after moving the washer or changing the water supply. Clean the standpipe and the hose end to remove lint and soap scum, and avoid disposing of large debris down the drain. Regularly inspect clamps and ties, and replace any worn components promptly. By keeping the drain hose clean and properly routed, you reduce the risk of floods and mold behind the washer. Drain Guide recommends repeating this quick check every few months as part of routine appliance maintenance.
Tools & Materials
- Drain hose(Replacement or spare hose if damaged or worn)
- Bucket or shallow tub(To catch water when disconnecting hose)
- Adjustable wrench or pliers(Loosen hose clamps without rounding fittings)
- Towels or rags(To manage spills and keep the area clean)
- Safety gloves(Protect hands when handling sharp clamps)
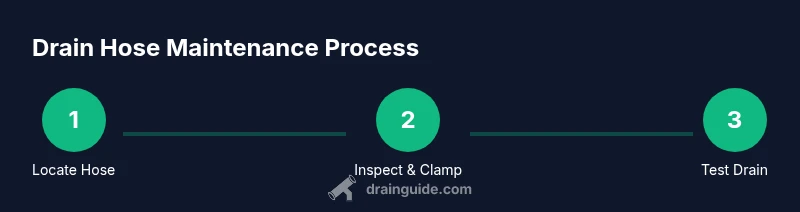
Steps
Estimated time: 30-45 minutes
- 1
Power down and prepare
Unplug the washing machine and turn off the water valves. Move the unit slightly away from the wall to access the hoses. This prevents accidental shocks and minimizes spill risk.
Tip: Take a photo of the hose routing before disconnecting to guide reassembly. - 2
Locate the drain hose
Identify the drain hose at the back or bottom of the washer. Confirm it exits toward a standpipe or drain and check for any visible kinks or damage before proceeding.
Tip: If you’re unsure, consult the user manual for the exact hose path. - 3
Disconnect from the drain
Loosen the hose clamp with pliers and gently detach the drain hose from the standpipe or drain. Have a bucket ready for any residual water.
Tip: Do not yank the hose; keep tension even to avoid damaging fittings. - 4
Inspect and clear
Examine the interior and exterior for cracks, mold, or clogs. If obstructed, insert a flexible snake or brush to dislodge debris. Rinse the interior with water.
Tip: Replace immediately if you see cracks or bulges in the hose. - 5
Reconnect and test
Attach the hose firmly with clamps, re-route to avoid sharp bends, and reconnect to the drain or standpipe. Run a short rinse cycle to verify there are no leaks.
Tip: Watch the connection closely for the first minute of operation. - 6
Finalize and clean
Slide the washer back into place, wipe any water, and store tools. If there’s any doubt about the fit, replace the hose and clamps with fresh hardware.
Tip: Keep the area dry to prevent mold growth behind the machine.
Got Questions?
Where is the drain hose located on most washing machines?
Most machines route the drain hose from the back or bottom to a standpipe or household drain. Always unplug first and check the manual for model-specific routing.
Most washers have the drain hose at the back or bottom, connected to a standpipe or drain. Unplug first, then check your manual for your model's routing.
Can I replace the drain hose myself?
Yes. With the machine unplugged and water valves closed, detach the hose, replace it with a compatible hose, and resecure clamps before testing.
Yes, you can replace it yourself by unplugging, closing water valves, detaching, and reattaching a new hose with clamps.
What causes a drain hose to leak?
Leaks usually come from a damaged hose, loose clamps, or a kinked routing path that puts stress on fittings.
Leaks typically come from a damaged hose, loose clamps, or kinks in the routing.
Is it safe to run a cleaning cycle after checking the hose?
Yes, once you confirm the hose is securely attached and there are no leaks. Start with a test rinse with no load.
Yes, after ensuring secure connections, run a test rinse with no clothes.
How often should I inspect the drain hose?
As part of routine maintenance, inspect during periodic appliance checks and after moving the washer.
Do a quick hose check during routine appliance maintenance or after moving the washer.
Watch Video
The Essentials
- Identify the drain hose location before starting work.
- Inspect for wear and replace damaged hose promptly.
- Secure all connections to prevent leaks.
- Test the setup with a controlled rinse to confirm stability.